The main reason for doing this is so that you can get Pinterest to auto-pin your relevant blog posts. See how to set that up here: (opens in a new tab) https://niftytoolz.com/auto-pinning-to-pinterest-from-your-blog
In this tutorial we’ll cover:
- Setting up your blog to allow auto-posting by email
- Setting up your schedule
- Choosing alternative search terms
What you’ll need
- A blog
- An IFTTT account (get one here: https://ifttt.com)
- A Pinterest business account
- A Gmail account
Your secret auto-post email address
The key to auto-posting is to get IFTTTT to send what you want to be posted on your blog to a secret email address that you set up specifically for that purpose.
How you set it up that secret email address depends on the blogging platform you use. The instructions for Blogger and WordPress are shown below. If you use Weebly or Wix, you’re out of luck as they don’t support post-by-email.
Blogger
Set up your secret auto-post email address under Settings. Scroll down to the Email section, click Post using email and fill in the secret part:
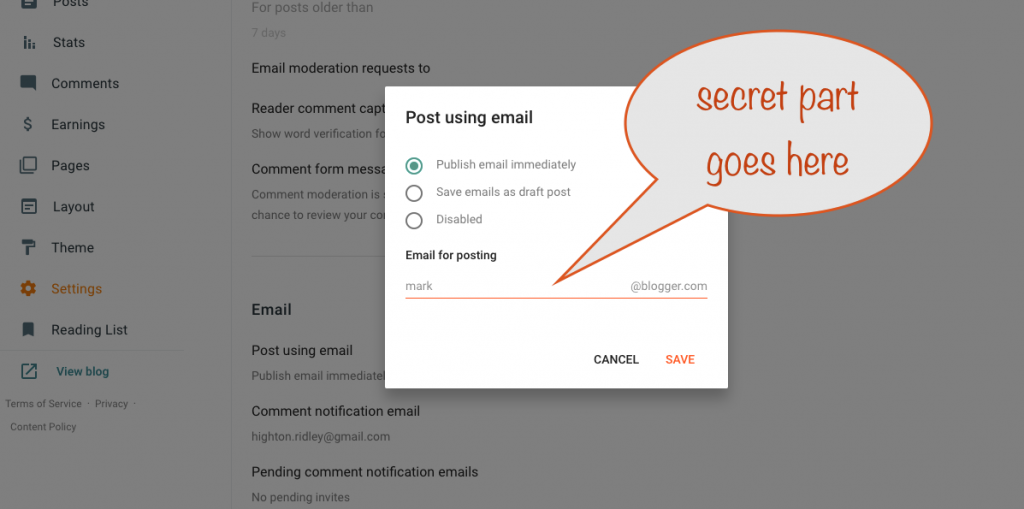
Make sure that Publish email immediately is selected
WordPress
The way you set up your secret auto-post email for WordPress depends on whether you’re using a free or a self-hosted blog.
Free WordPress
With a free WordPress blog, you set your secret email address via the dashboard for your blogs, here: https://razamazazzle.wordpress.com/wp-admin/index.php?page=my-blogs

Full instructions can be found here: https://wordpress.com/support/post-by-email
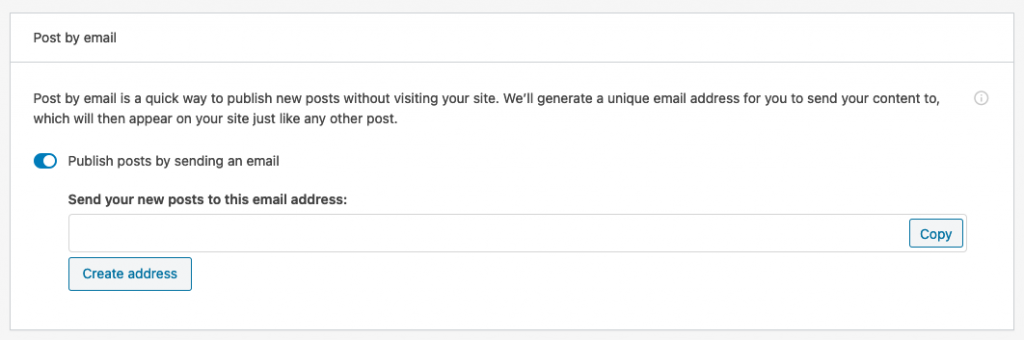
Self-hosted WordPress
Use the free Jetpack plugin and under its settings, scroll down to the Post by email section:
Check your secret email address works
Now that you’ve set up your blog for posting by email, check that it works by sending a test email:
- Start a new email and put your new secret email address in the To box
- Into the subject put the title you want for your blog post
- Put some text into the body. Don’t worry too much what you say as you’ll be deleting your post
- Hit send
Give it a few seconds then visit your blog to see your new entry. If you don’t see it, give it a minute or two – emails might be taking a while to reach your blog.
If it still doesn’t appear, make sure you’ve got it set to publish immediately and not to create a draft post.
Assuming all is well, delete that test post,
Now you’re ready to use Nifty and IFTTT to do your posting for you 😎
Setting up your nIFTTTy Scheduler
In this section you’ll use it to:
- Set up the products you want to be posted to your blog using the Nifty Promo Control Panel
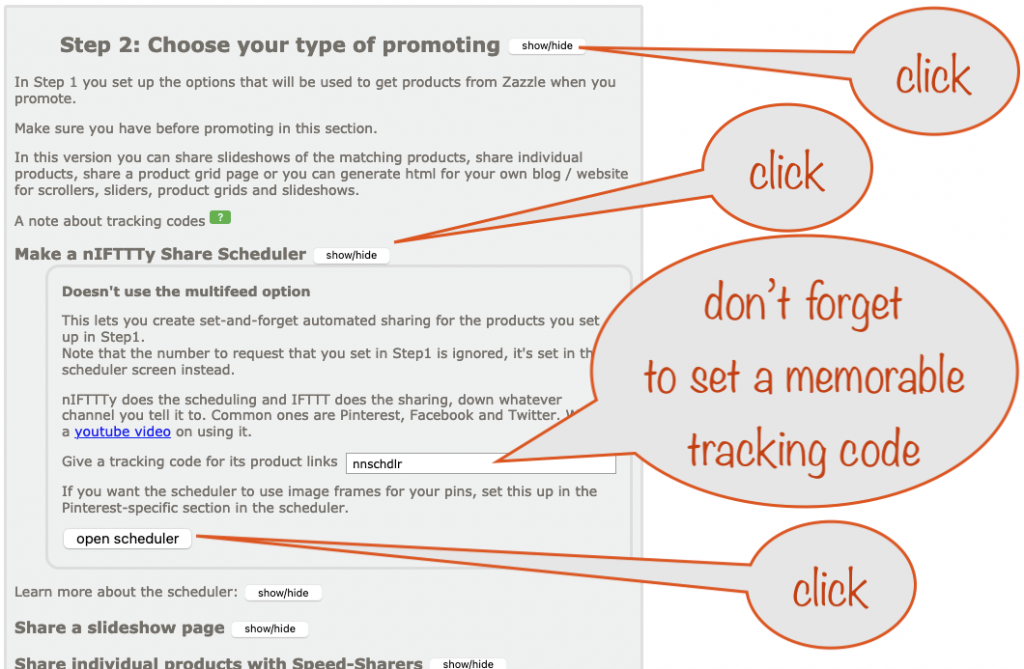
- Open the nIFTTTy Scheduler from Step 2
- Set up the posting schedule (days of the week and times)
First, use Nifty to set up a “pull” of the products you want to auto-post to your blog. In Step-2, use the button to open the scheduler. Don’t forget to set a memorable tracking code first!
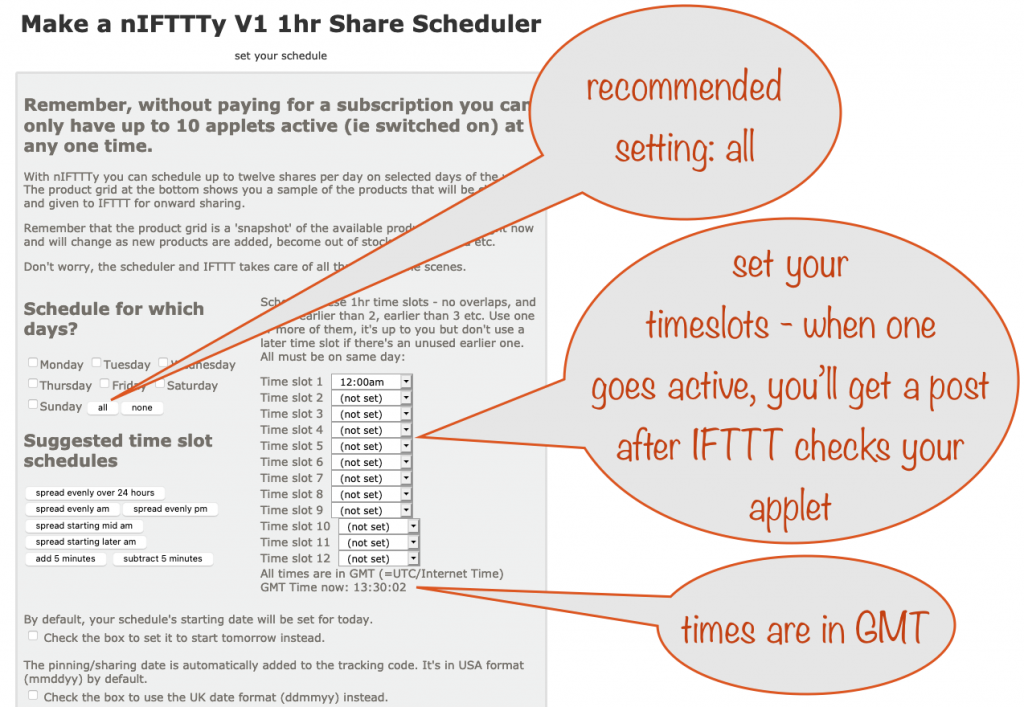
The first part in setting up your nIFTTTy Schedule
With the scheduler opened, set up what days to post on and the timeslots when you want posts to be made.
This is where you set up the rest of your nIFTTTy Schedule
This is what you see when you scroll down on the scheduler page. We’ll go over this step by step a little later but here’s a screenshot showing a summary:
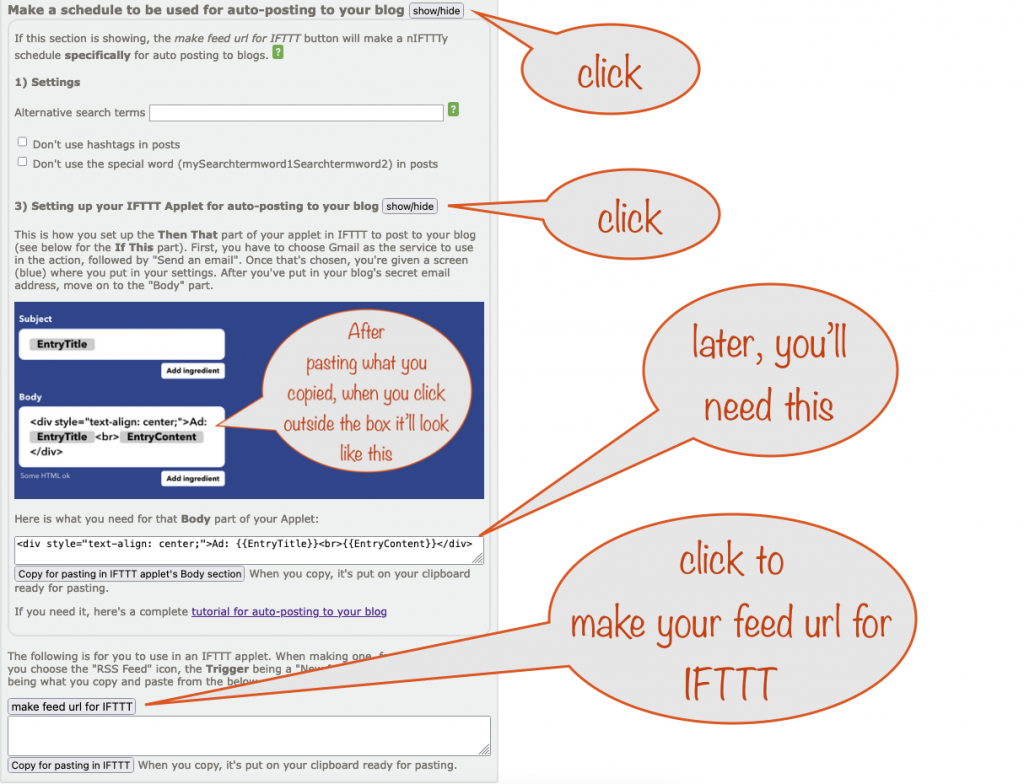
Setting the Alternative search terms
Whoa! What are those? On a random basis, instead of using the search term you set up for your pull, one of the alternative ones will be used instead.
Yes, and…??
It allows you to pin to different Pinterest Boards – no hit-and-miss! You see, Pinterest lets you pick off your blog posts using a filter and send the results to the right board.
To make that really easy for you, posts created by your scheduler will include a special word for you to use in your filter. It’s made up from the first two words in your search term, with my added onto the front.
So, for example, if you use an initial search term of easter bunny with outer space and rainbow unicorns as alternatives, the special words you’ll get will be myEasterBunny, myOuterSpace and myRainbowUnicorns.
You can then set things up in Pinterest to put each post into the right board. All from the same schedule – how cool is that? 😎
Do I have to use them?
No. It’s up to you to use them or not. But they do multiply the power of your nIFTTTy Schedules and if you’re using a free IFTTT account, anything that makes your 3 free applets go further is a good thing!
Preparing your IFTTT Applet
Everything needed for your new IFTTT applet (apart from your secret email address) comes from the scheduler screen.
Open a new tab / window in your browser as you’ll need to come back to the Nifty Schedule in a little while.
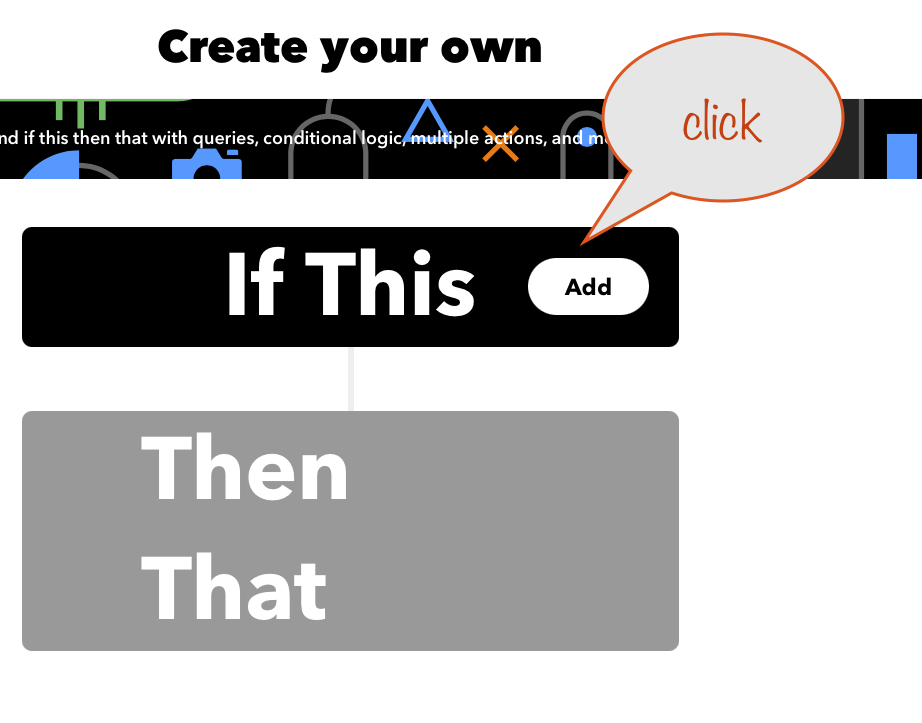
Let’s get your applet ready… In the new tab / window, get to your IFTTT account and hit Create:

When you hit that button, the next screen is where you set up the trigger (If This…) and the action part (Then that…)
When you click Create, you’ll see the next screen ready for you to set up the If This part. Click as shown:
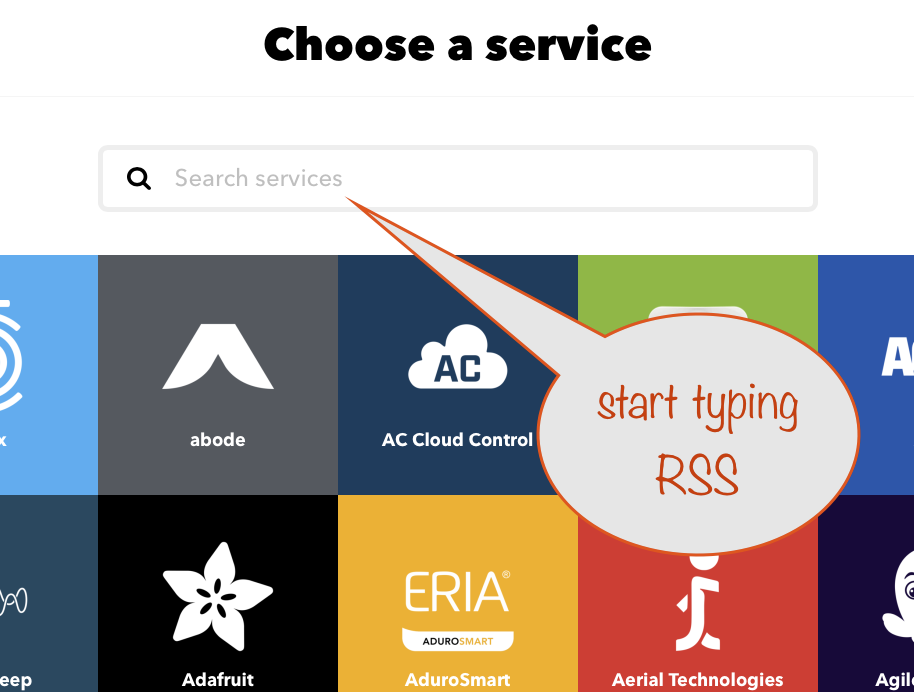
When you start typing RSS you’ll see the RSS service come up
…like this. When you see the RSS Feed service come up, click it

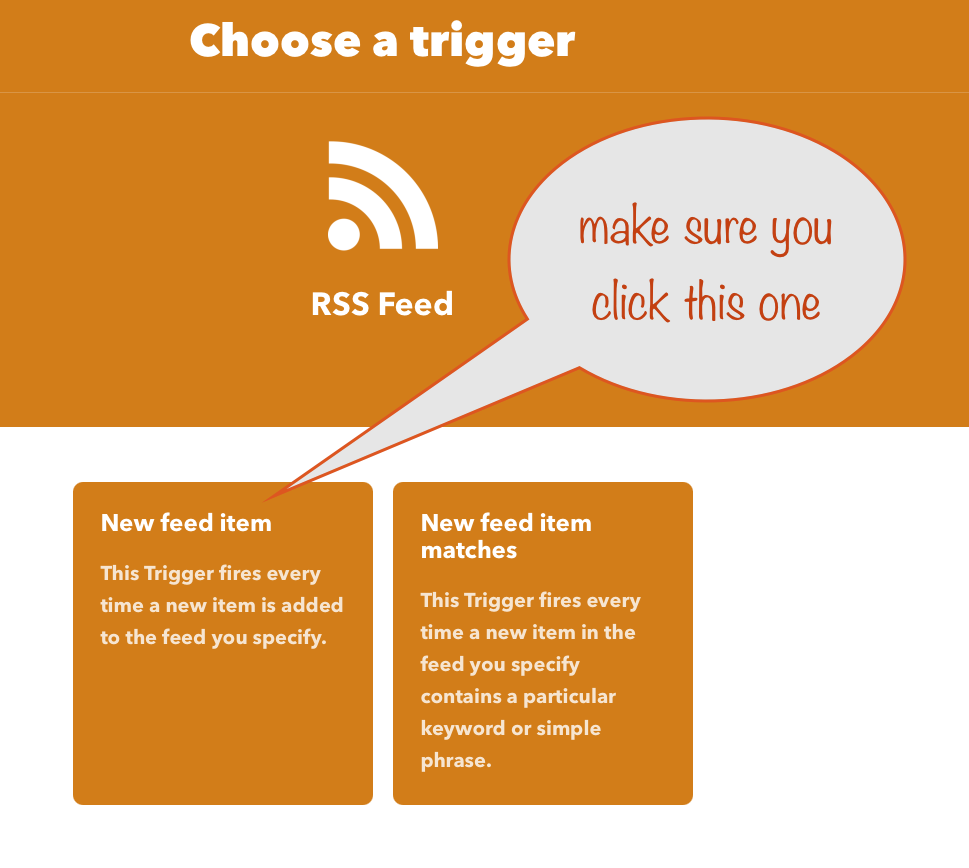
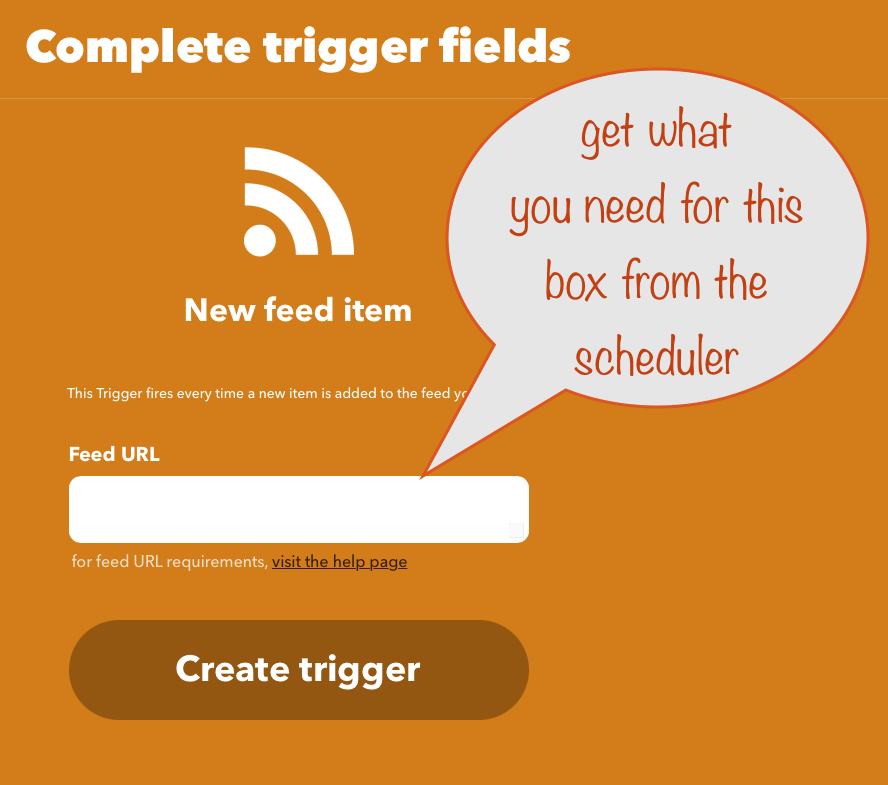
When you choose the RSS Feed service, make sure you click the New feed item choice
Once you click the New feed item, this is what you see. Now you need to get the feed url to paste into that box from the Nifty Schedule screen…

Back to the Nifty Scheduler to make your feed url and copy it ready for pasting into your applet. Click the buttons as shown and then get back to your applet to paste in what you’ve just copied.
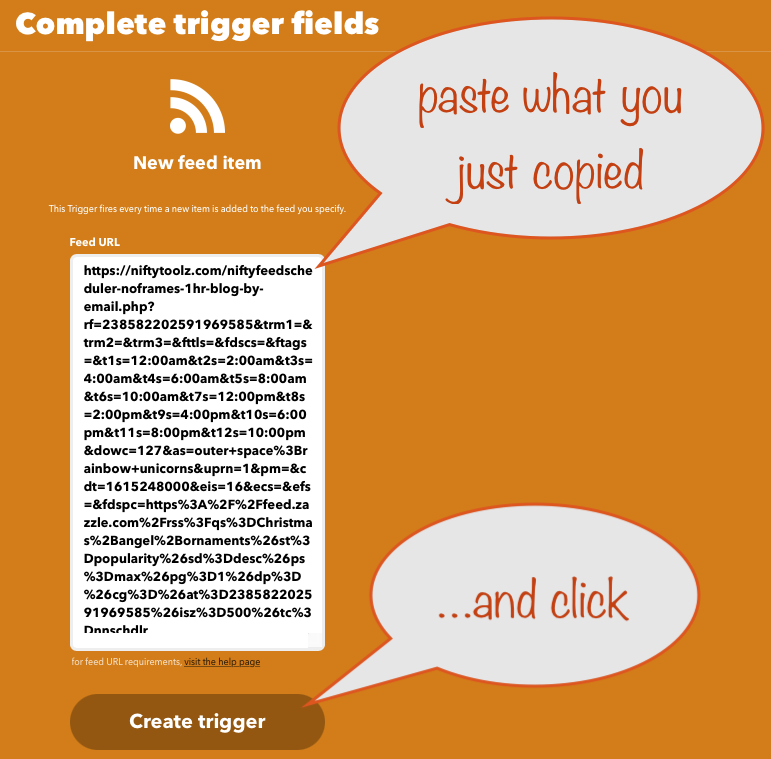
Cick in the Feed URL box and paste what you just copied.
When you’ve done that, click the Create trigger button, as shown
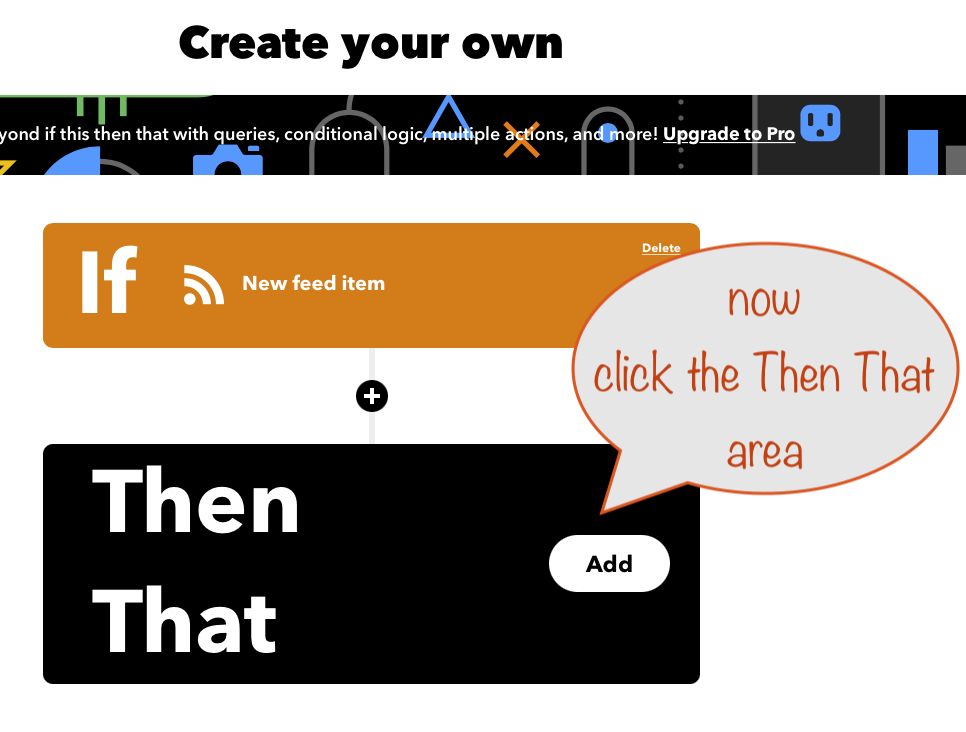
You’ll be taken back to the initial screen ready for you to enter the Then That part.
Click the button to set up the action that’s to be taken (when a schedule’s timeslot becomes active, a product will become available in the feed url)
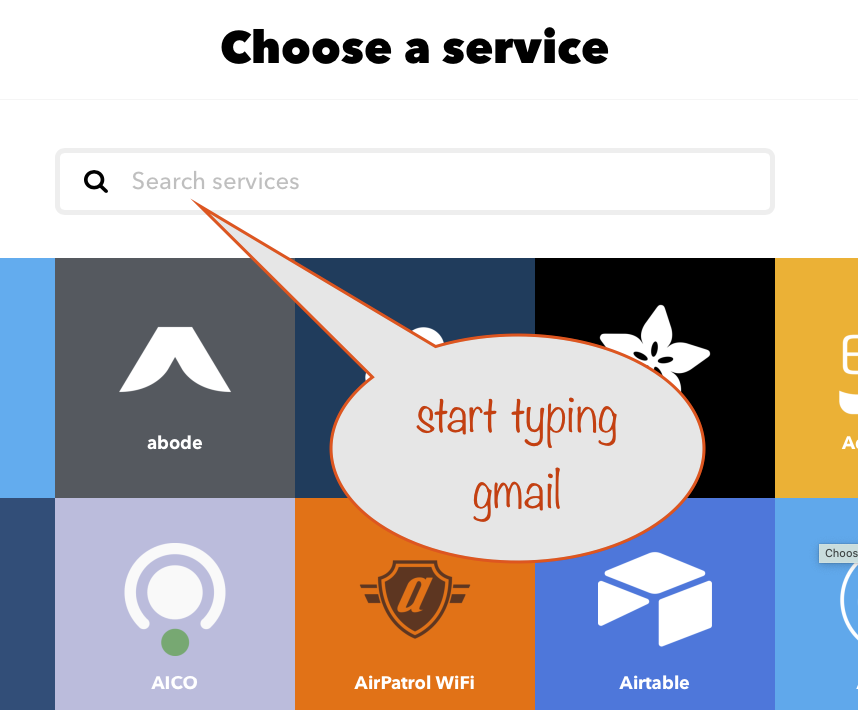
Now you have to choose the service for the Then That part.
Start typing gmail in the box…
Click the button as shown to select Gmail for the Then That service

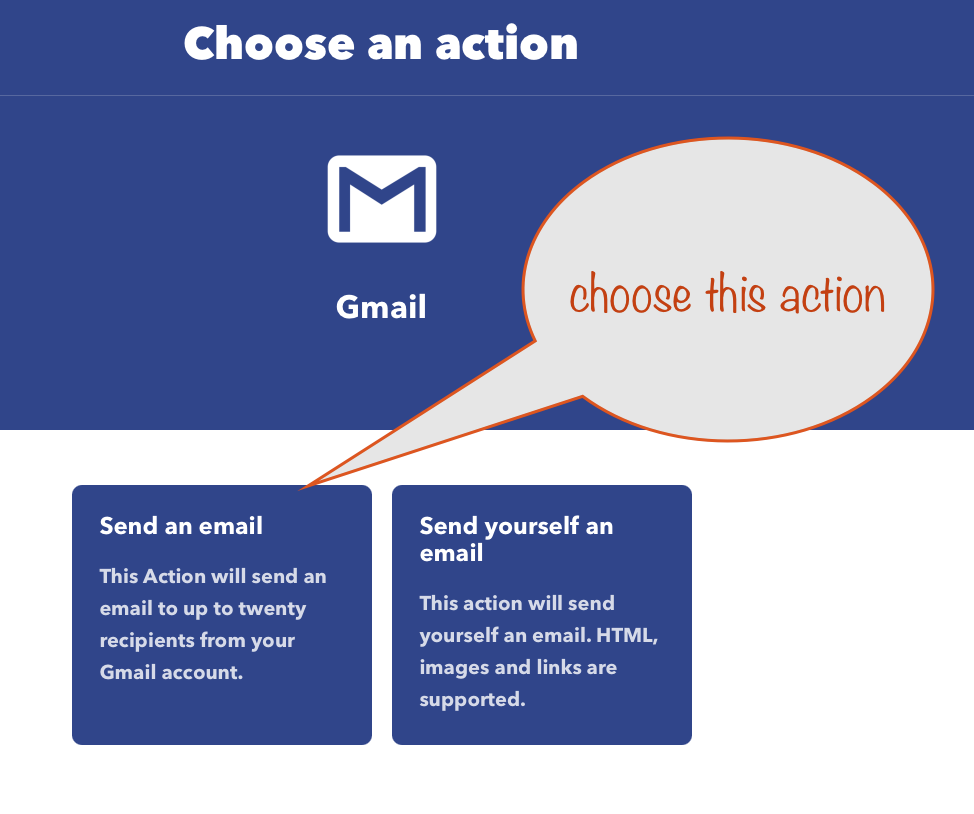
Once you’ve chosen Gmail as the Then That service, you have to choose the Send an email action
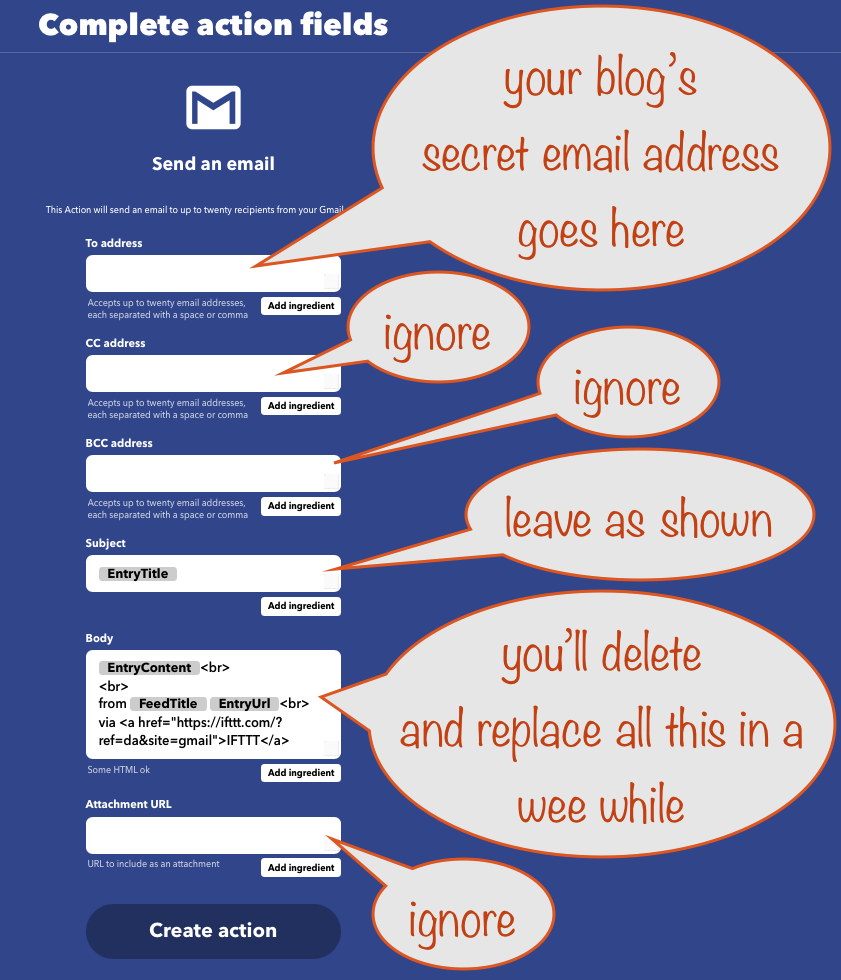
When you select Send an email, this is what you’ll see next.
It looks like a lot but you can ignore most of the boxes, working only with two of them.
The first thing to put in is your blog’s secret email address – as you set up at the start of this tutorial.
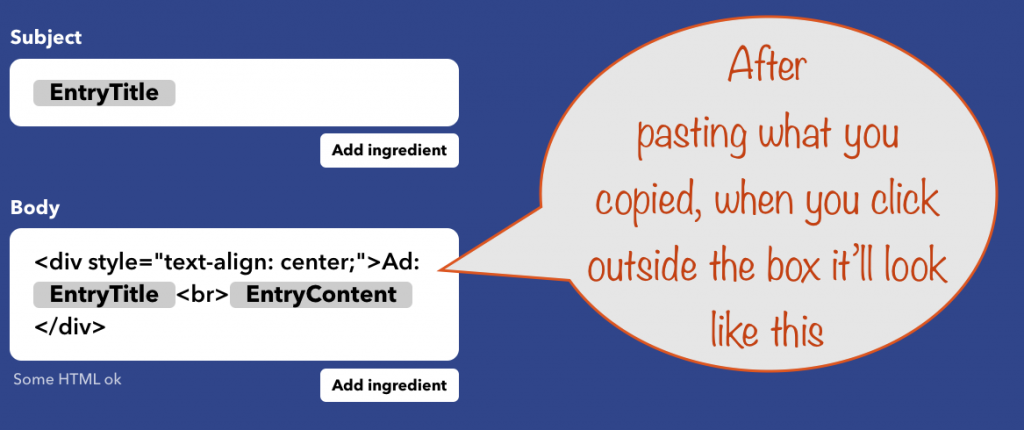
For the box labelled Body, you need to get the contents for it from the Nifty Scheduler tab. First delete the existing contents.
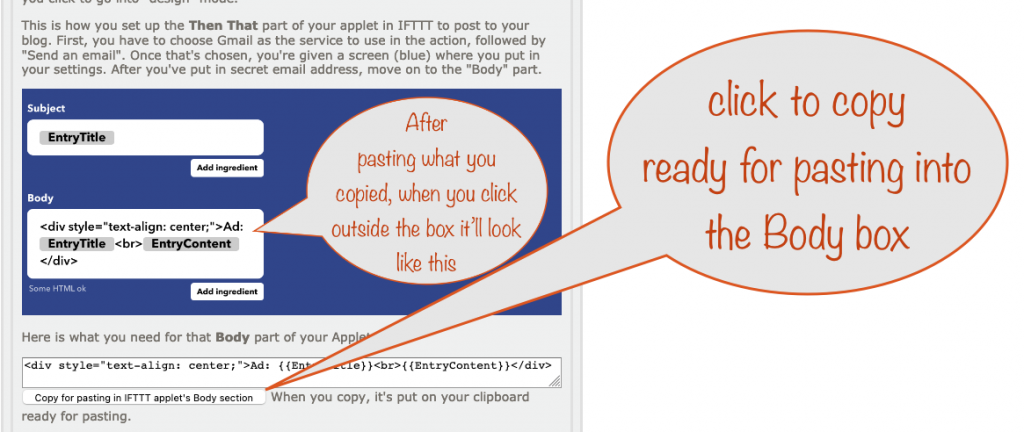
So, get back to your applet and delete the contents of the Body box, if you haven’t already, and then paste what you just copied.
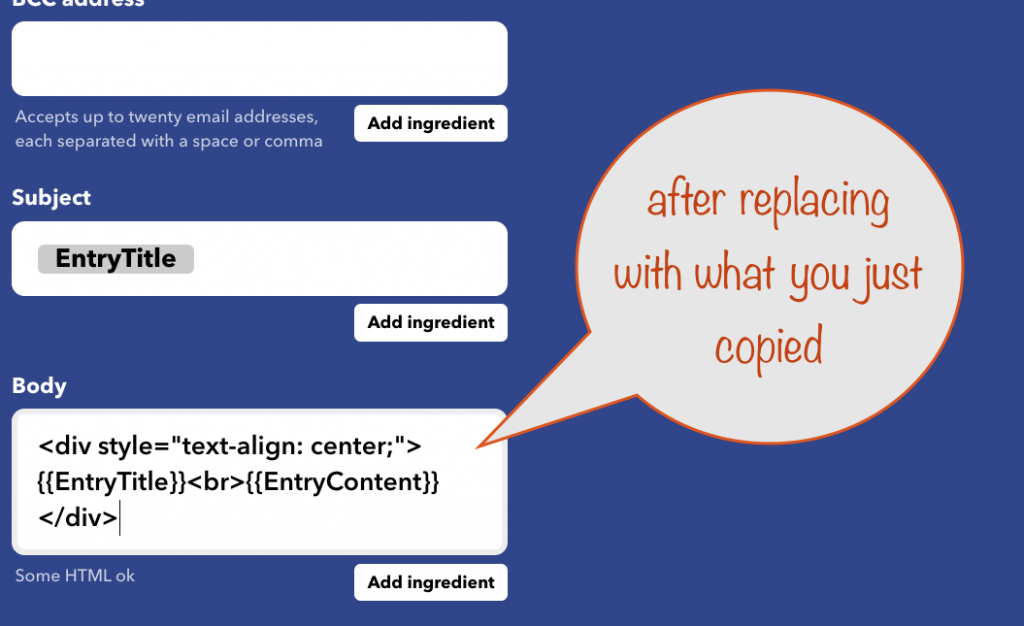
This is what it’ll look like while your cursor is in the box.
When you click outside the box, it’ll look like this.
If you’ve got a very wide or very narrow blog, you might want to change the 468px to something that works better for it.
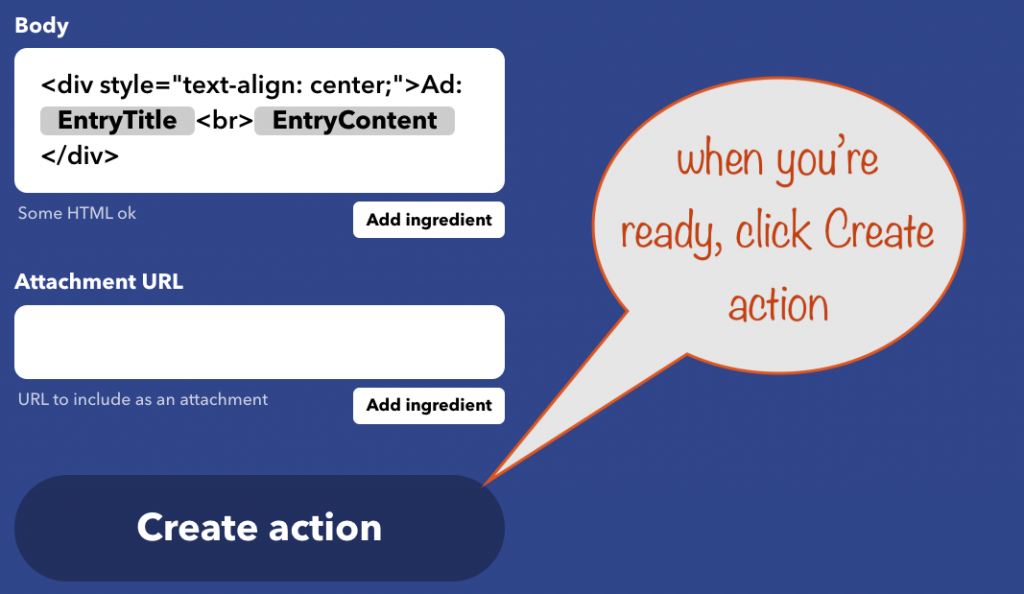
Once you’re ready to move on, click the Create action button
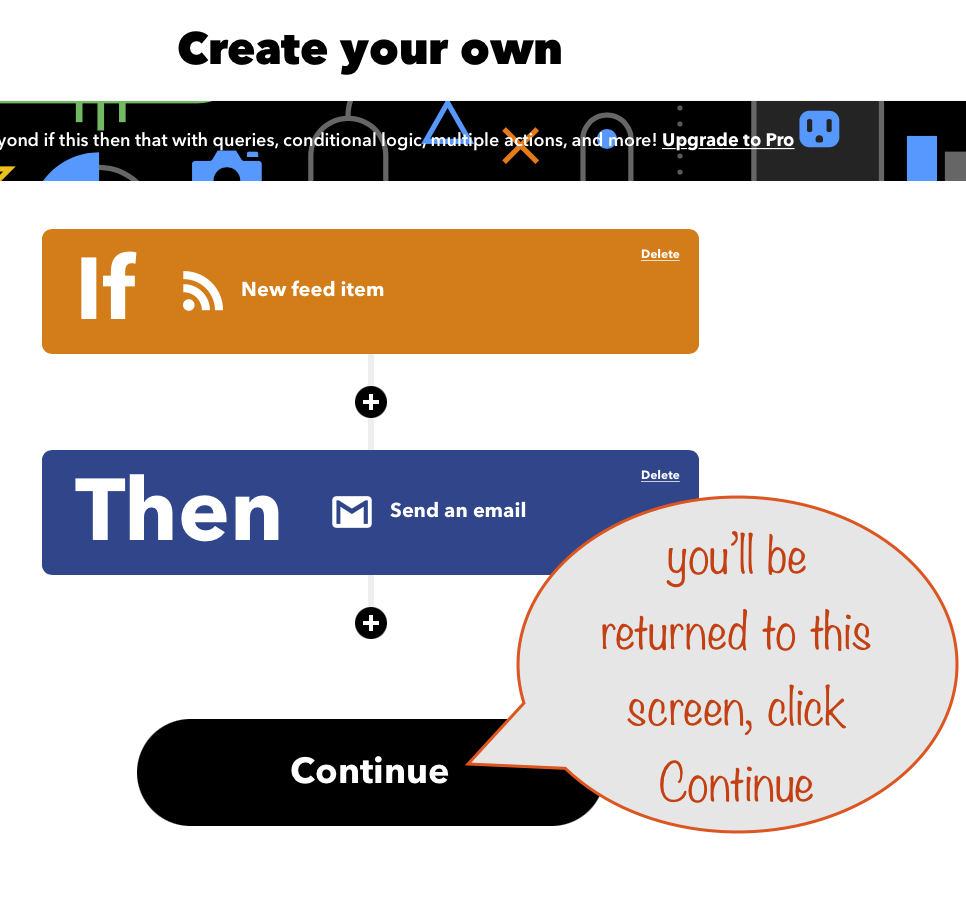
…and you’ll come back to this screen.
Click Continue – almost done…
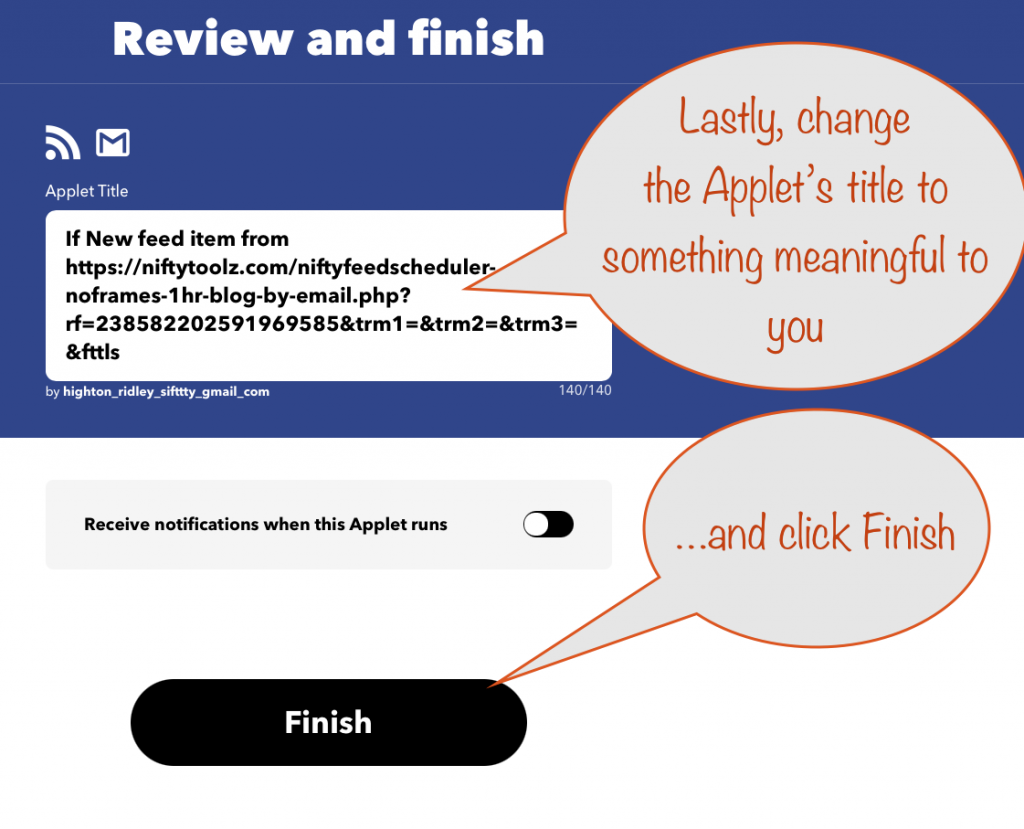
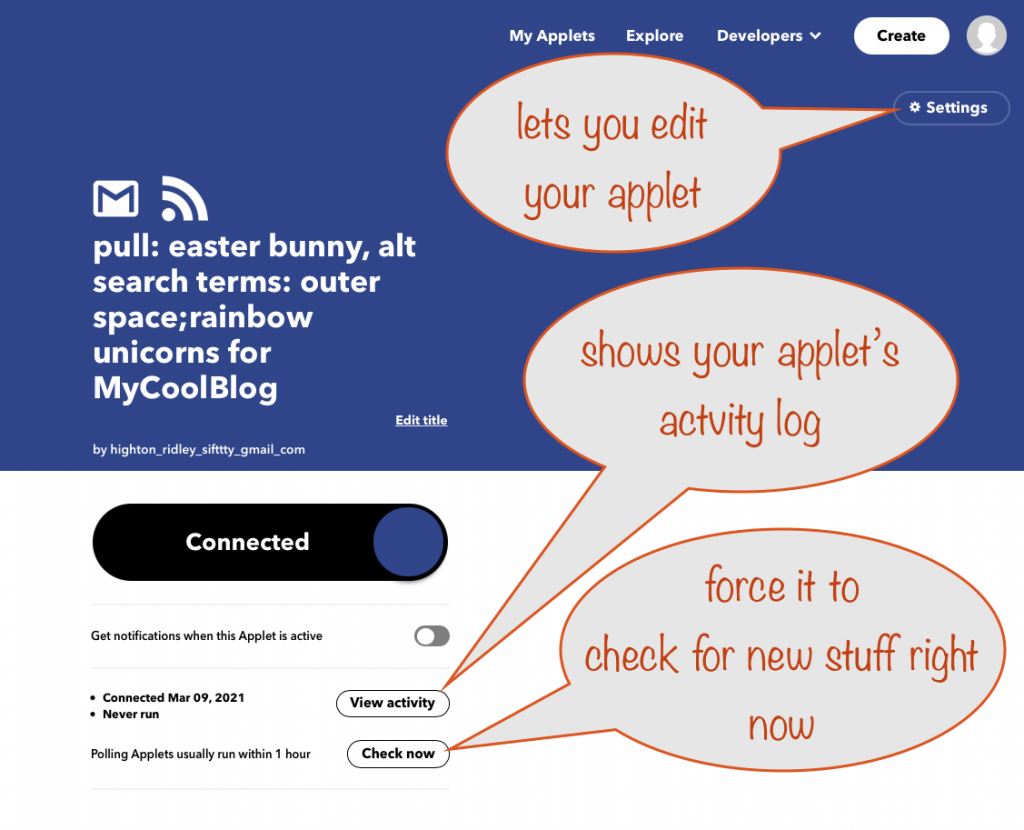
Last thing to do is to give your applet a name that’s meaningful to you.
Including details about the “pull” you used and the blog it’s going to makes a lot of sense.
That’s it – now show some patience…
Well done, you’ve now made your nIFTTTy Scheduler (a Nifty Schedule combined with an IFTTT applet) to auto-post to your blog.
You now have to wait for the next timeslot in your schedule to go active and for IFTTT to get round to checking it.
Do remember that timeslot times are in GMT/Internet time and so may not be the same as the time shown on your watch/clock/mobile.
If you’re not sure how that relates, have a look on the Nifty Schedule page and you’ll see the GMT/Internet time ticking away and updating as you look. Compare it to what’s shown on your watch/clock/mobile and you’ll see how much the time difference is.