Automatically creates a vertical or horizontal animation of the product views Zazzle gives on a product page. Sensible defaults mean you get what’s needed for your social media with the minimum of effort.
If you can’t wait, get your bookmarklet now at this link:
https://niftytoolz.com/npcp/prod-views-anigif-maker.html
(opens in a new tab)
I went to this page on Zazzle: Pillars of Creation Gift Wrap (opens in a new tab), clicked the Nifty 2SlotPVA bookmarklet and got this:

As you can see I chose Option 4 and this is what I got after the animation maker page opened and some stuff happened behind the scenes:
But I wanted more, so I clicked the stop and set options button….
Options Panel for more control
If you want more control over what views are used in the animation and any text to go with it, there’s an options panel for you to use.
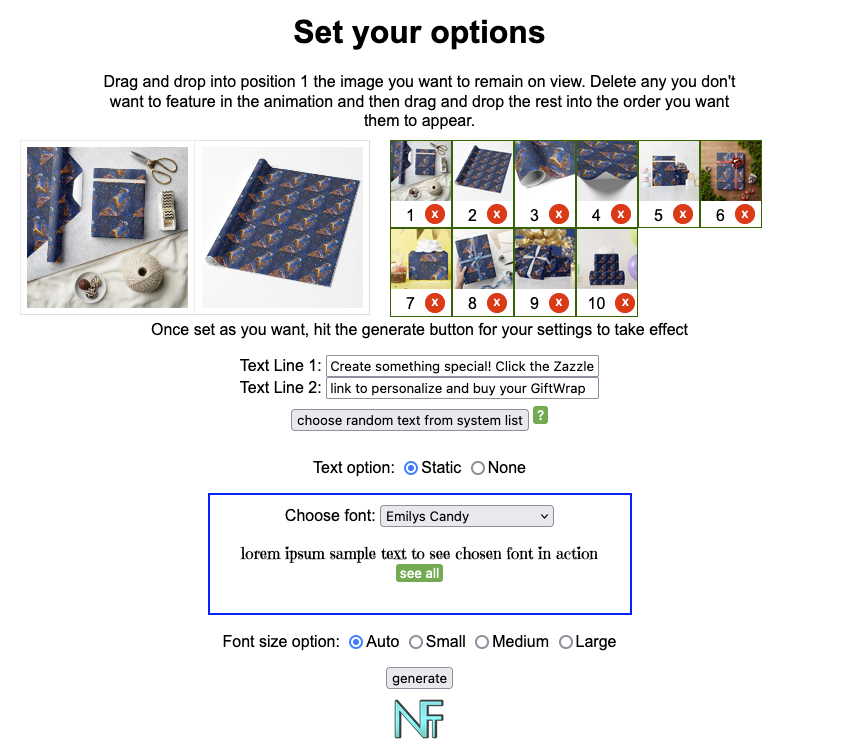
Above you can see what the panel looked like after I set things up for the final animation.
Here’s the choices I made:
- dragged the last image (number 12) into position 1 – that put it into the static slot on the left
- deleted two of the original 12 product views that I didn’t want in the animation
- clicked the button to get some random call-to-action text and edited it to put in the product name
- changed the text option to static
- chose the font I wanted – Emilys Candy
- left the font-size at auto
After setting those options, I clicked the generate button to apply the changes and I got my updated animation (above).
Watch a video instead
This 6 minute video tutorial takes you through the steps of getting your bookmarklet and creating your first product views animation, using the above gift wrap product as an example.