Find out how to include a personalization screenshot in your Pinterest carousel pins.
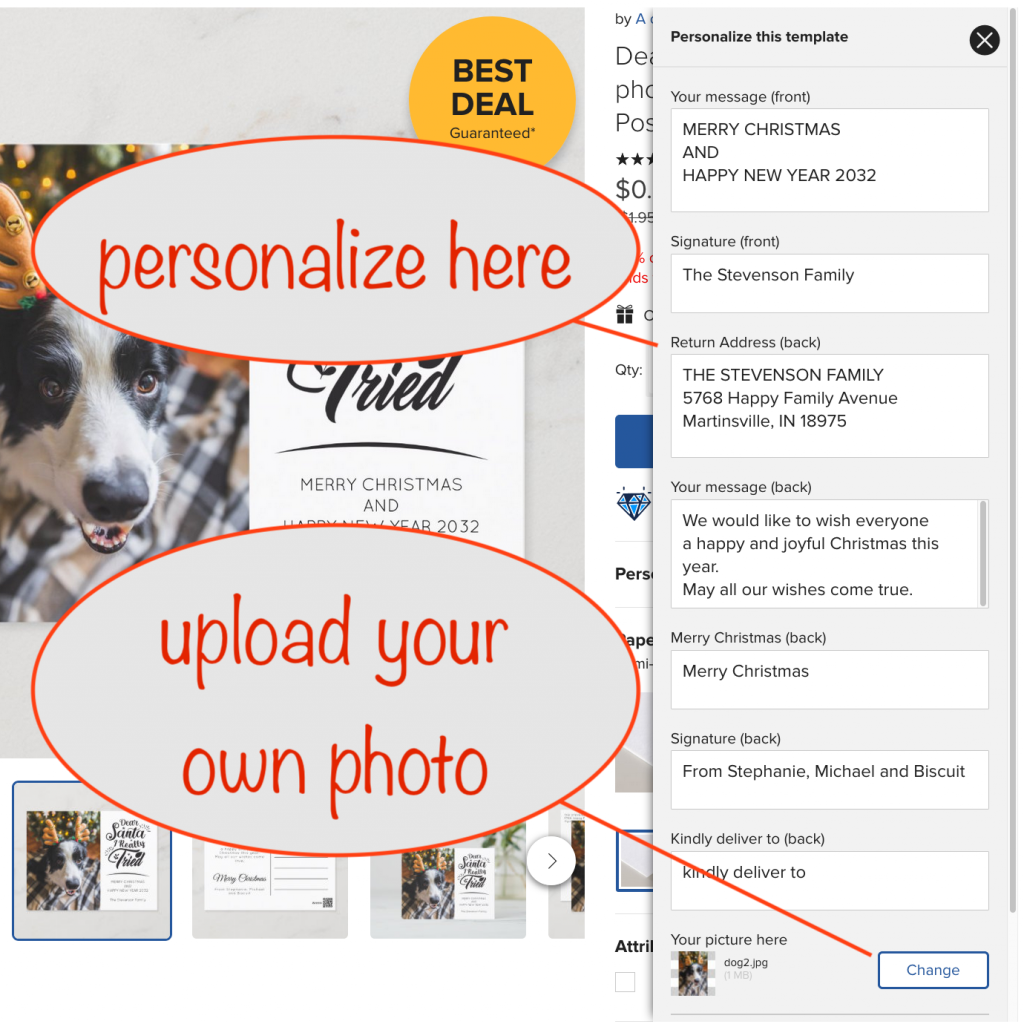
Why use Carousel Pins?
You’ll get far more exposure using Carousel pins on Pinterest because Pinterest likes them so much more than ordinary pins. That means it makes sense for you to use them whenever possible, time permitting. With their ability to include up to five images, you get the opportunity to use great in-situ pictures to show off great product designs.
If you want to speed up the whole process of making carousel pins of Zazzle products, see how to quickly get all product views in this tutorial (opens in a new tab / window)
Here’s a link to the Pinterest Carousel Pin I made using the above screenshot (opens in a new tab / window)
Why include a personalisation screenshot?
There are far more people who have never heard of Zazzle than the other way around. When they see a product they like, they might be put off by thinking that it’s too hard or a lot of work to personalise it.
If you use one of your carousel images to set their mind at rest, you’ll remove that obstacle to selling and increase your chance of a sale.
Luckily you can use a carousel pin to show just how easy it is to personalize the featured product with the template texts / images the designer’s used.
How to get a personalisation screenshot at the pixel dimensions that Pinterest likes?
Pinterest prefers large pixel sizes for images, with a minimum of around 1000px wide. Read on to find out how to get a screenshot of the relevant part of your browser’s contents at around that size.
What you need to do is to use your browser’s Zoom facility to first enlarge what the browser shows.
You do need to use Firefox for this because, at the time of writing, Chrome and Chromium-based browsers (think Edge, Vivaldi, Brave, Opera and others) all cut off a chunk of the right hand side of browser screenshots when zoomed in.
Get to the product page, open up the Personalize pane and then zoom in. The keyboard shortcuts for this are
- Windows: <ctrl>+
- Mac: <command>+
Zoom in a few times to make things really big. When you’ve done that, right-click a blank area of the browser window:
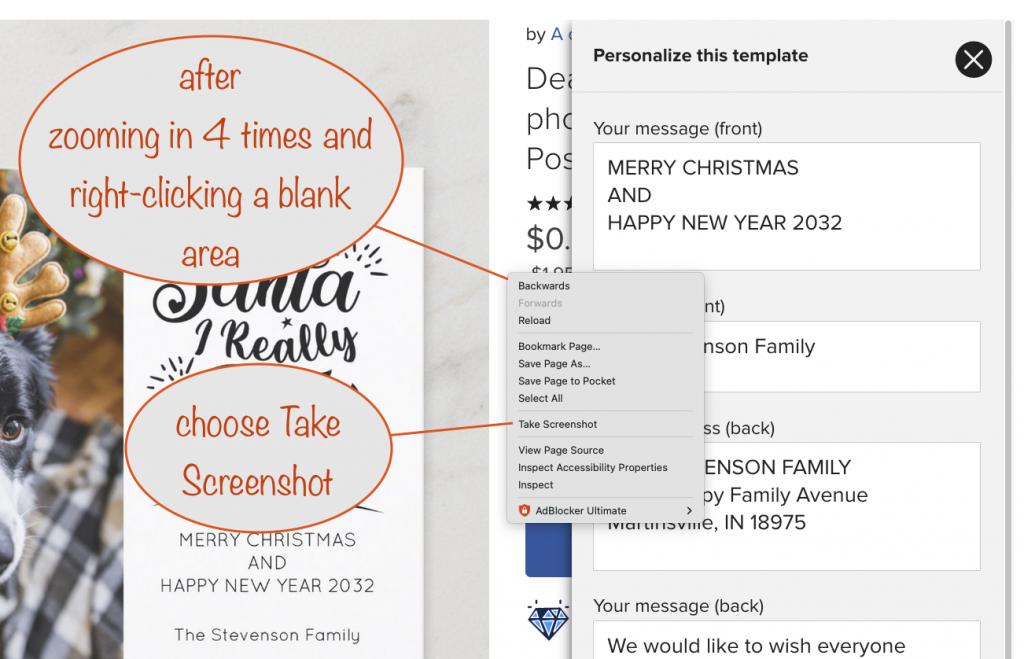
Next, choose “take Screeshot”. If you prefer, you can use a keyboard shortcut to take the screenshot without right-clicking first:
- Windows: <ctrl><shift>S
- Mac: <command><shift>S
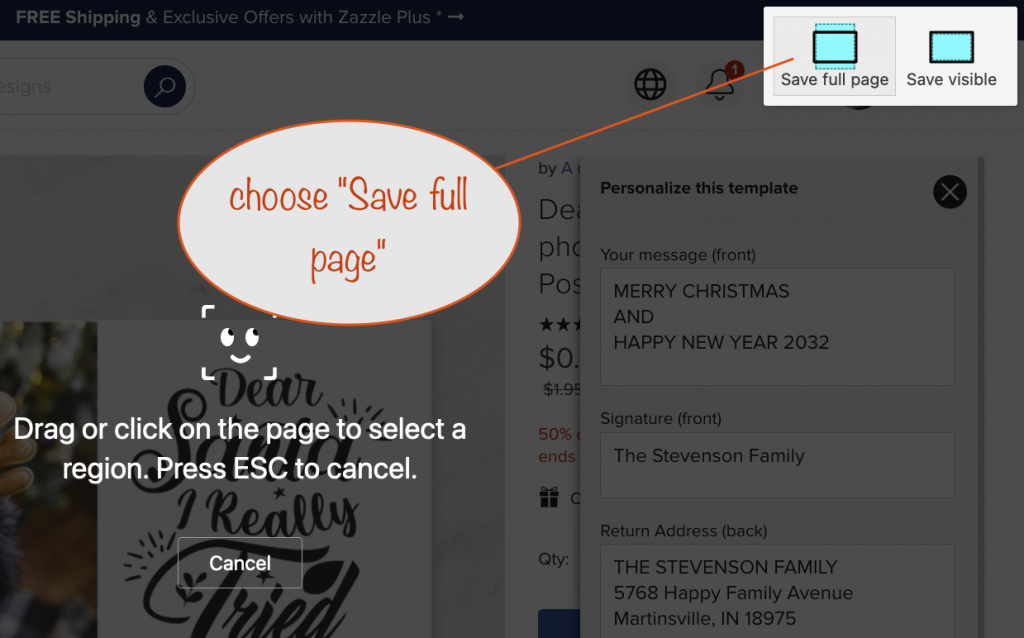
Whichever way you go about it, you’ll be given the option to save the full page or just the visible part; choose “Save full page”:
Behind the scenes, Firefox prepares a file containing a screenshot of the whole web page. After a while you’ll be given a download button to click:
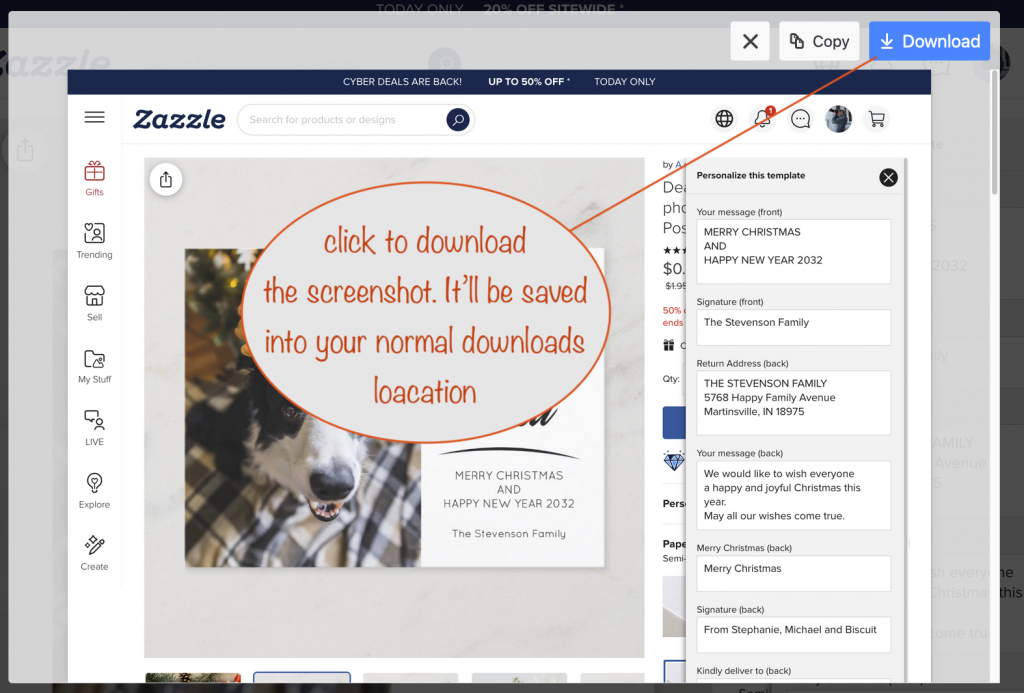
Then just crop the image to the right size in your favorite image editing program. I use Preview on my Mac where I also add the speech bubbles.
Depending on the number of template texts / images, you might have to crop to an aspect ratio that’s not quite what you want. Never mind if that happens as you can adjust things when you’ve added it to your carousel pin.
Here’s the carousel pin I created with the above (opens in a new tab / window)
It’s not nearly as obvious as it should be that it’s a carousel pin because of the way that Pinterest displays them. It’s easy to confuse carousel pins with ordinary ones if you give them a quick glance.
The way to tell is to look for the forward-facing white arrow overlaid on the right-hand side. There’s also be a number of dots overlaid on the bottom indicating how many images are included in your carousel pin.
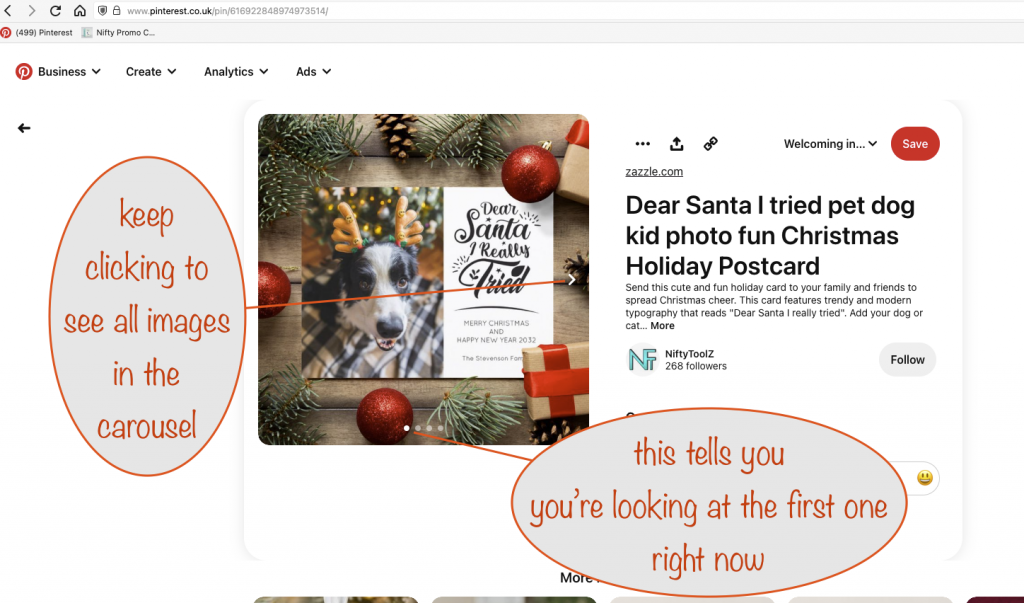
I put my personalization screenshots as the last carousel image presently but I might be tempted to try them as the second or third image in future.
We’d love to hear your comments or suggestions to improve carousel pins – you know what to do 💐