Nima-WS is another bookmarklet-driven utility from the Nifty stable. This one works on lots of different websites, letting you create animated gifs from their images.
The bookmarklet itself is called Nima-WS and the Nifty tool page it opens up is called the Animaker.
get the Nima-WS bookmarklet here
(opens in a new tab / window)
You can mix images from different web sites in the same animation. This means you can use your own images as long as they’re held somewhere on the web you have access to.
Of course, you need to respect other people’s copyright and only incorporate images into your animations that you’re allowed to use.
Key to how it works is Local Web Storage
Browsers have a thing called local web storage that’s private to each web site. When you use the Nima-WS bookmarklet to pick the images you want for your animation, that’s where they get put.
When you’re done picking, they get passed across and put into the local storage for this NiftyToolZ web site – called the Master Image Store and it’s from here that your animation is made.
If you want, you can read more about Web Storage on Wikipedia (opens in a new tab / window)
How do you use Nima-WS?
Summary
- you visit a web site with images you want
- you click the bookmarklet to activate it
- <alt>-right-click (<option>-right-click on Macs) on each image that you want in your animation
- in the dialog that opens up you choose to add the image to that website’s image store
- you maybe move to another page on that web site to get more images – reactivating the bookmarklet if needed
When you’ve got all the images you want from that web site:
- you select the animation template you want from the drop-down list in the Nima-WS dialog box
- then click one of the buttons to open the animaker – either adding to the existing Master Image Store or creating it afresh
- you watch while the default animation is made from the images in the Master Image Store
- if you want you, can close that window, visit another web site and grab more images
- or you can set some options, rearrange the images into the order you want and then remake your animation. Repeat until you have it just the way you want.
Screenshots
These screenshots show the steps so you know what to expect. First, here’s what you see when you activate the bookmarklet:
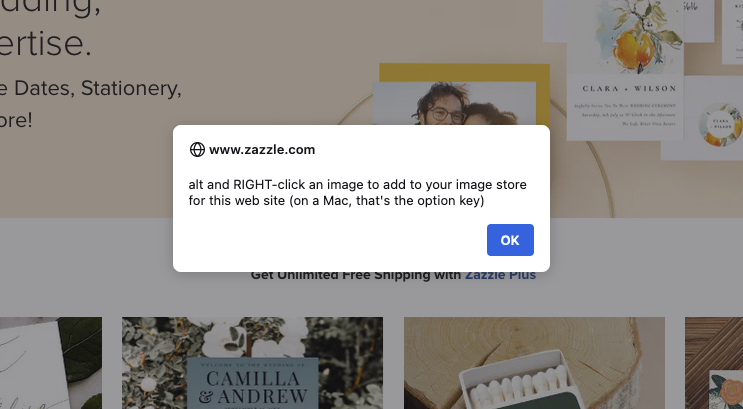
With the bookmarklet activated you can now <alt>-right-click on an image you want to use in your animation (for a Mac, that’s <option-right-click).
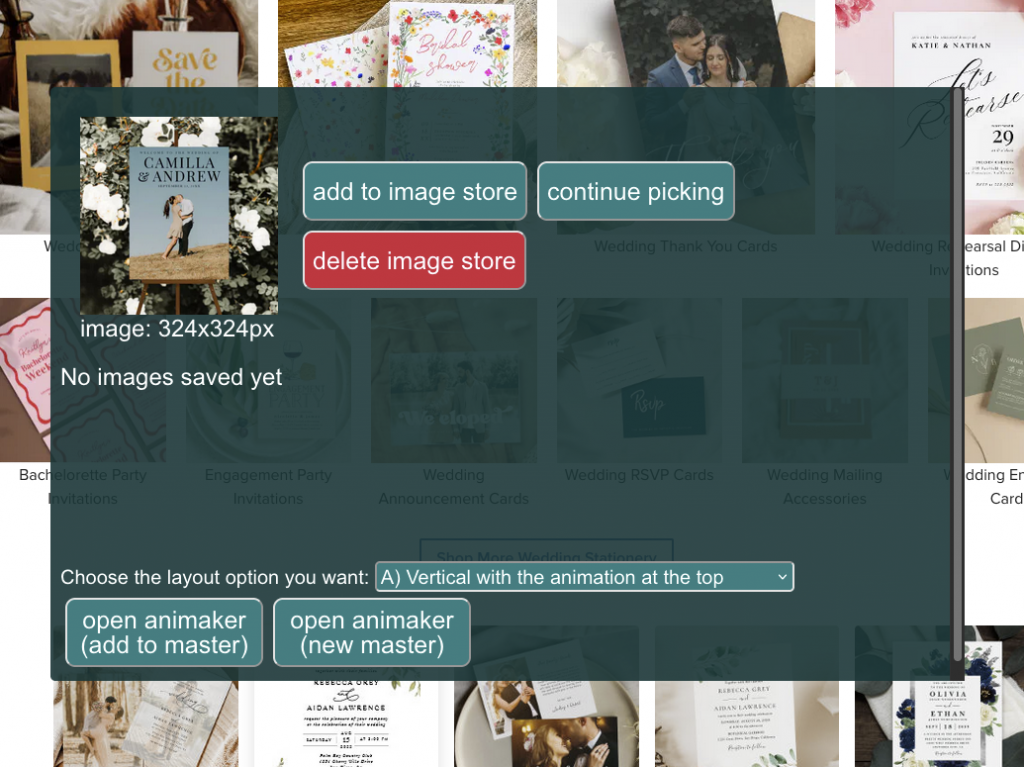
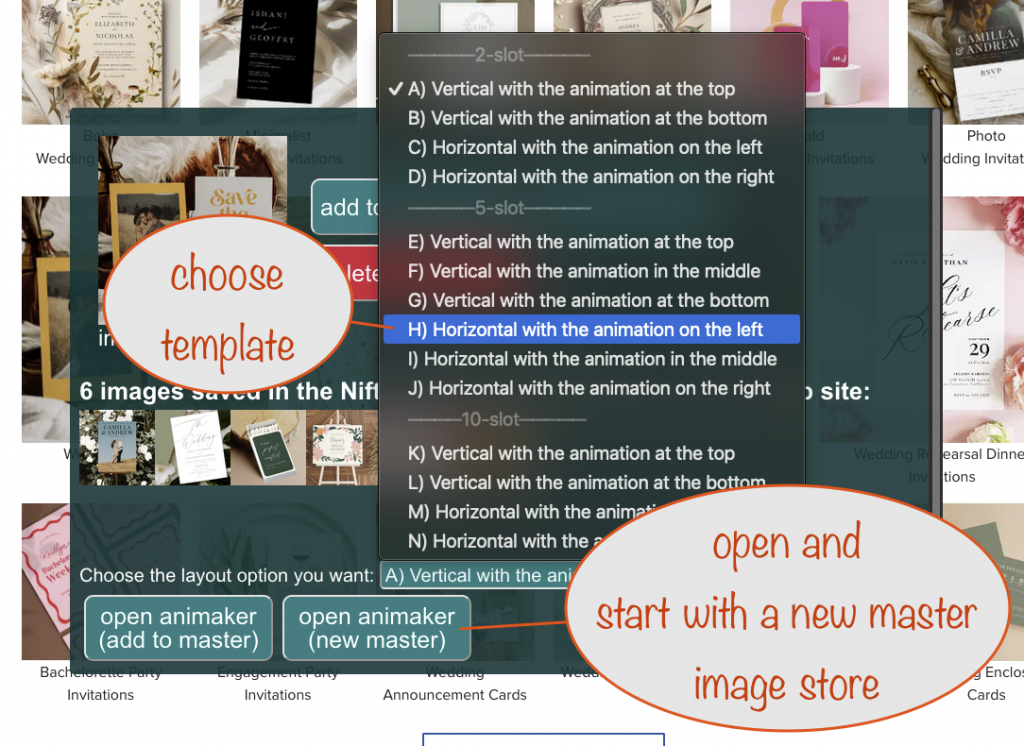
Add it to the image store and click to continue picking:
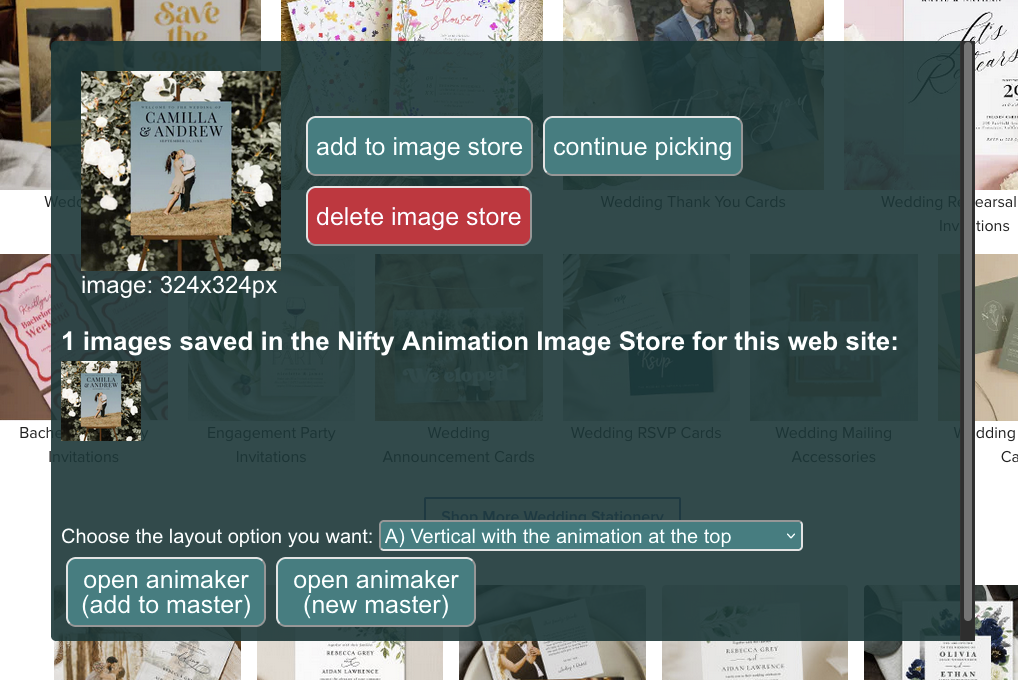
After adding all the images from this web site to the image store, choose the template you want and click the open animator (new master) button.
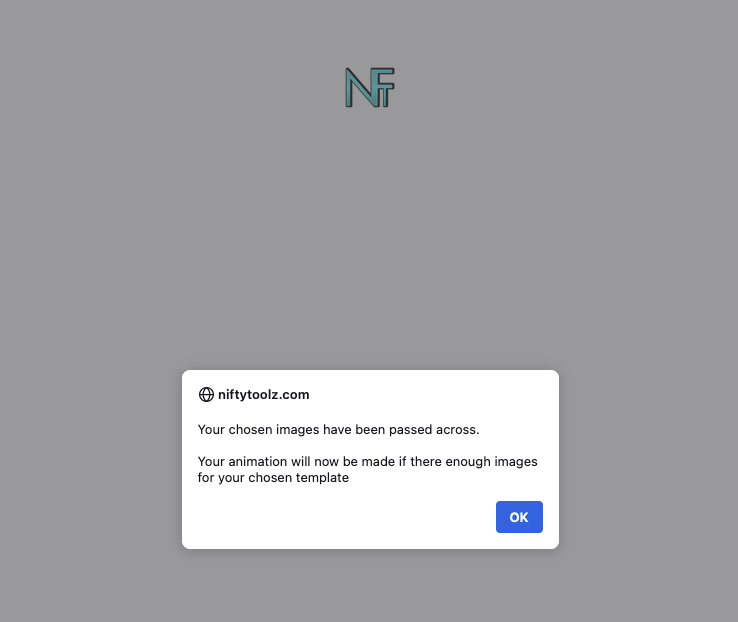
Here’s the message you see when the Animaker page opens up, confirming that the images were passed across ok and the animation is about to be made:
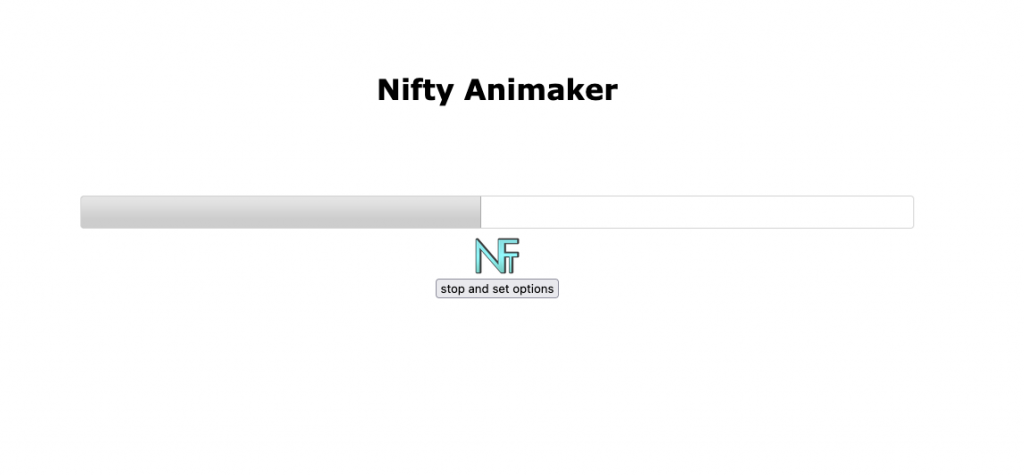
While your animation is being generated, you’ll see this:
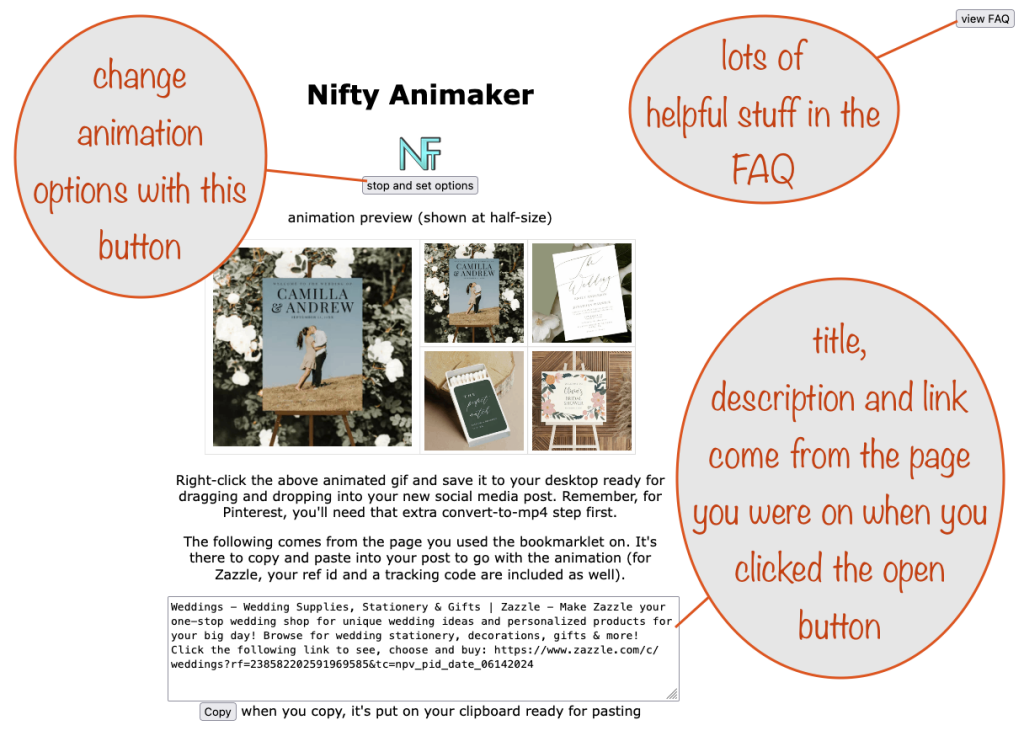
Once complete you’ll see the default animation for the template you chose with the images appearing in the order you initially picked them.
You’ll also get a text box filled in with information from the page you were on when you opened the animaker. You’ll get that page’s title, its description and the url (link) of the page. If it’s a Zazzle page the link will also have your referral id and a tracking code.
If you want to add text and / or change the order of the images then that’s what the stop and set options button is for.
Here’s the options section that appears when you click that button. Use it to add and position text, change its font and size and reorder the images. Clicking the generate button applies those settings and remakes the animation using them.

Tips
- Use “call to action” text on your animations – they and their accompanying links will get many more clicks that way
- If you use lots of images, the size of the animation might get too big for social media. Much more than around 25 images and you’ll need to convert to MP4 to get round this size limitation – see the FAQ
- Around 40 images or more and your browser will struggle and slow right down – it’s a lot of effort to make such big animations! Poor thing!
- Make sure you scan the FAQ so you know what you can find out more about