December 10th: This tool is now withdrawn. Changes at Zazzle mean it’s no longer effective.
April 19th: New feature to import backend stats added. Tutorial updated.
Find out how well your store’s products are doing in the marketplace for a given search term and see how your tags and titles compare to the one in the number one slot for that search.
You’ll also see which search term words appear in tags, titles and both, helping you decide what to optimize. The history function keeps track so you can monitor progress over time.
Overview
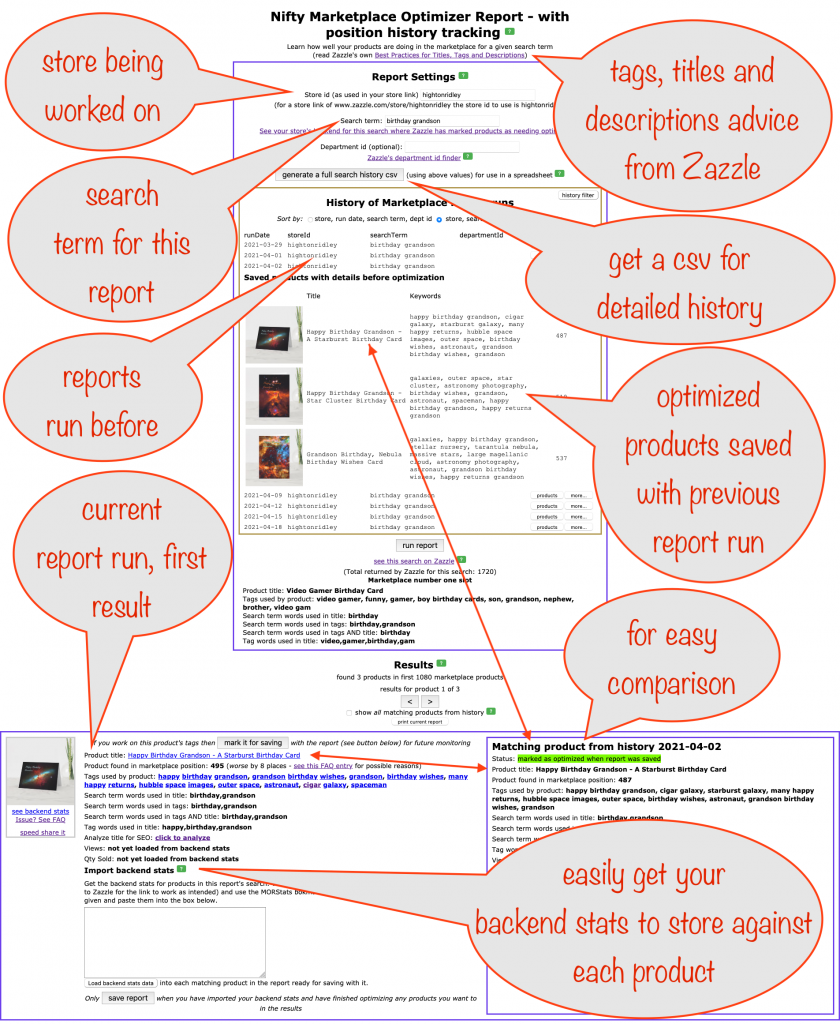
Here’s a screenshot highlighting all the major parts of the report to give you a flavour of what it does for you (click the image to see it at full size)
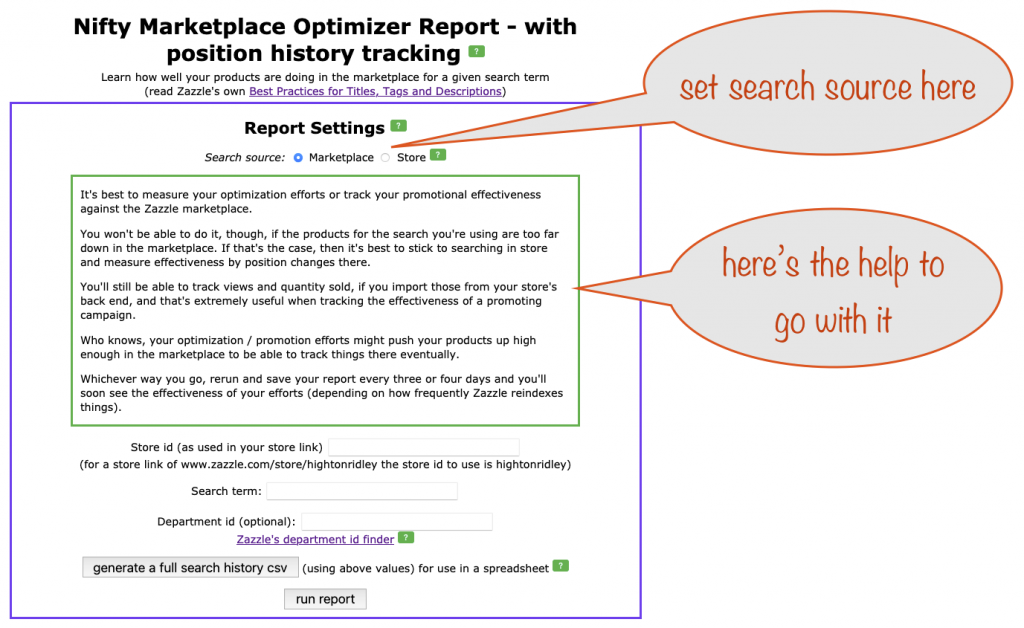
Since updating the above, I’ve added the option to set the search source to a store rather than the marketplace. The reason is that, more often than not, the products you want to track don’t reach high enough in the marketplace for the search you want to use.
Example search and results
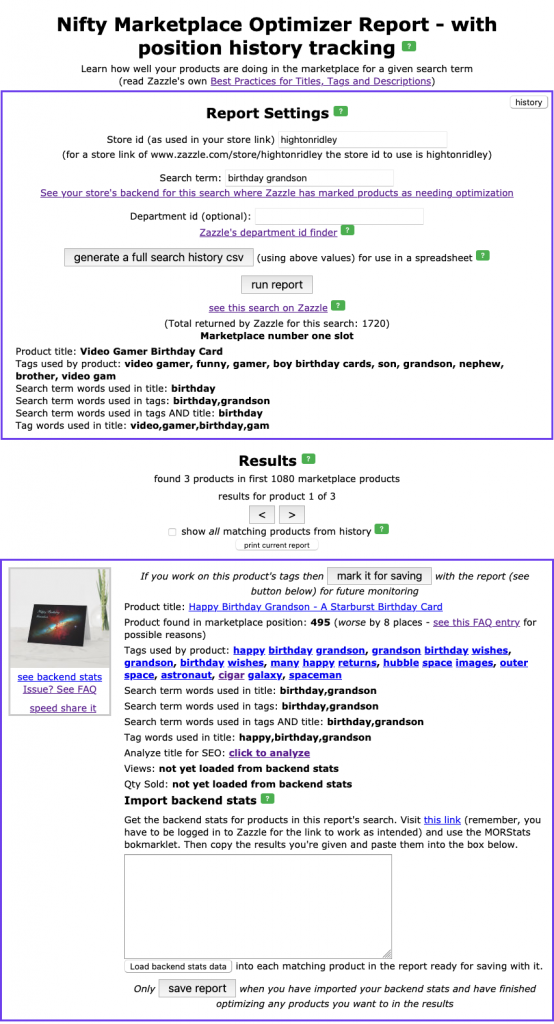
Here’s a marketplace search using the term birthday grandson together with the results (click the image to see it at full size)

There’s lots of help available when you click those green help buttons – make sure you have a look at each one!
There’s also a couple of useful links that will help you in optimizing things. The first is Zazzle’s own Best Practices for Titles, Tags and Descriptions
The second is a link to your store’s backend in Zazzle (you have to be logged in to Zazzle for it to work). It’s set up to use the same search you’ve entered (and the department id if you used one) and shows you all matching products in your store that Zazzle has marked as needing optimization.
That second one is really helpful because those products won’t appear in the report. See the bottom of the page for helpful hints to get the best out of your efforts.
Report History
The marketplace optimizer report also keeps a history unique to you so you can compare how your optimization actions turned out.
Here’s how to see your saved reports history and the products you worked on and saved with it
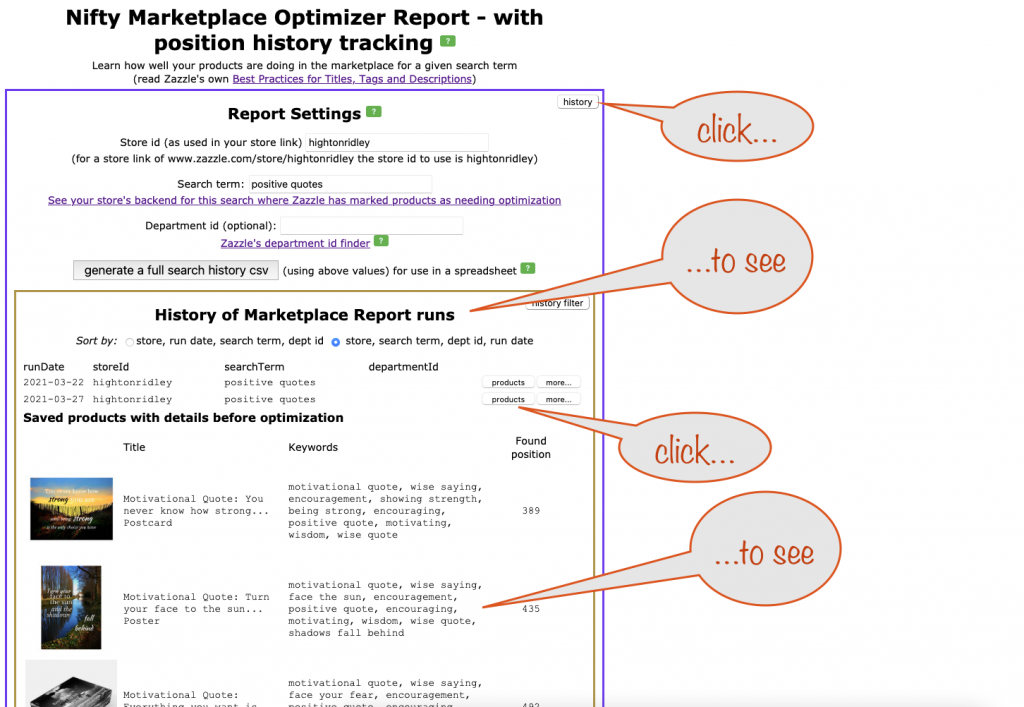
When you work on a product, it’s recommended that you mark it for saving with the report’s history. This is so you can run the same report again in the future and compare the results of your optimization efforts.
Here’s an example. I first ran the report using positive quotes as the search term. I worked on five of the products found (having worked on one of them previously).
After finishing working on each one, I used the provided link to visit the stats page in my store’s backend for it. I then copied and pasted what I found there into the notes box. Finally I marked it for saving with the report.
When I’d done them all, I saved the report. A couple of days later, I ran the report again using the same search term as before and you can see the results below.
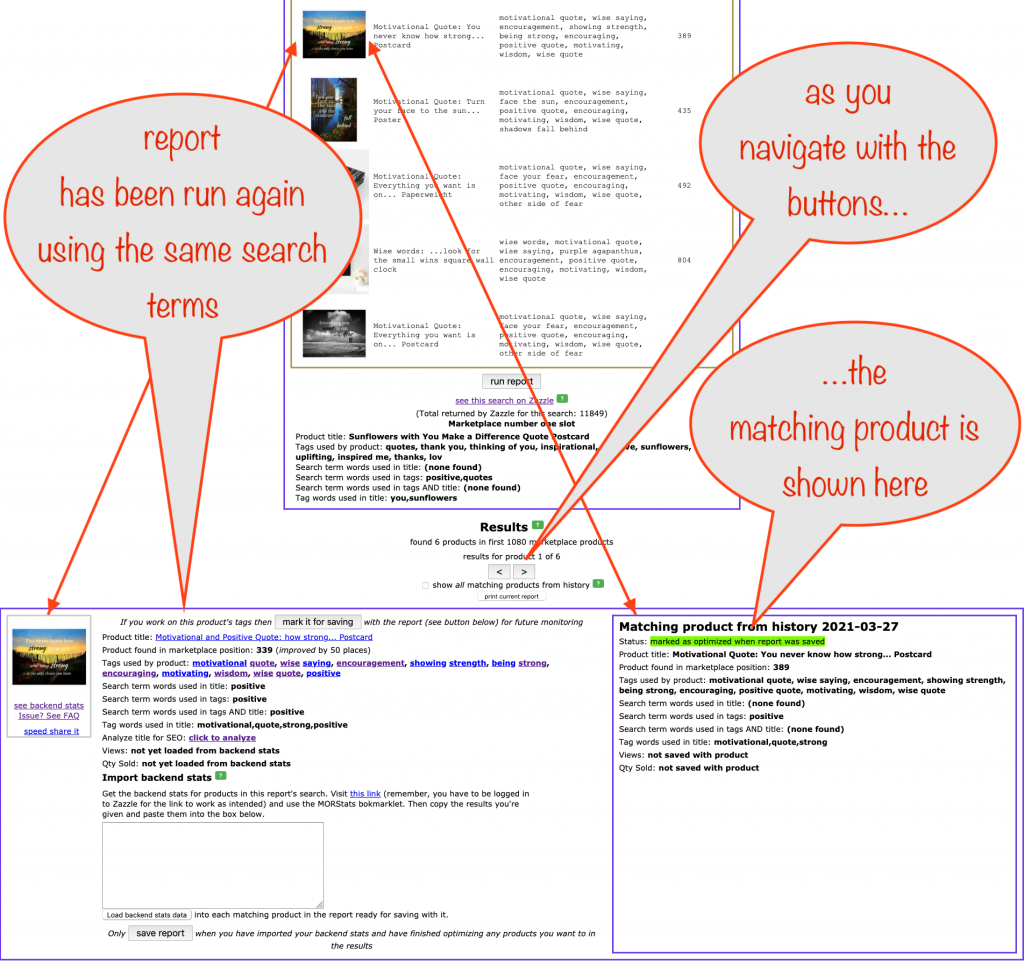
See how useful it is?
Optimization progress
Reveal the detail (before optimization) on an optimized product in the history. Then run the same report again so you can see and compare the before and after.
In the example in the screenshot the optimization was to change the product’s title to include the search term I was optimizing for.
My optimization efforts were rewarded with a marketplace jump from 389 to 339 – a climb of 50 positions! Sales are bound to follow (hopefully!)
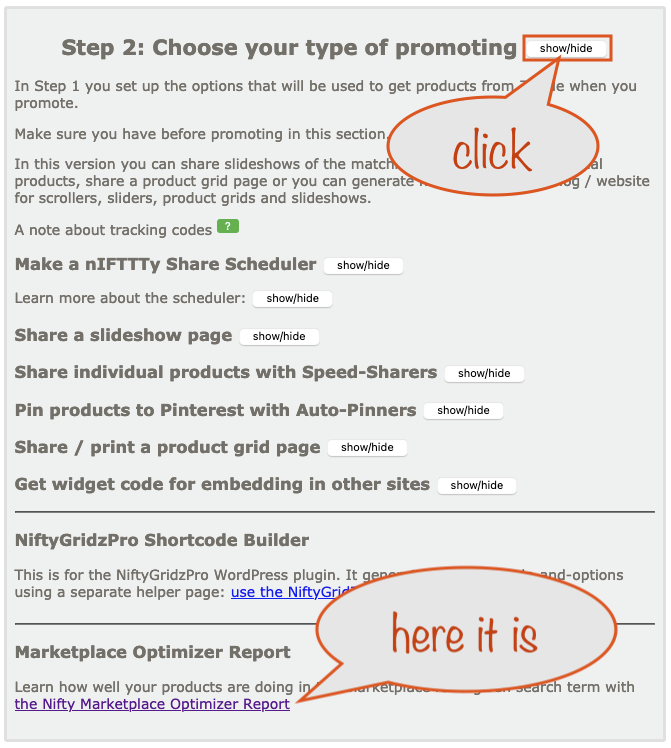
Where’s the link to it?
It’s found in Step 2 of the Nifty Promo Control Panel as shown below
Helpful hints to get the best out of your optimization
These tips will guide you in being successful in your optimization efforts.
Don’t take on Goliath!
You might like to think of yourself as a giant-killer but no amount of optimization is going to take the top spot for a particularly popular search term. Why is that? It’s because marketplace position is determined by far more than titles and tags.
Zazzle’s secret sauce for determining marketplace position also uses things like sales performance (sales as a proprtion of views) as well as many other ingredients we have no hope of ever working out!
So go for search terms that are less popular / more niche because anything that improves your marketplace position is going to increase your chances of a sale. And more sales means your marketplace position will also improve. Win-win!
Focus
Decide first what search term you want some of your products to do well with.
How you make that decision is is an artform in itself. One place to get a clue is Zazzle’s front page – see what designs they’re pushing and look at the products being shown. Visit some of them and check out their titles / tags as a guide.
Research
When you’ve homed in on a search term, run the report using it and see where your products appear in the marketplace.
If you only get a few (or none) when you expect more, check your store’s back end with the link provided to see if they’re marked as needing optimization. If so, do something about it while you’re there. Don’t forget to change any you work on from hidden to public.
As those changes will take time to have an effect, consider focusing on a different search term / products for now.
Optimize away!
First, refamiliarize yourself with Zazzle’s article on Best Practices for Titles, Tags and Descriptions so you’re primed to optimize.
Look in your report results and pick products that are furthest down the marketplace. Do your optimization and then make sure you mark the product as optimized for saving with the report.
When you’ve done all the products you want to, you’ll save the report so you can monitor progress over the next few days.
It’ll take Zazzle some time (from hours to days) to reindex things so don’t expect results right away.
But before you save your report…
Import your backend stats for saving with the report’s products. The backend stats saved are the number of views and the quantity sold. These two stats will help tremendously in understanding movement in marketplace positions of the products as time goes on and you run and save the report again.
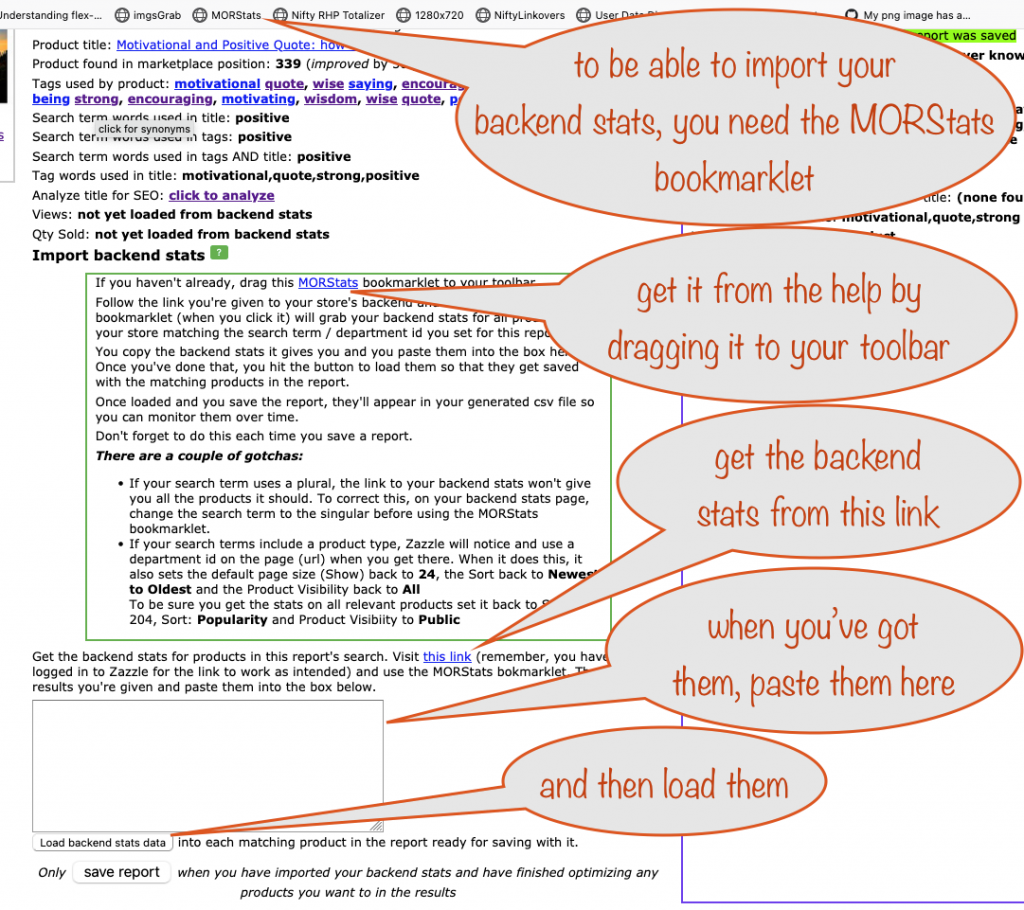
The key to importing your backend stats is the MORStats bookmarklet. Here’s an article about bookmarklets from Mozilla (opens in a new tab).
When you visit the link given to your store’s backend and click the MORStats button in your toolbar, a new tab opens.
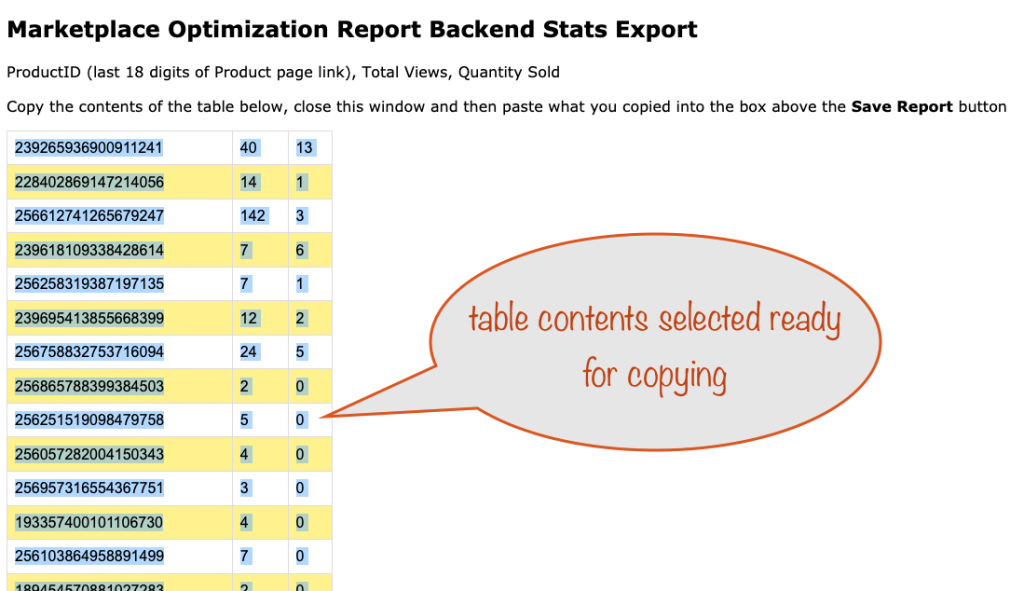
Once you’ve selected and copied the contents of the table, close the tab and paste what you copied into the loader box on the report page.
When you click the Load backend stats data button, the product id (the last 18 digits of the product page url) in each row of data is compared to the products in your report. For each match found, the views and quantity sold is stored with the matching product.
Monitor your optimization efforts
After a day or two, run the same report again and check the impact of your optimization efforts.
Look at the history for the products you marked as optimized to remind you of their marketplace positions before you worked on them. Look at the marketplace position, views and quantity sold and compare things from where they were to where they are now (you’ll need to import the backend stats for the current report to see its views and quantities sold).
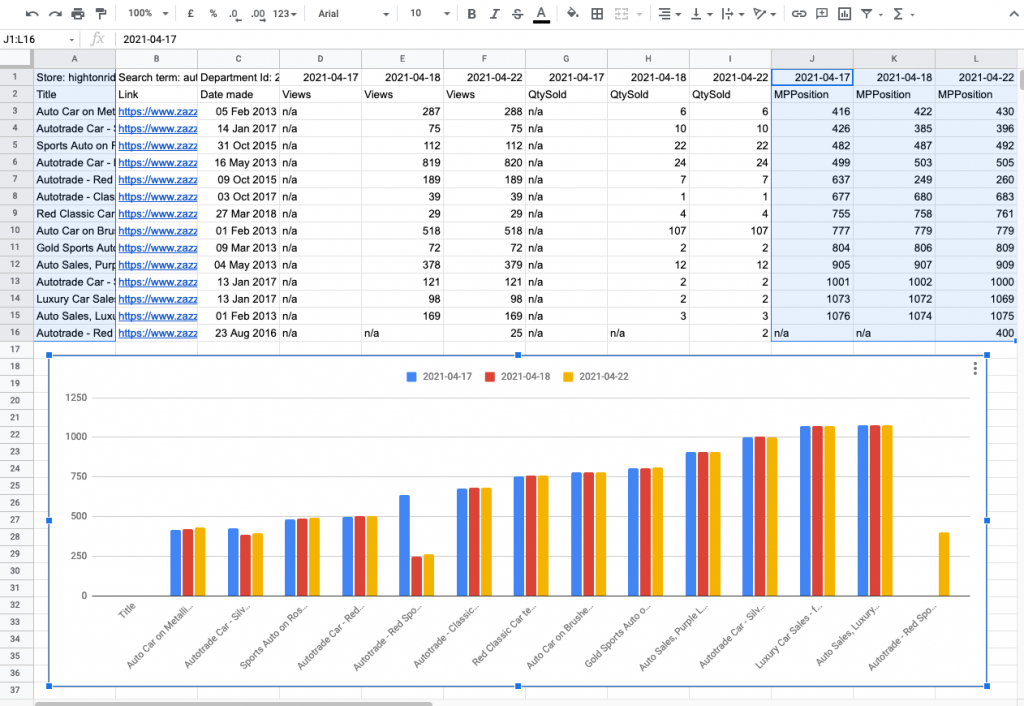
When you’ve saved a few reports, the best way to see a complete history is to use the generate a full search history csv button to get a csv file you can load into a sppreadsheet and see a report-by-report listing of marketplace positions, views and quantity sold. Perfect for assessing things over a longer period of time!
Getting a print of your current report run
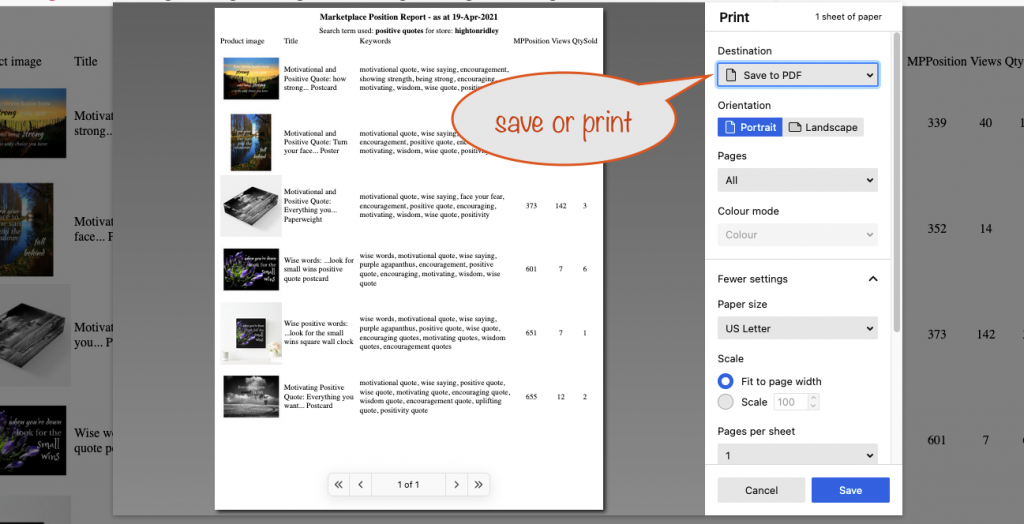
After running a report, you’ll see a button that lets you print it. It uses your systems in-built printing system with most systems allowing you to print to a pdf file.
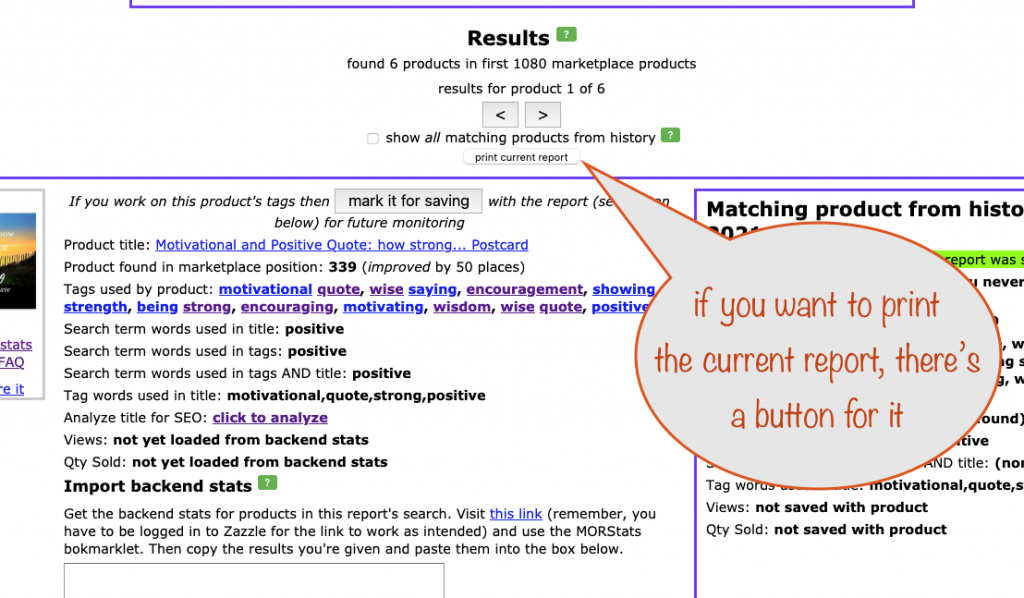
After you click it you can choose to save or print:
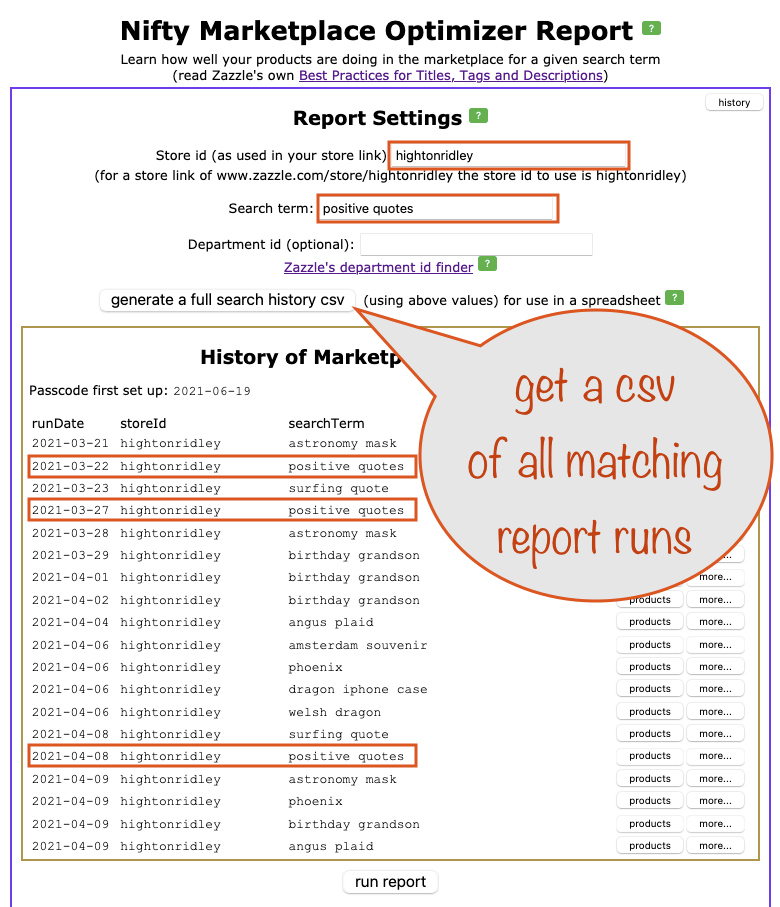
Getting a csv file for report-by-report marketplace position movements
If you want to see the movement in the marketplace of products as recorded in the report runs, set up the same store, search term and department in the Report Settings and then generate the csv file.
You’ll need to load your csv file into a spreadsheet program like Microsoft Excel, Google Sheets or LibreOffice Calc.
Here’s a generated csv (from a different set of saved reports) loaded into a Google Sheets spreadsheet
