Tutorial to auto post to your blog using nIFTTTy Schedules is here: https://niftytoolz.com/auto-posting-to-your-blog-with-nifty
Before you start
- your blog needs to have an RSS Feed of your posts using RSS2. Blogger blogs are fine for this.
- you need to be able to add a short piece of code to your blog’s head section
- you need to have a Pinterest business account
Summary of steps
- Set up your Pinterest (business) account
- Claim your website (ie your blog)
- Copy the code you’re given
- Prepare your blog
- Paste the code into your blog’s head section
- Back to Pinterest and complete claiming your blog
- Finally, tell Pinterest your blog’s RSS Feed url so it can start auto pinning
See the end for fine-tuning your RSS Feed url
Let’s get started…
Set up your Pinterest account
To be able to do this your Pinterest account must be a business one.
Get to your settings screen. Right now (but it may change in future, knowing Pinterest!) you do this:
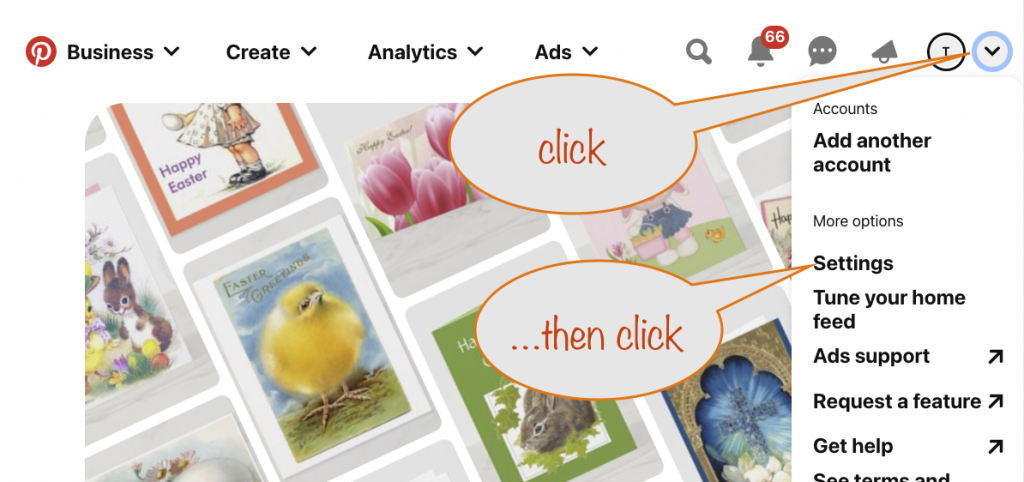
Claim your blog
You’ll now see something like this
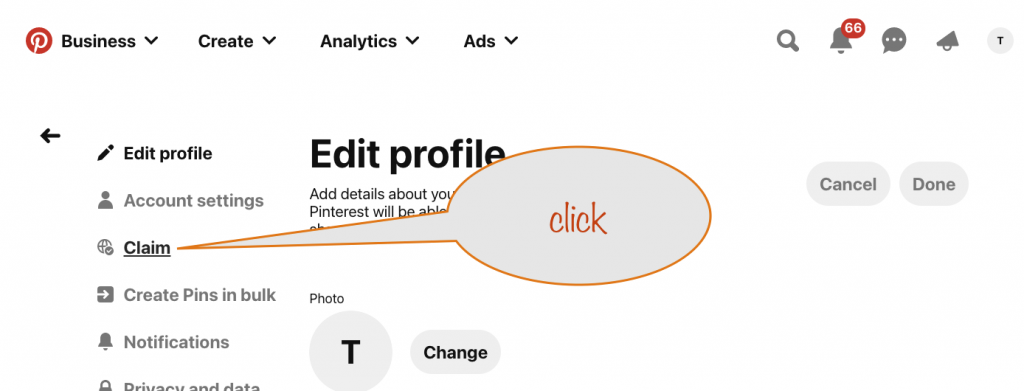
Click the “Claim” link
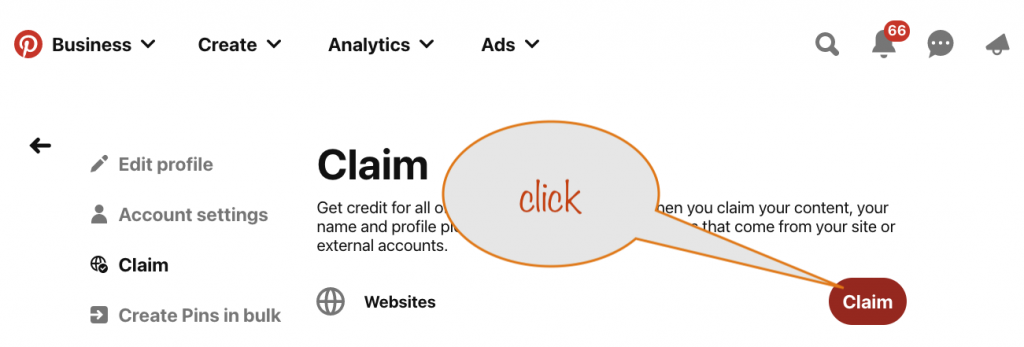
Next, click the “Claim” button
Get the code
You’re now ready to get the code to paste into your blog’s “head” section.
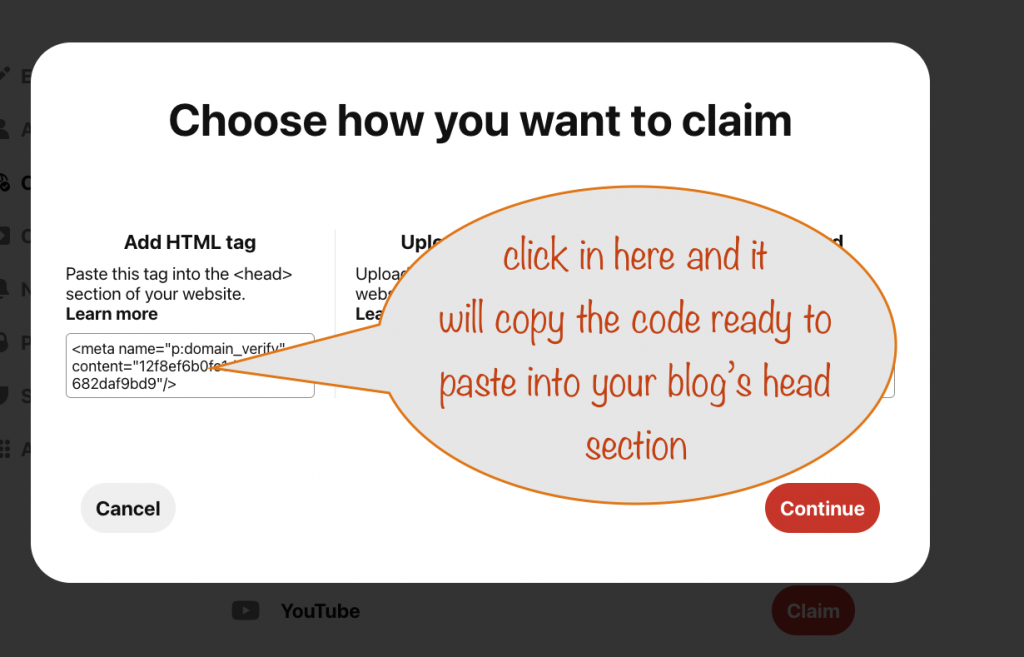
Click in the left-hand box to get the code ready for pasting into your blog’s “head” section.
When you do it’ll be copied automatically.
Prepare your blog
Next you get to the right place on your blog to paste the code you just copied. You want the design area where you see this
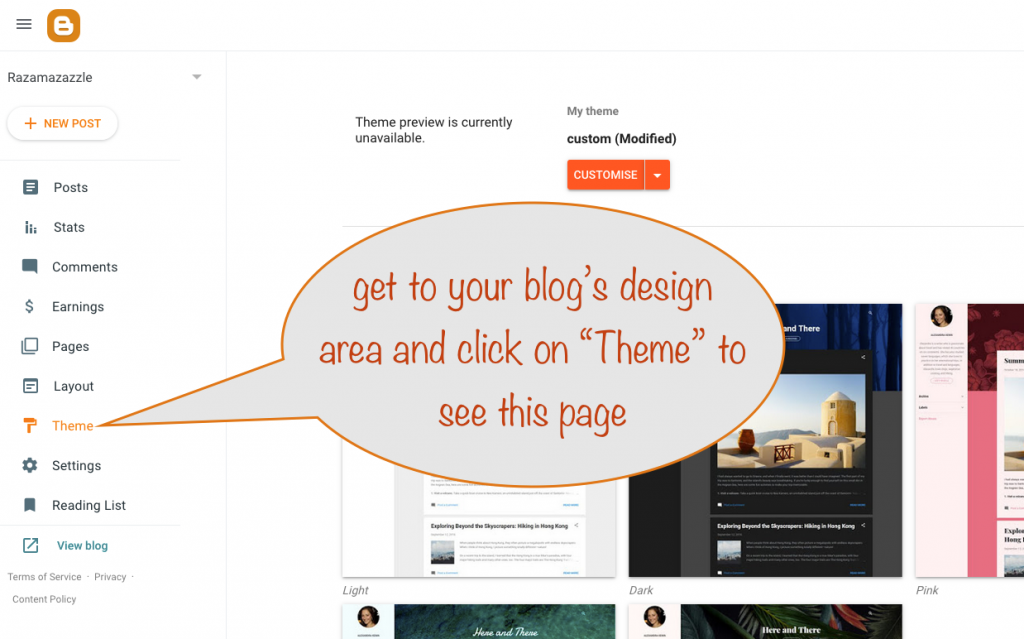
Click “Theme” ready to customize and add the code
You’re now ready to get to the “head” section so click the down arrow…

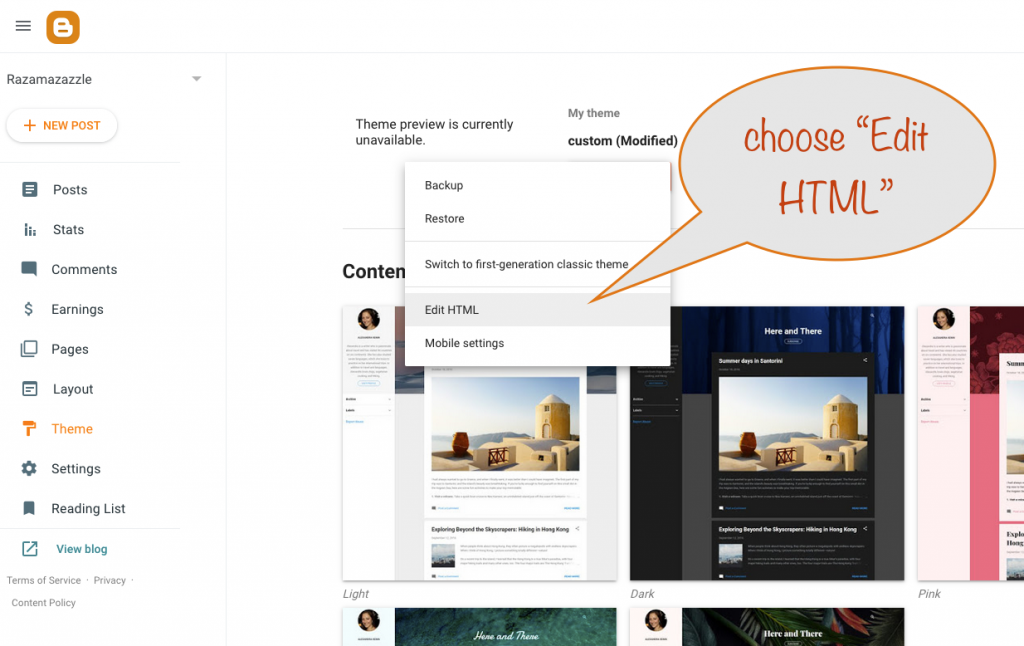
…when you do you’ll see these choices. Choose “Edit HTML”.
Before you choose that option, it’s wise to choose “Backup” first, just in case.
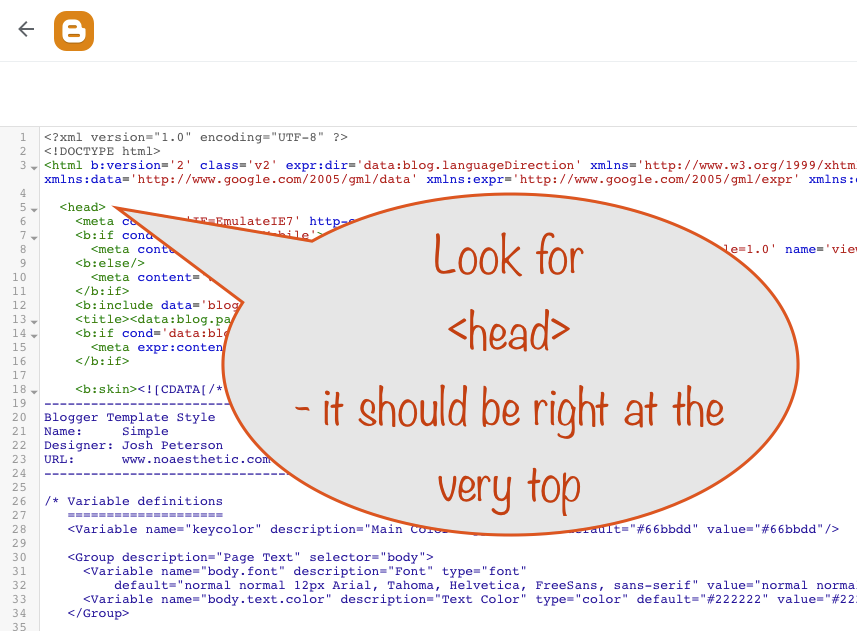
When you click to edit the html, this is what you’ll see. Look for the <head> section – it should be very near the top.
Paste the code
Look at the screenshot and paste the code you got from Pinterest where indicated:
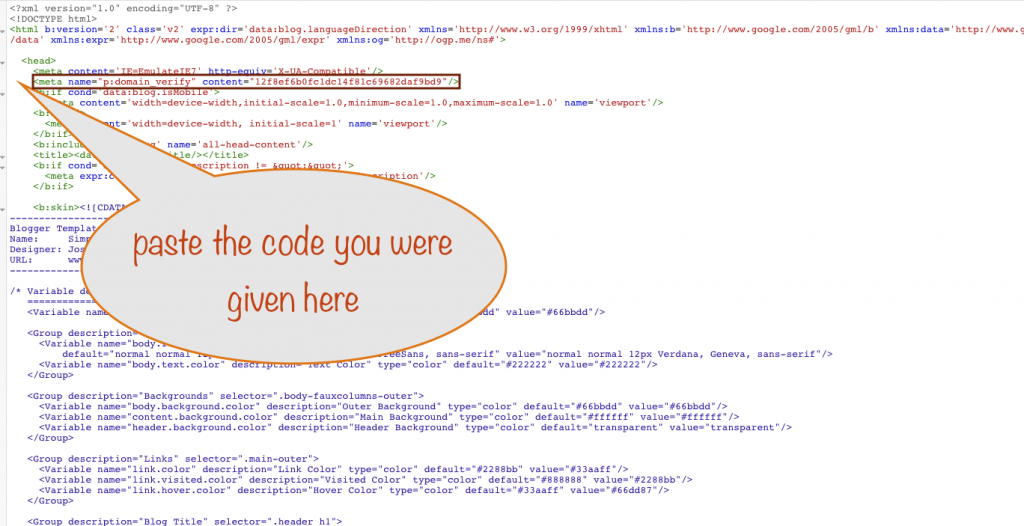

Click the icon to save your changes and you’re ready to verify with Pinterest that you made the changes and so confirm the blog is yours.
Back to Pinterest to complete your claim
Go back to your Pinterest tab…
Remember this from earlier?
You can now click the continue button and you’ll see the following
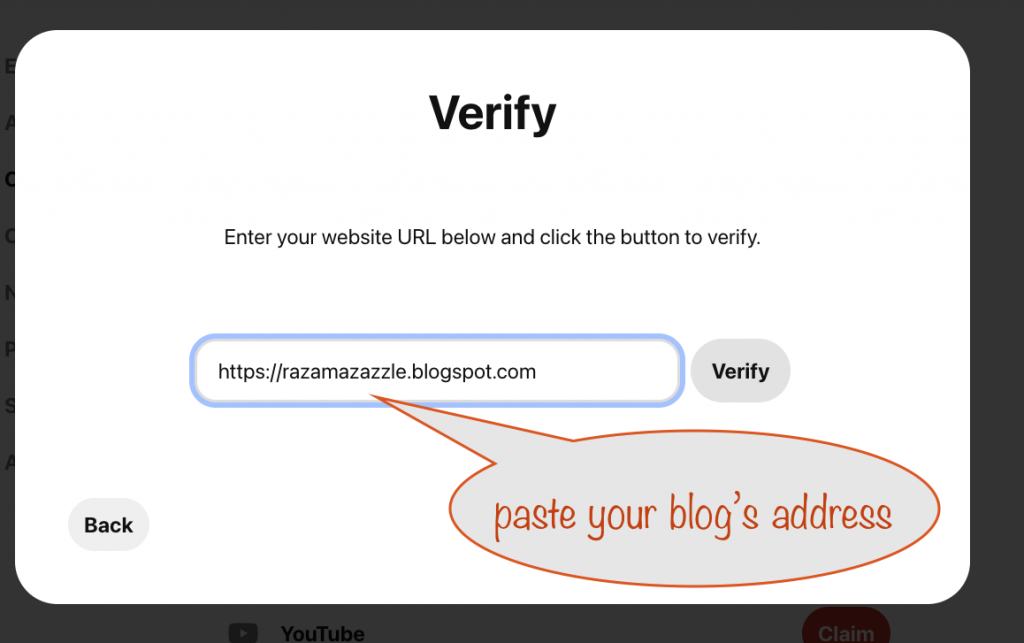
Verify…
Now paste in your blog’s address in the Verify dialog box
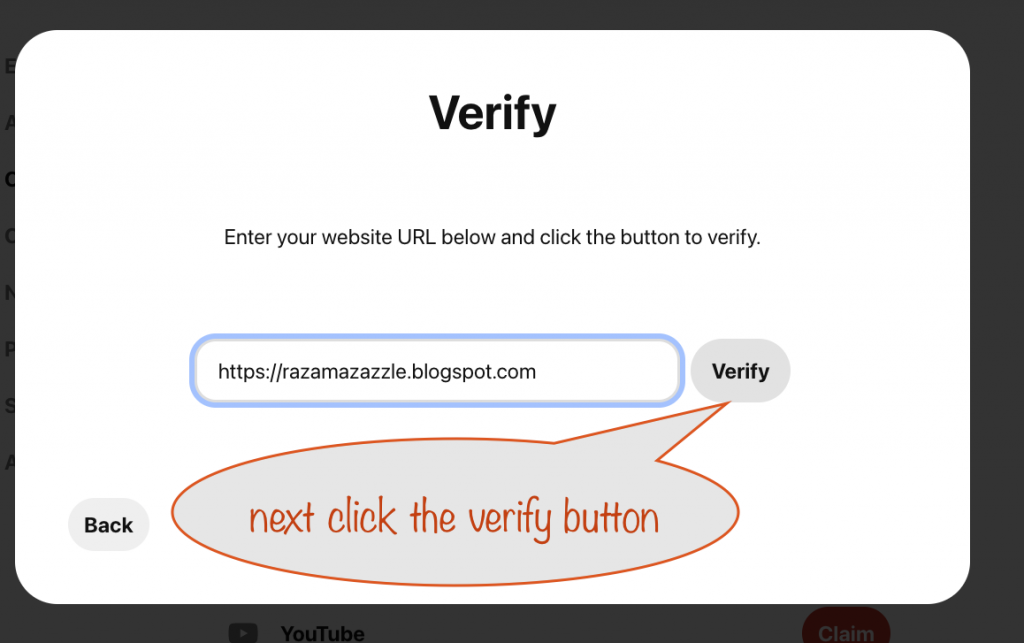
Next, click the “Verify” button so Pinterest can make sure the code has been pasted into your blog and so confirm you are the owner.
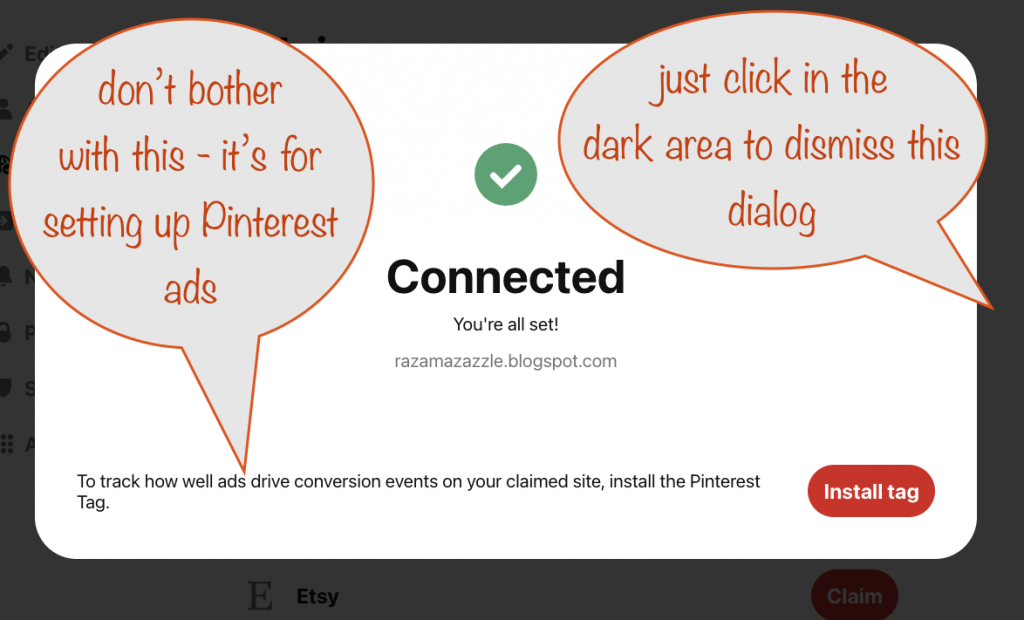
If all went well, you’ll see confirmation you’ve claimed your blog successfully and it’s connected to your Pinterest account.
Tell Pinterest your blog’s RSS Feed url
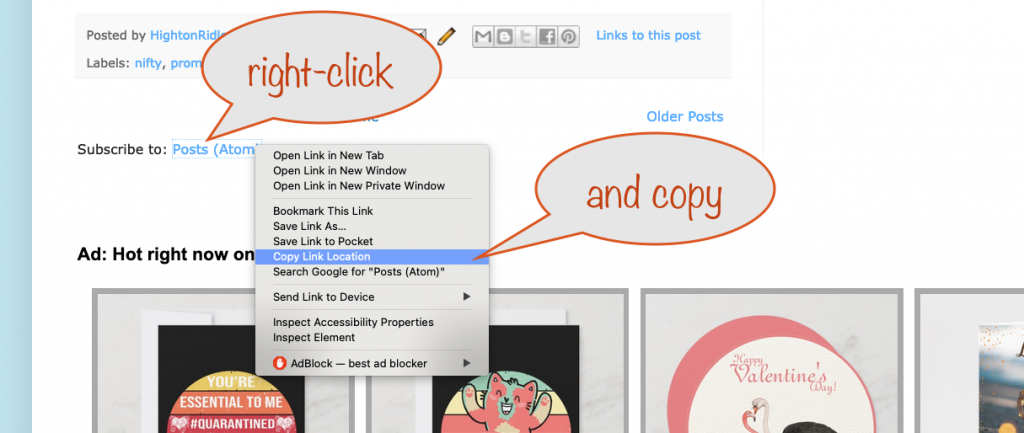
You’ll find where to do this in the “Create Pins in bulk” section on Pinterest. First, though, get your blog’s RSS Feed url ready for pasting. Scroll to the bottom of your blog where you should see a “Subscribe to: Posts (Atom)” link.
If you don’t have that “Subscribe to:” link, then the pattern to use is as follows. For the blog https://razamazazzle.blogspot.com the feed url to use is:
https://razamazazzle.blogspot.com/feeds/posts/defaultSo all you have to do is substitute your blog’s name in place of razamazazzle. Don’t forget to add ?alt=rss to the end as described below.

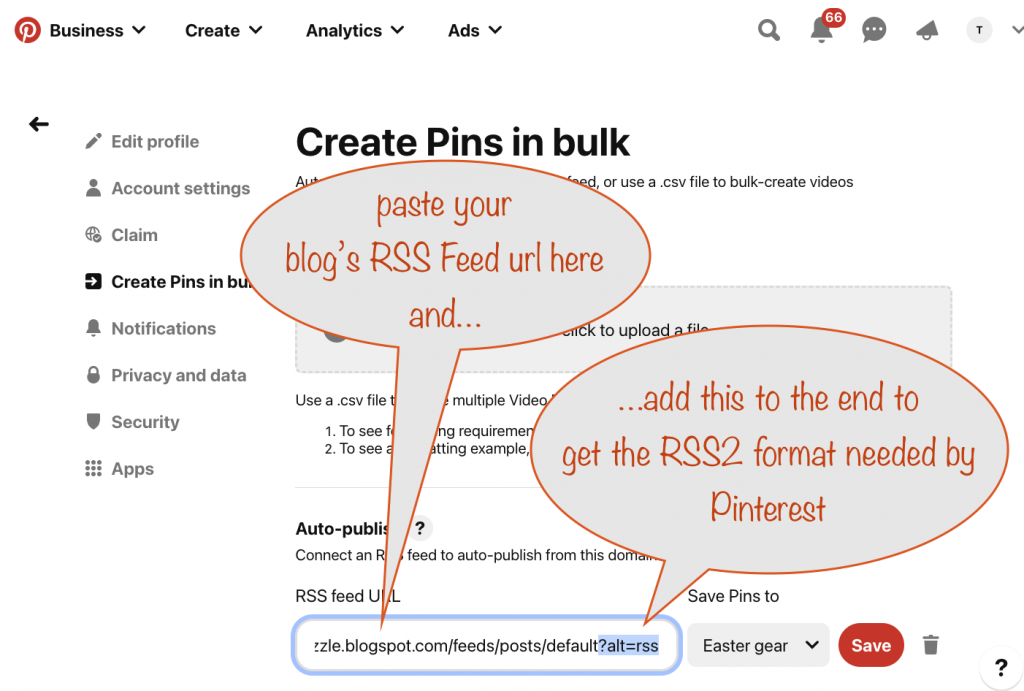
To add your blog’s RSS Feed url, first click the link “Create Pins in bulk”
Paste your blog’s RSS Feed url in the provided box and add ?alt=rss to the end.
What that does is tell Blogger to use the RSS2 format, the one that Pinterest needs.
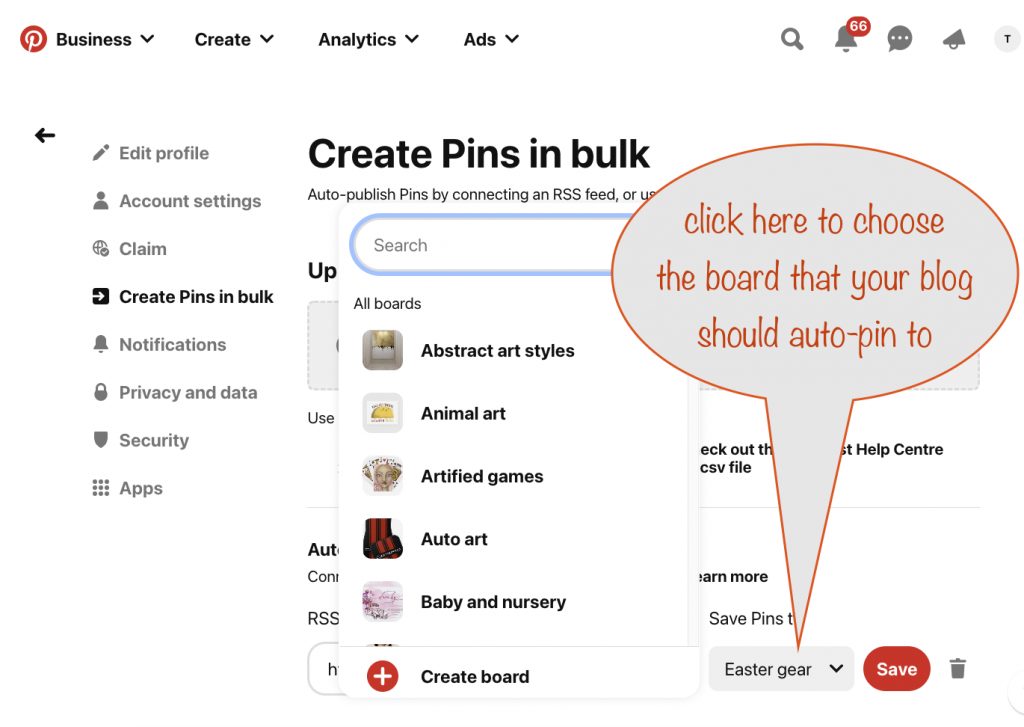
Finish off by telling Pinterest which board your blog should pin to automatically.
Here’s a video showing it all. It can be a bit tricky to tell Pinterest the board to use so pay special attention at 1.22 onwards.
That’s it.
Your first bunch of posts from your blog should now appear in the board you chose. Pinterest does say it may take up to 24 hours but mine were there straight away.
After that first time, Pinterest will only check every 24 hours or so. So you’ll have to be patient for posts to appear after the first lot were pinned.
More on your blogger RSS Feed url
You can limit what gets returned by your feed by adding &q=searchterm to the end.
Why is it &q ? It’s because you already have a ? on the end of your feed url (?alt=rss) and you never have more than one ? (and the ? has to come before you use a &)
Why would you want to?
It’s so you can pin relevant things to relevant boards.
You see, Pinterest lets you have more than one feed set up to auto pin from, and each can pin to a different board. So with this approach, you can control your auto pinning however you want.
Nice 😎
Examples
So let’s say you have 3 boards on Pinterest, one for St Valentine’s Day, one for Weddings and one for Fun for Kids.
For this to work, you need to make sure that each blog post has a word that uniquely determines what board it should go to.
So all posts you want to go to your Valentine’s Day board could use the word valentine somewhere in the post. For the Wedding board, you could use the word wedding in your blog posts and for your Fun for Kids board you might use the word kidsfun. You could use hashtags for this purpose, if you like.
When you’re setting up your Pinterest account to “suck” from your Blogger blog:
- the first one would use &q=valentine after ?alt=rss
- the second would use &q=wedding after ?alt=rss
- and the third would use &q=kidsfun after ?alt=rss
Pinterest doesn’t like you to have duplicate pins, so heed the following.
Be wary that your posts about Valentine’s Day don’t mention wedding or funforkids. The same goes for the other posts – no mention of valentine or funforkids on your Wedding posts and no mention of valentine or wedding on your posts about Fun for Kids.