Updated October 26th 2020
The auto-pinner tool (not to be confused with the nIFTTTy Scheduler) has been tested on Firefox, Chrome, Vivaldi and Opera on Macs. On Windows 10, people have reported it’s fine on Firefox, Edge Chromium and Opera.

What does this tool do?
It auto pins up to 20 pins of Zazzle products per feed (up to 6 of them) onto each of up to 6 Pinterest boards of your choosing. Each pin’s link includes your referral (aka associate) id and a tracking code, with date pinned appended. Without a Nifty Subscription, the normal 50/50 referral sharing applies.
You set up each feed with a “pull” in the Nifty Promo Control Panel. To help with this, once you’ve set things up in the auto-pinner, there’s a template option that allows you to save those settings to use the next time.
Even better, you can choose to have image frames added to your pins with an option to set how often, from never to every 6 pins.
The Nifty 10-120 Auto-Pinner, available to those people paying a Nifty Subscription (opens in a new tab/window), gives you up to 10 feeds and boards, with each feed sized at 120 products.
How does it work?
It uses an open source browser extension / add-on called UI.Vision RPA to replicate the keystrokes and mouse clicks you’d normally do by hand to pin lots to Pinterest.
Preparation:
- Start your browser normally (ie not in Private Browsing mode)
- Install this plugin: UI.Vision RPA (opens in a new tab/window and links to Firefox and Chrome versions)
- Close your browser completely
- To do this on a Mac, right-click it in the Mac Dock and choose quit.
- In Windows 10, File -> Exit and give it a minute to do it’s tidy up)
- If you still see your browser icon in the system tray after this, click it and select exit. Again, give it a minute to tidy up.
- Restart your browser and you should now see the UI.Vision icon at top right:
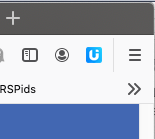
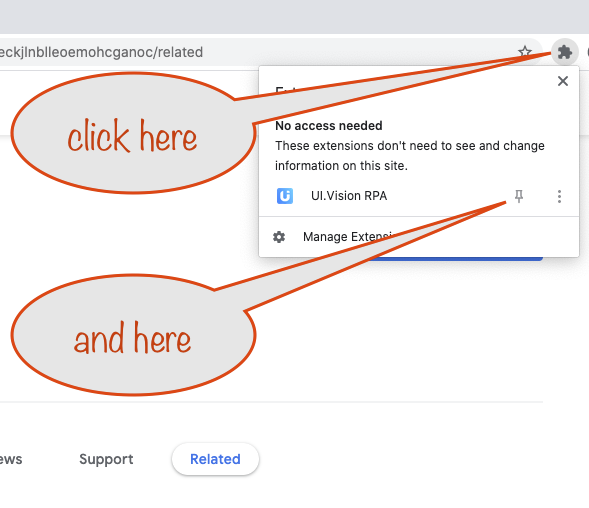
In Chrome, you’ll need to use the Extensions icon to pin the UI Vision RPA icon so it’s visible:
To check it’s installed correctly and to initialize it for your browser, click the UI.Vision icon. A new window should open showing all the macro bits and bobs. You can close it again for now.
If you’re using Firefox and are having trouble getting the auto-pinner to run, you might need to check / change a couple of configuration settings (opens in a new tab/window). One Windows 10 user had issues until these were done.
In any browser you might need to change the setting to allow pop-ups for the niftytoolz website. A quick search on Google will show you how. For Firefox, it’s shown at the link above.
That completes the preparation. You’re now ready to auto pin your first products!
Automated pinning
Start from the Nifty Promo Control Panel and set up a “pull” to match the Pinterest board you intend the pins to go on.
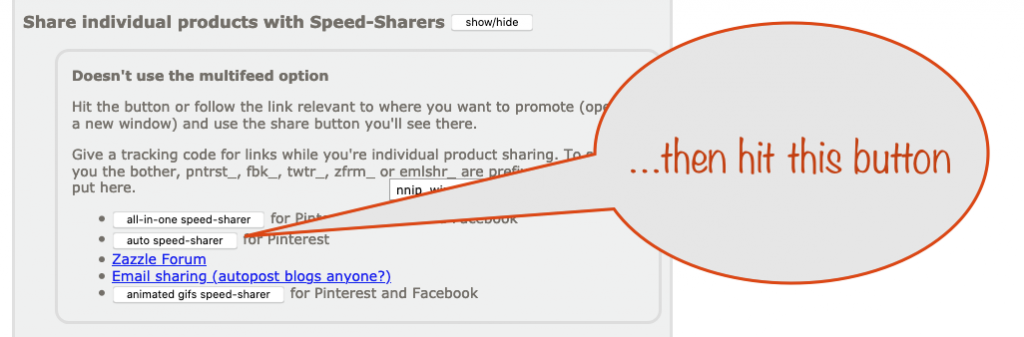
In Step 2, open up the Share Individual Products with Speed-Sharers and hit the auto speed-sharer button. Don’t forget to set up an appropriate tracking code first. Note that the tool will automatically add pntrst_ to the front of whatever tracking code you set and will add the date pinned to the end.
Here’s a short video showing the whole process for 3 pins:
While it’s running and doing its automated pinning, don’t interact with your browser in any way or you’ll prevent the auto-pinning from working.
Tips
- Start off with just one board and feed until you’re confident in using it. While it’s doing its stuff, go and make a coffee or do something useful. Pinning 20 should take around 30 minutes.
- Once you’ve got the hang of it, set up all 6 boards/feeds .
- If you need to do things on the internet while it’s pinning away, use a different browser. As long as you don’t do anything too intensive with the internet, it won’t interfere with the pinning.
- A better way is to create a new login on your PC or Mac and reserve it for running your auto-pinners. With fast user switching you can get back to your main login and carry on unhindered while the auto-pinner login does its stuff.
- Use templates to make it easy and save even more time! Doing that makes it easy to focus on one set of boards one day and a different set the next.
- If you’re more organized than us, you could keep a spreadsheet of your pulls and the page numbers pulled from so you saty on top of things.
- Every so often, completely shut down your browsers if you’ve been auto-pinning with them. Why? Browsers aren’t designed for 24/7/365 use and over time they leak memory (amongst other things):
- To do this on a Mac, right-click it in the Mac Dock and choose quit.
- In Windows 10, File -> Exit and give it a minute to do it’s tidy up)
- If you still see your browser icon in the system tray after this, click it and select exit. Again, give it a minute to tidy up and then you’re ready to start your browser.
- For belt-and-braces, refresh your browser after going to the auto-pinner page.
Beware this Gotcha: You can’t use boards that have categories!
Recommendation
When you’re not using this tool, we recommend using the Add-ons Manager (available in the hamburger menu) to disable UI.Vision RPA as we’ve found it slows down interaction on Facebook with photos, gifs and videos:

More on templates
Once you’ve set up your six (or fewer) pulls and the boards they’re to be pinned to, you can download them as a template file for you to use next time.
Using a template file makes it easy for you to advance to the next page in each pull when you’re ready for your next session.
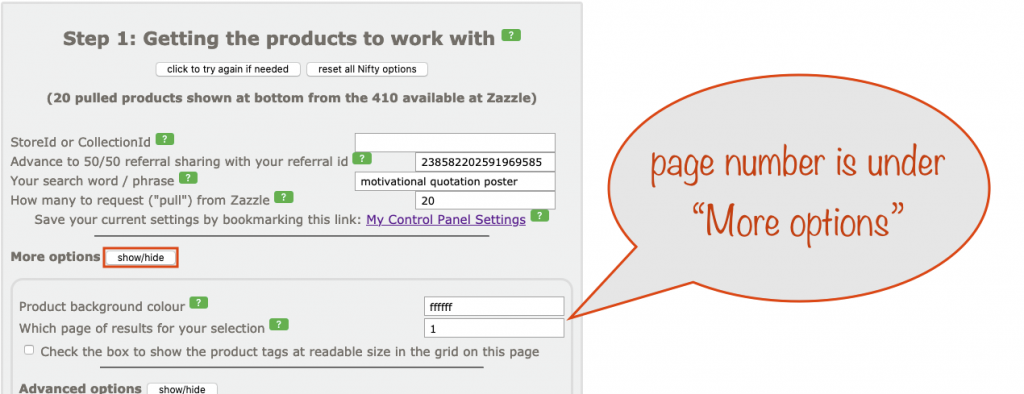
You probably know already that when you use the Nifty Promo Control Panel to set up a pull, you can set the page number to pull from. It’s that page number that the template file facility makes easy to change without needing to go back the control panel.
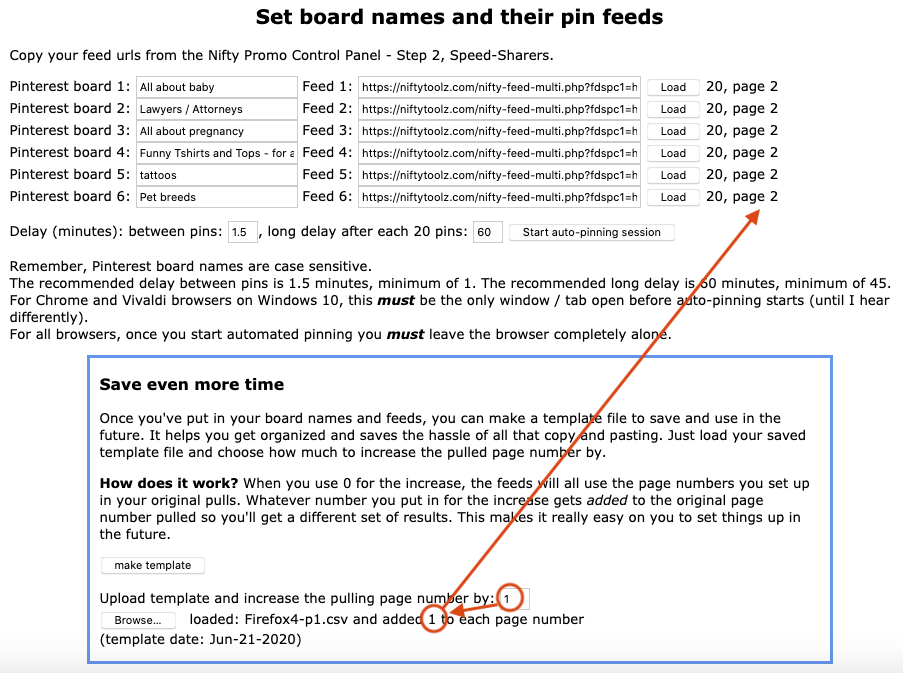
Here’s a screenshot of the relevant part of the control panel
When you upload a previously downloaded template file, you have the opportunity to increase the page number recorded in each feed by adding a number to it as shown in the screenshot below.
At 20 per page and with Zazzle allowing us to reach around a 1000 products in any feed, you can get up to 50 pages – if there’s that many products meeting the criteria of your pull.
Our recommendation is to have a bunch of template files that you cycle round, with each having variations of product themes to match with the boards they use.
If you’ve gone as far as to have a different Pinterest account set for each of the four supported browsers (Firefox, Chrome, Vivaldi and Opera) then you’d have a bunch of template files for each.
After running the Autopinner for a while, you’ll need to delete the recovery files it makes behind the scenes. If you don’t, your browser will eventually run out of local memory / storage and you won’t be able to autopin any more.
To delete the recovery files, click the CSV tab you’ll find in the UI Vision RPA window in the section at the bottom.
You’ll either see a list of recovery files or a “Load now” button for you to click.
When you see the list of files, next to each is a delete button. Unfortunately you have to delete them one at a time.
We’d recommend getting rid of any dated last month or earlier.