Feb 2024: Now at V2!
Learn how to use this brilliant tool to take the strain out of pinning collections from your own store or from across Zazzle. Get on with your life while Nifty automates the pinning for you.
Watch this short 6 minute video showing it in action:
The pins use the portrait image that Zazzle makes available when sharing a collection, so you always get great looking pins. The pin title comes from the collection title and the same for the description.
Here’s a screenshot of a pin made with the auto pinner. It’s linked to the pin so you can see it for yourself (opens in a new tab / window)
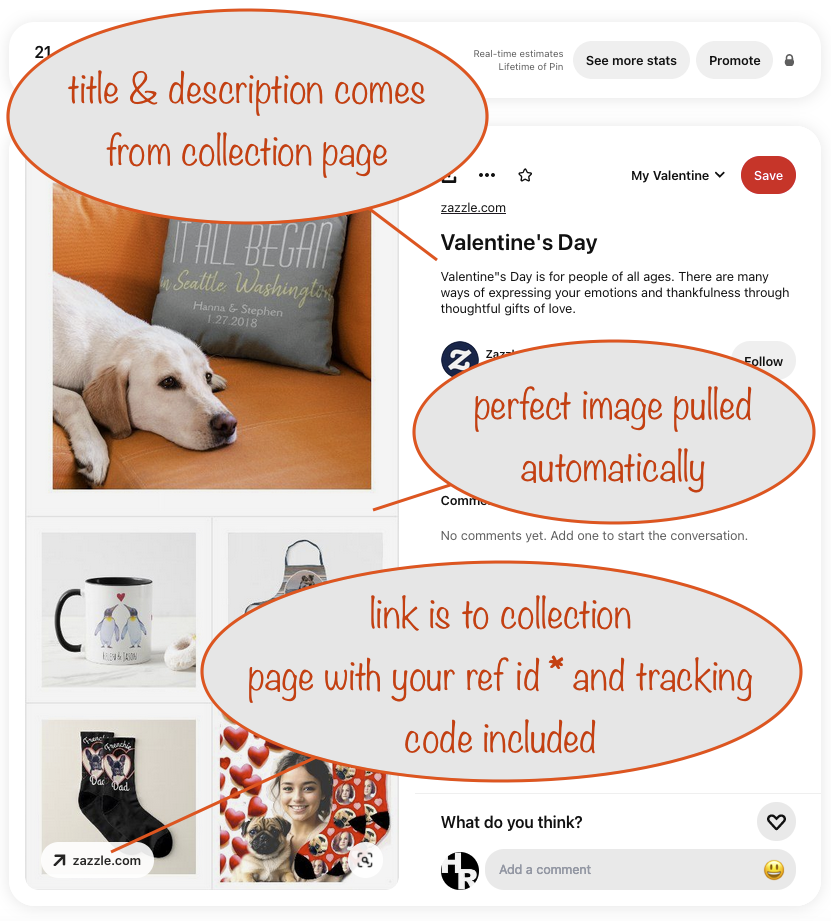
(*If you don’t pay a Nifty subscription, a 50/50 computer coin toss
will choose either your referral id for the link or mine)
What you need
- The NiftyCAP bookmarklet – it creates a file of your chosen collections from your own store or across Zazzle
- A Pinterest business account
- The link to the auto pinner
- a browser plugin called UI Vision RPA, and one of*
- a separate user account on your computer, or
- a spare computer
*The reason for this is down to the way the auto pinner works. It uses the UI Vision RPA plugin and a specially crafted macro to emulate you pressing keys and clicking the mouse in the right places and at the right times.
If you you don’t take the steps above, using your computer normally will interfere with and mess up the operation of the macro.
If you’ve used one of the other Nifty Auto Pinners then most of the above won’t be a surprise and all you’ll need is the bookmarklet.
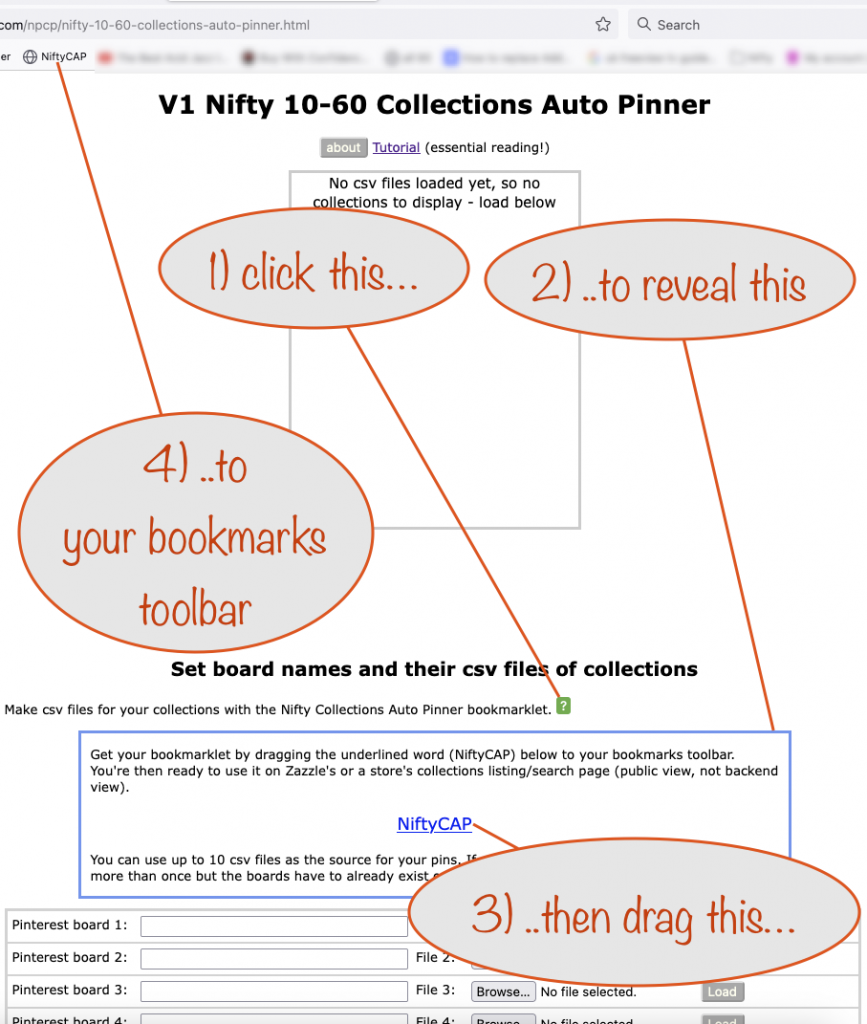
Getting the NiftyCAP bookmarklet
Follow this link: https://niftytoolz.com/npcp/nifty-10-60-collections-auto-pinner.html (opens in a new tab / window) and drag the underlined NiftyCAP link to your bookmarks toolbar
Getting and installing the UI Vision RPA plugin
Follow the instructions on the 6-20 Auto Pinner tutorial page (opens in a new tab / window) and come back here once you’ve done that.
Using the bookmarklet to get your first set of collections
The bookmarklet will only work on Zazzle’s Collections page or your own collections page (when viewed as your public storefront – ie not in your backend).
So visit Zazzle’s Collections page (opens in a new tab/window). Decide on the type of collections you want and put in a search term to get them. You’ll want to use a search that will pick out collections suitable for a Pinterest board you have in mind.
When you’re ready, click the NiftyCAP bookmarklet that’s now in your bookmarks toolbar.
When you do, you’ll be given some info and asked to provide a tracking code. Pick one that makes sense to you and includes something that tells you the type of collection used.
Note that you have to be logged in for your referral id to be picked up automatically ready for use in links (always, if you pay a Nifty subscription, or half the time on average, if you don’t).
Any questions or suggestions for improvement, drop them off in the comments here or get over to the Nifty Facebook group and post there.
Version 2 Benefits
The main additions in V2 are:
- the ability to prevent really, really spammy collections from being pinned
- lets you prevent making duplicate collection pins
- identifies possible poor quality collections in the data files you’ve uploaded and lets you remove them this time and in the future
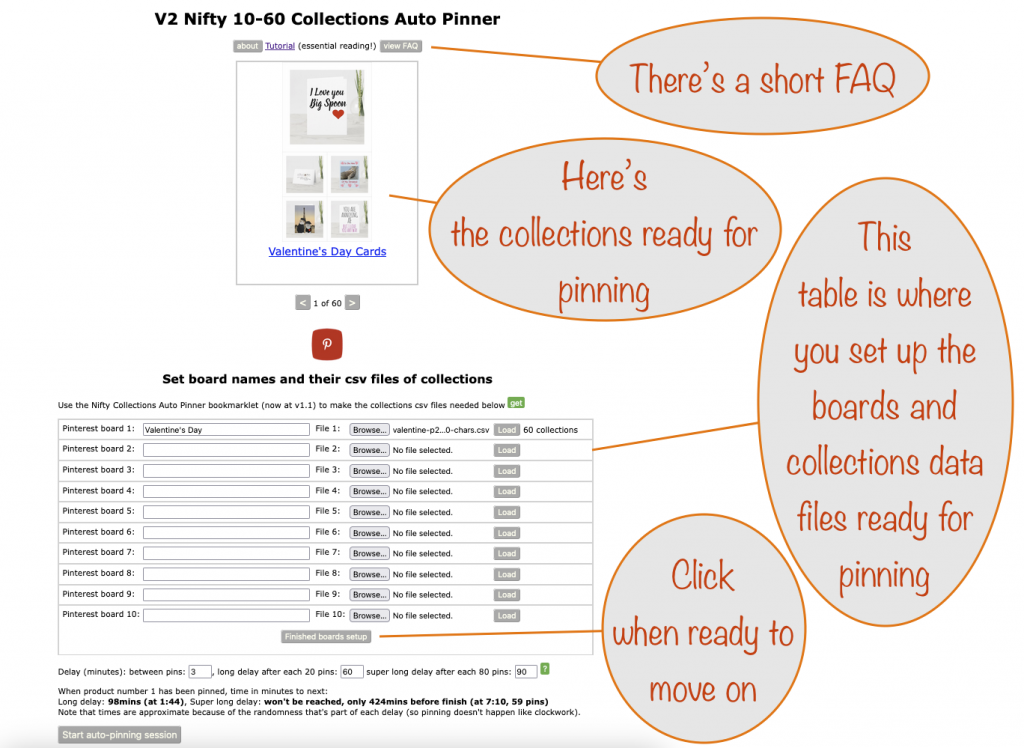
- a short FAQ
When you’ve finished setting up the boards and files, the system exclusion list is automaticaly applied to get rid of any spammy collections in your uploaded data files
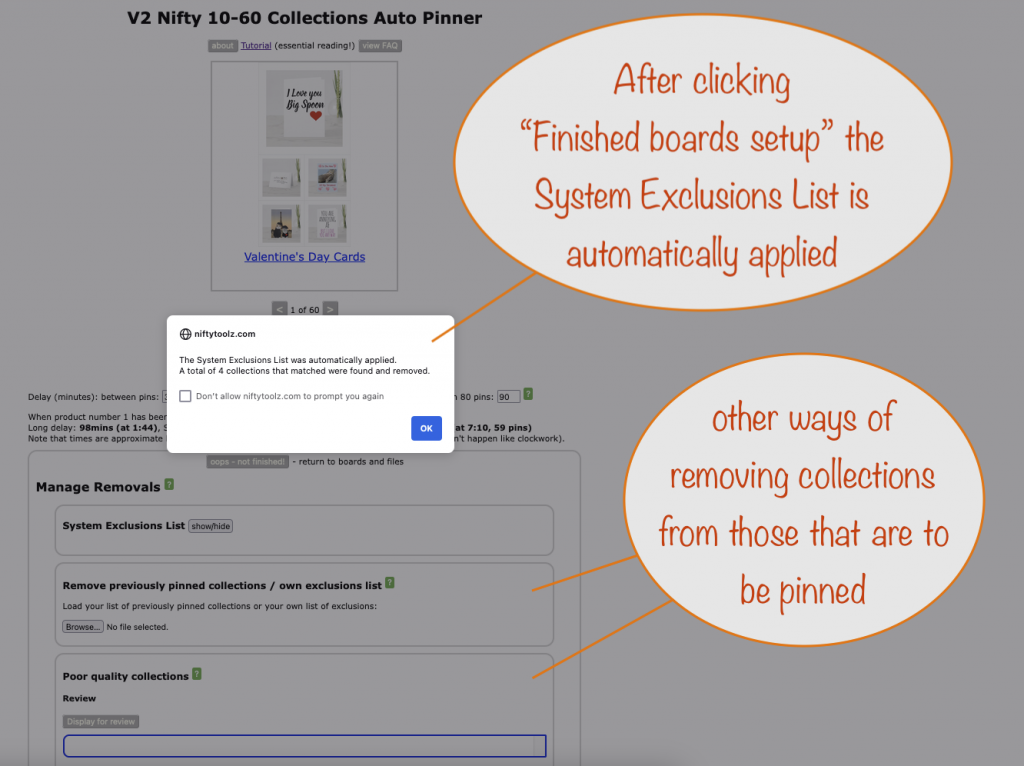
There are other ways of removing collections from your uploaded data files:
- lists of collections you’ve previously pinned
- your own exclusion list
- automatically identified collections that could be poor quality that remain in your uploaded data files – you decide if they should be removed or not. For those you do remove, you get a list of their collection ids so you can add them to your own exclusion list, if that’s what you want.

Enjoy!