Dec 2023: Forget it – Facebook is now saying:
“Starting from April 24, 2024, only shops with checkout on Facebook and Instagram will be supported. To build a seamless shopping experience for people that helps businesses of all sizes grow, starting from April 24, 2024, we will only continue supporting Facebook and Instagram Shops with checkout enabled”
This is a no-brainer for Zazzlers and / or Affiliates and is about as automated as it gets. The Shop is on Facebook but customers are taken to Zazzle to personalize and buy when they click the link on a product’s details page.
Here’s a link to the Highton Bridal Shop created in this tutorial (opens in a new tab / window) so you can see it for yourself.
If you want to find out about setting up a Facebook Shop for other purposes this tutorial will work for you as well. Just do something different when it comes to the section on your data sources.
What you need
- A personal profile on Facebook
- A Zazzle account
- A Nifty membership (optional – without one it’s a 50/50 referral split which is the normal Nifty arrangement, like a try before you [possibly never] buy)
The Zazzle Promoter Program is supported with a Nifty PP membership and you get ‘clean’ links for your products with it, giving you 35% referral in addition to any royalties.
Starting with a new business page
If you want to start off with a completely new brand for your Facebook Shop, you’ll need a new Facebook Page for it – and it must be a business page. I’d strongly recommend this approach – you can later apply what you’ve learned to your existing Facebook Page / brand if that’s what you want.
I’ve had some feedback where people tried this on their existing page right away and have come to grief.
It seems to happen when they try to apply the steps here and their existing page doesn’t quite match the screenshots I’ve included. So they try a few things and in the trying, they get errors.
So, please, for a trouble free set-up, do start with a new Facebook Page!
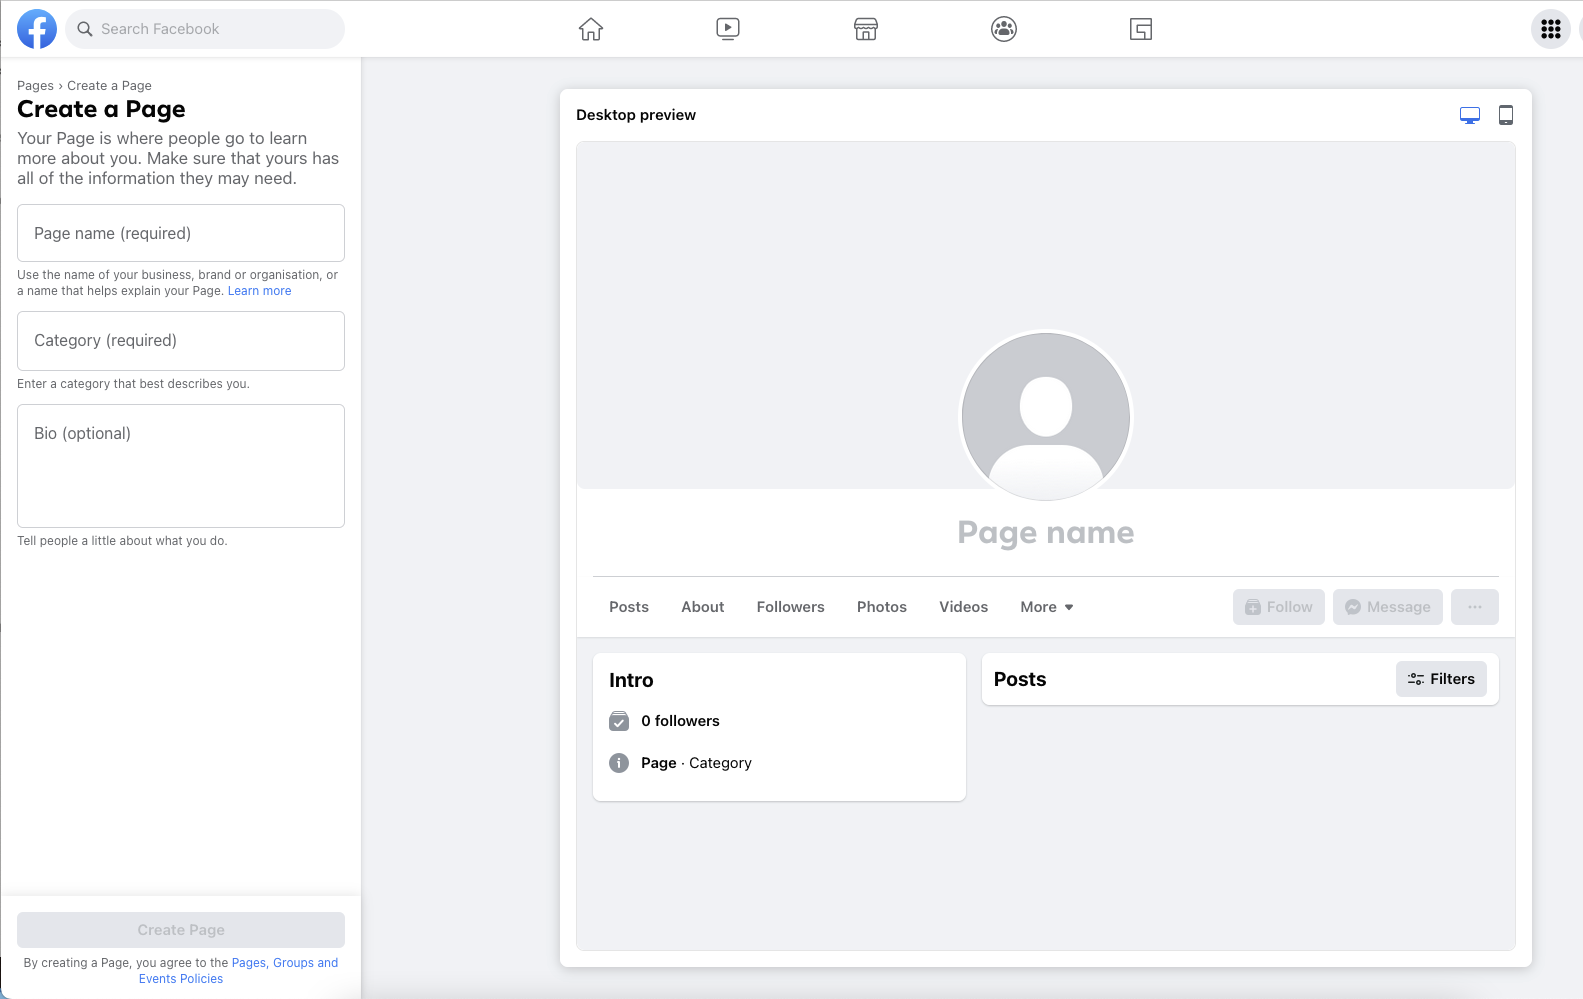
Here’s the link to use to set up your new page: https://www.facebook.com/pages/creation/?ref_type=facebook_business_website (opens in a new tab / window)
Here’s what it looks like when you first go there:
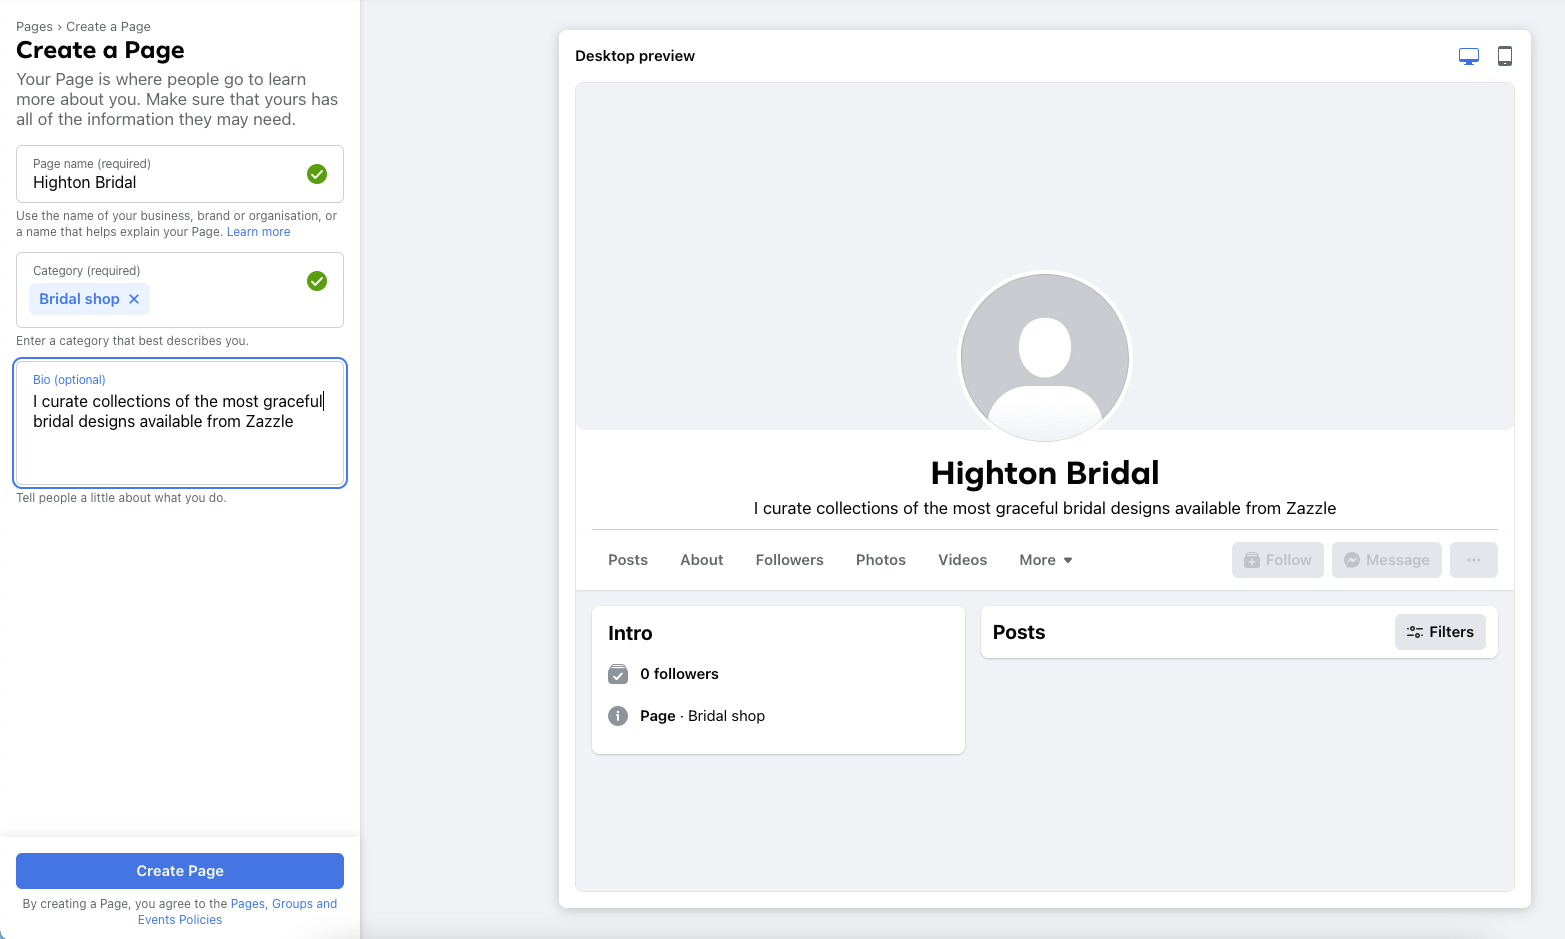
…and here it is with the basic info filled in:
…and here it is after clicking the create page button
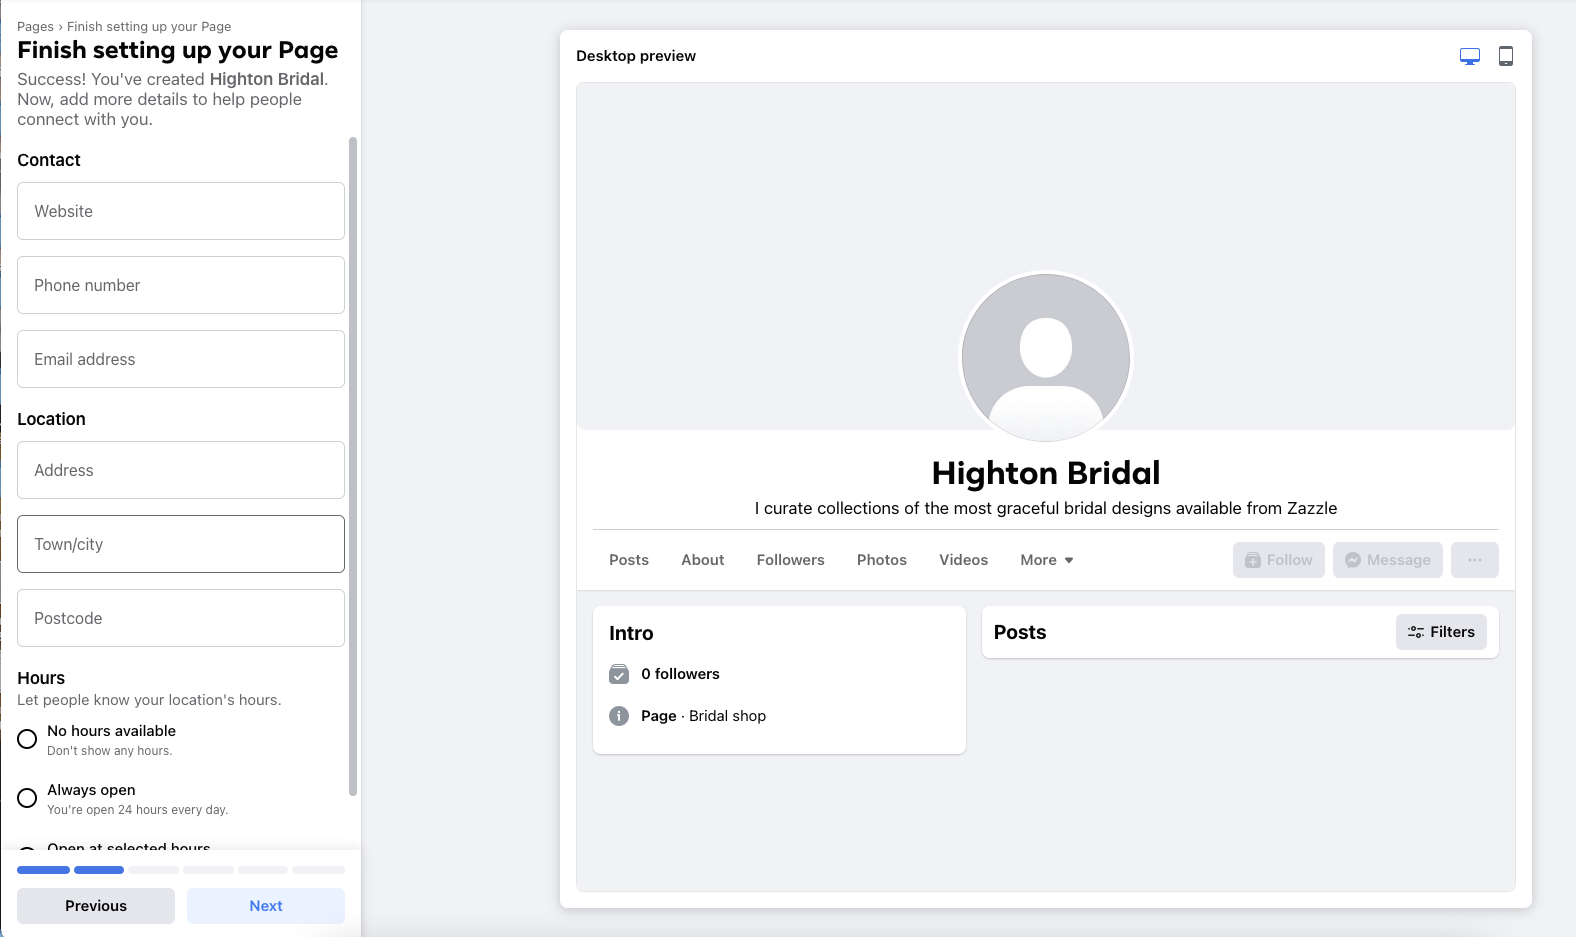
After completing the rest of the steps, here’s the success dialog:
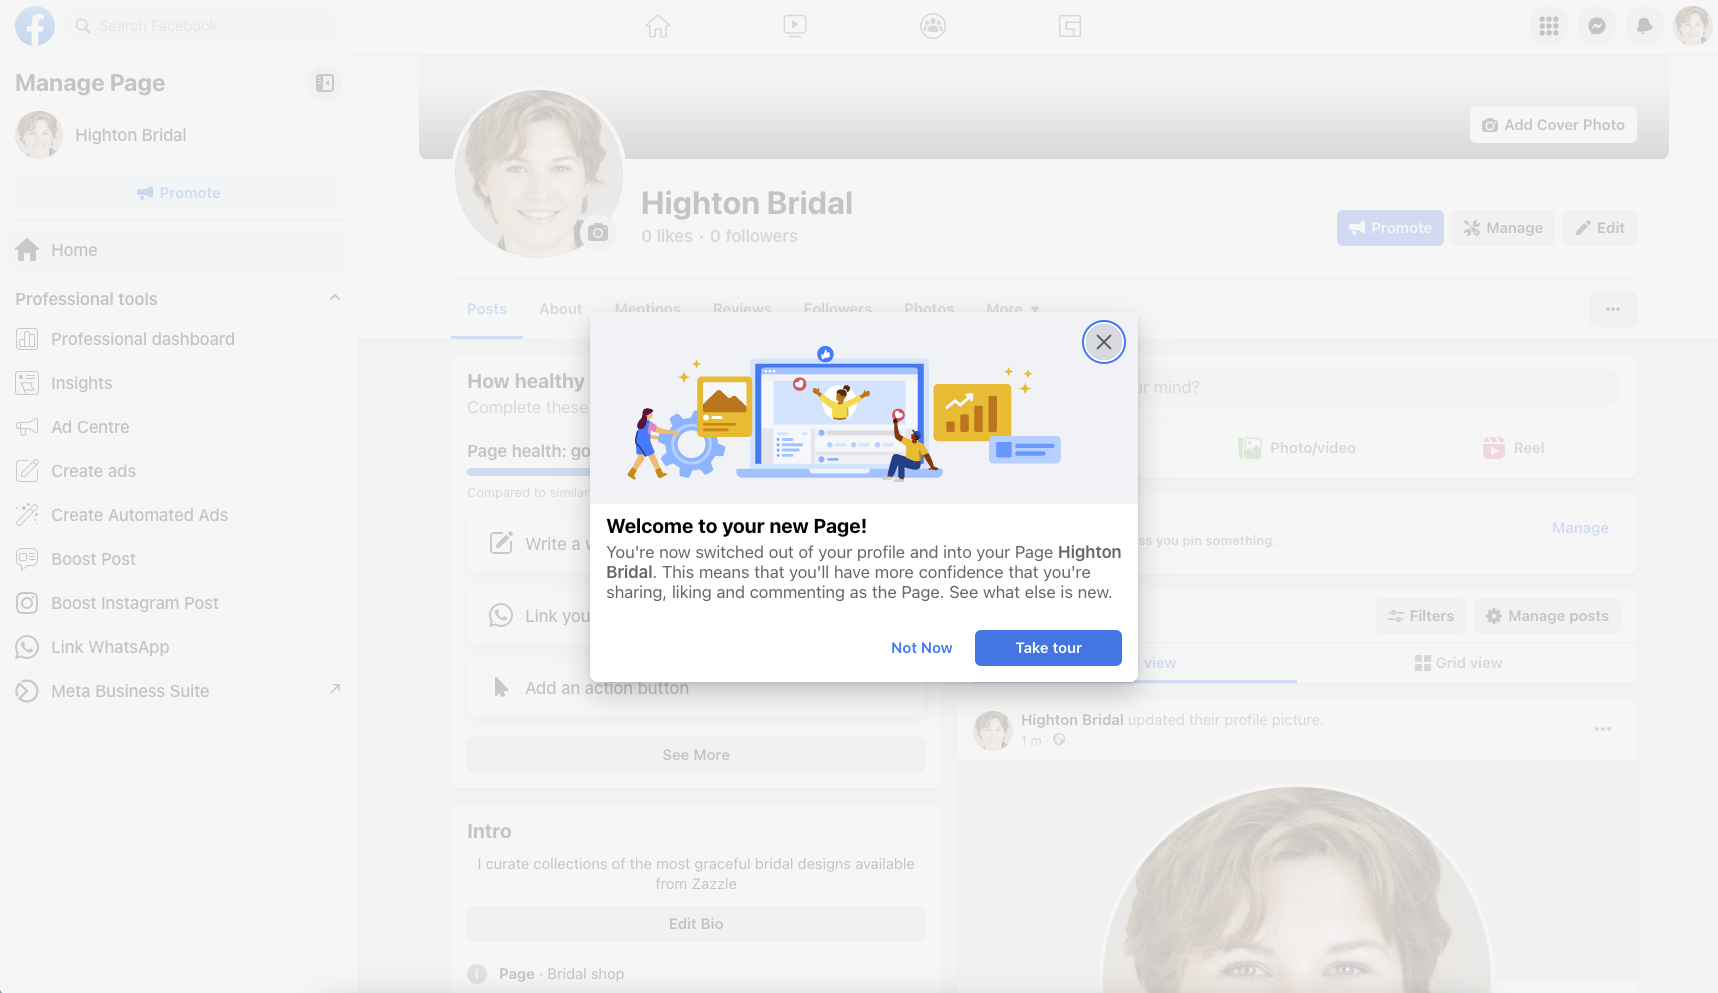
Ok, that’s finished setting up the basics of your new Facebook Business Page and the next step is to create your Shop for it.
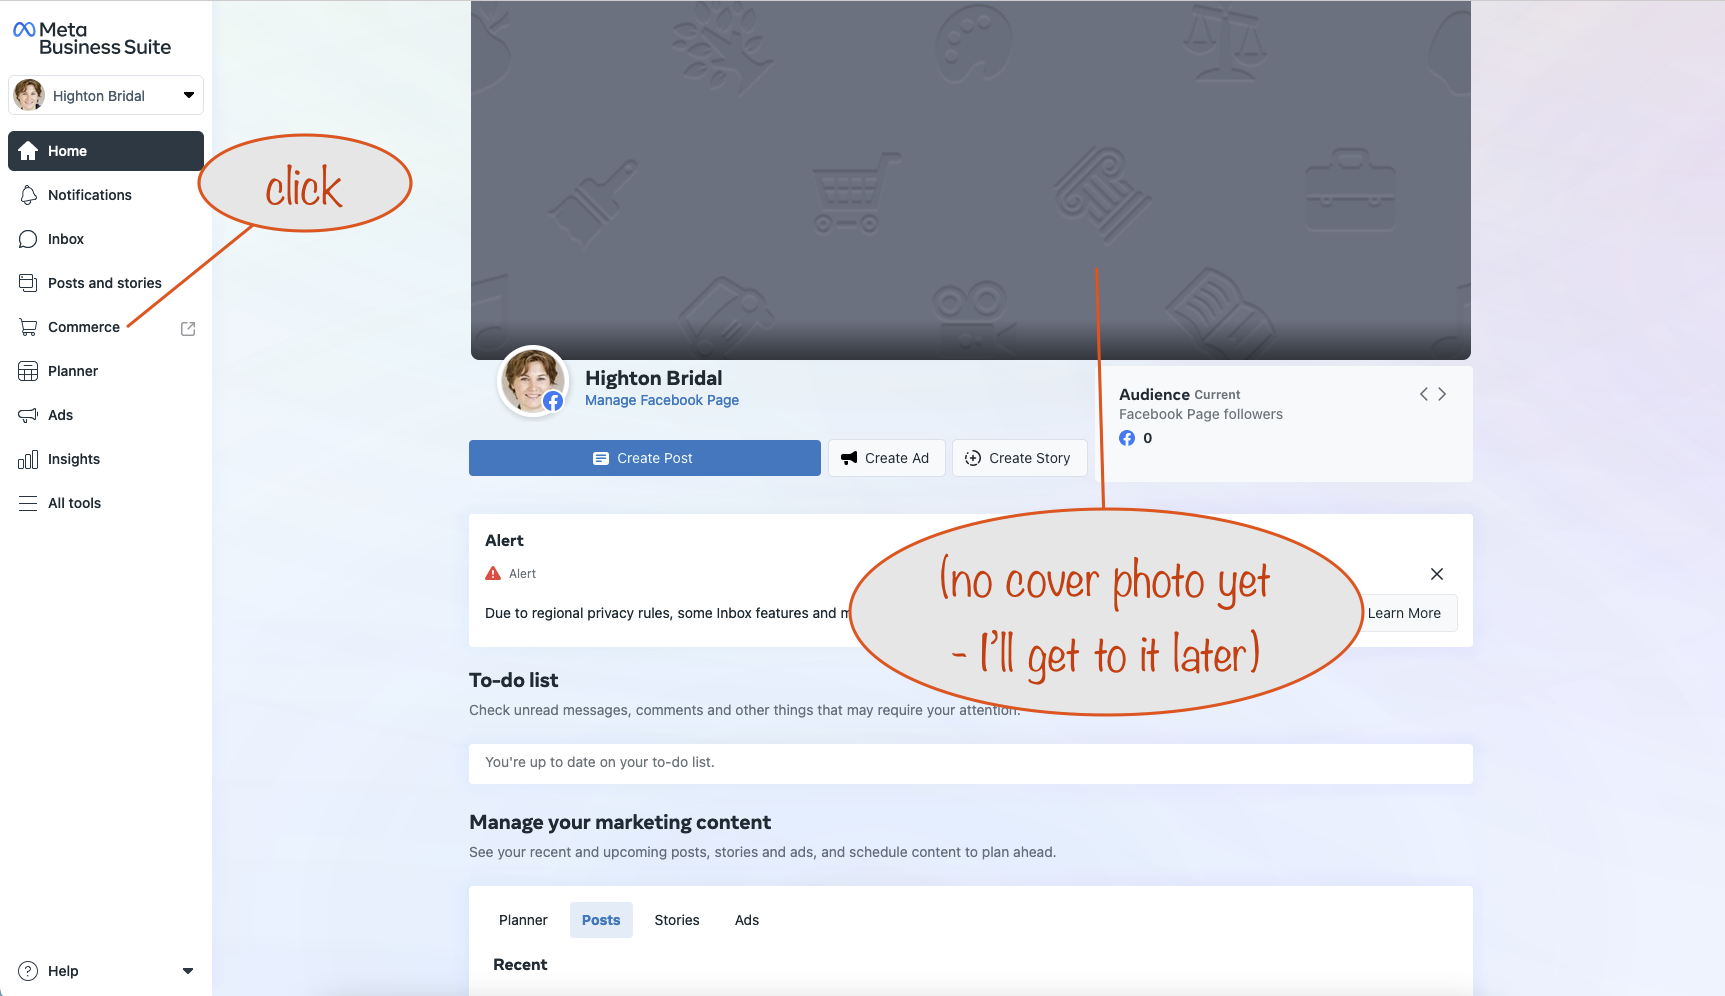
Setting up the business page’s Facebook Shop
With the new business page created, it’s time to set up shop. First, though, you have to get to the right place:

Steps
- Make sure you have a Business account – you need one to be able to continue setting up shop.
I’ve already got one so can’t show you screenshots of the steps in setting one up. Instead, find out how here: https://www.facebook.com/business/learn/how-business-manager-works/guide - You’ll also need a Commerce account – you’ll make one below
When you have a Business account, this is what the page to add a Commerce account will look like:
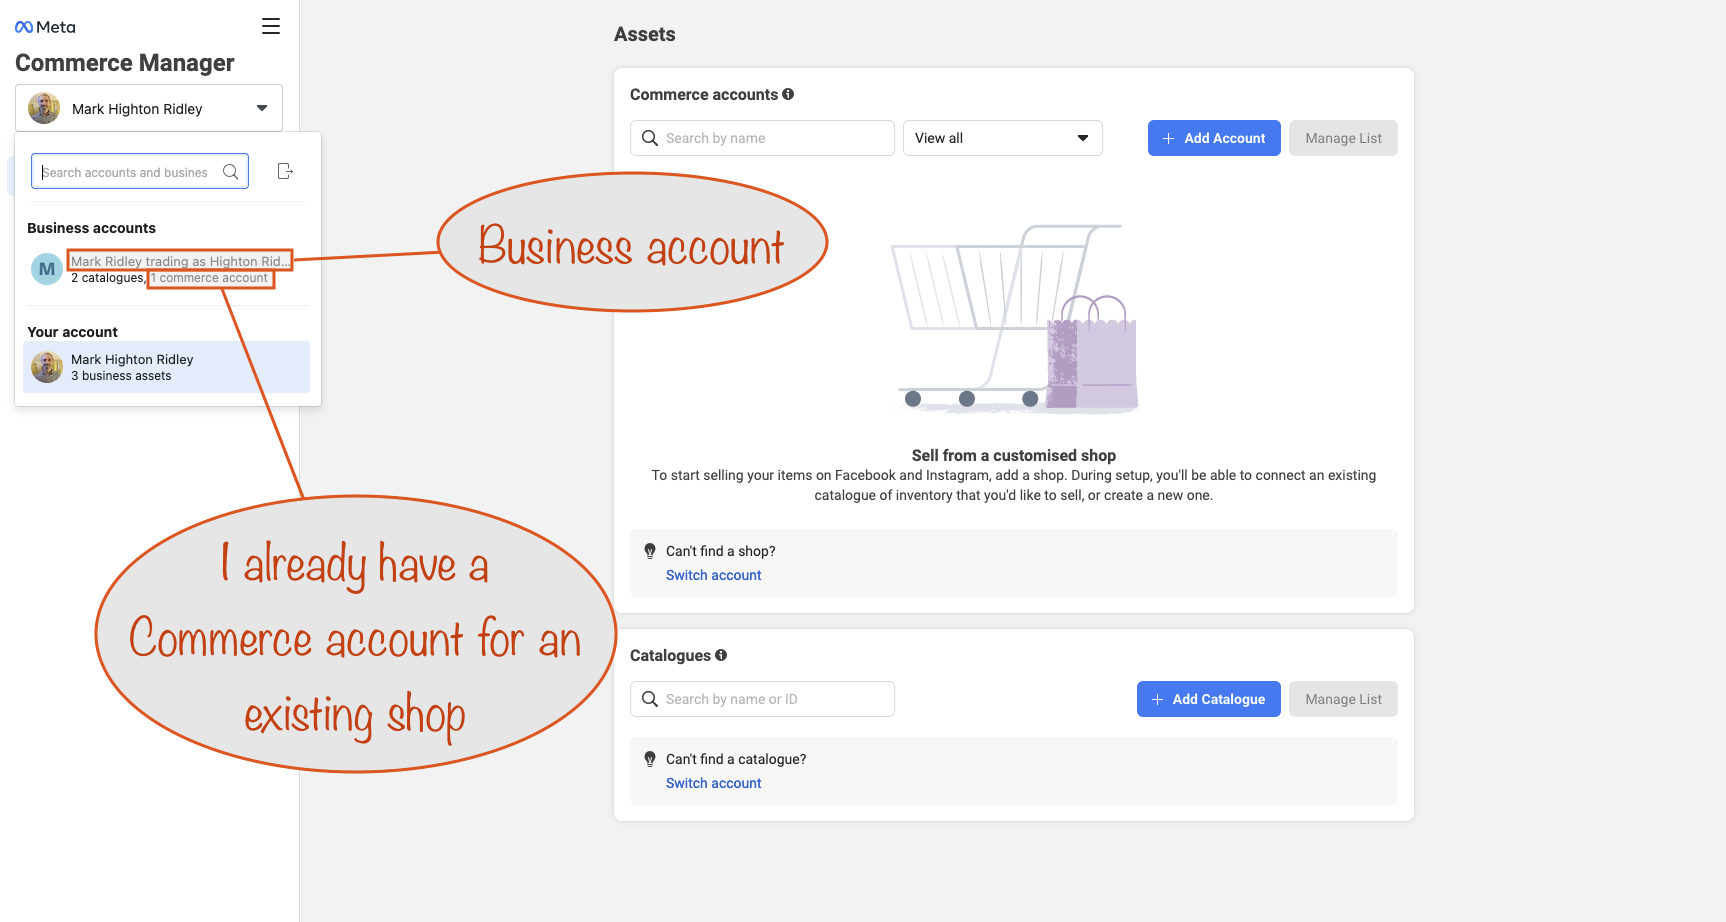
Assuming you’ve got your Business account and have claimed the new Facebook Page with it, you’re ready to add a Commerce account:
Note that claiming the Page by connecting the chosen Business account takes control of the page away from your personal profile. Facebook will send you an email informing you about it but there’s nothing to worry about.
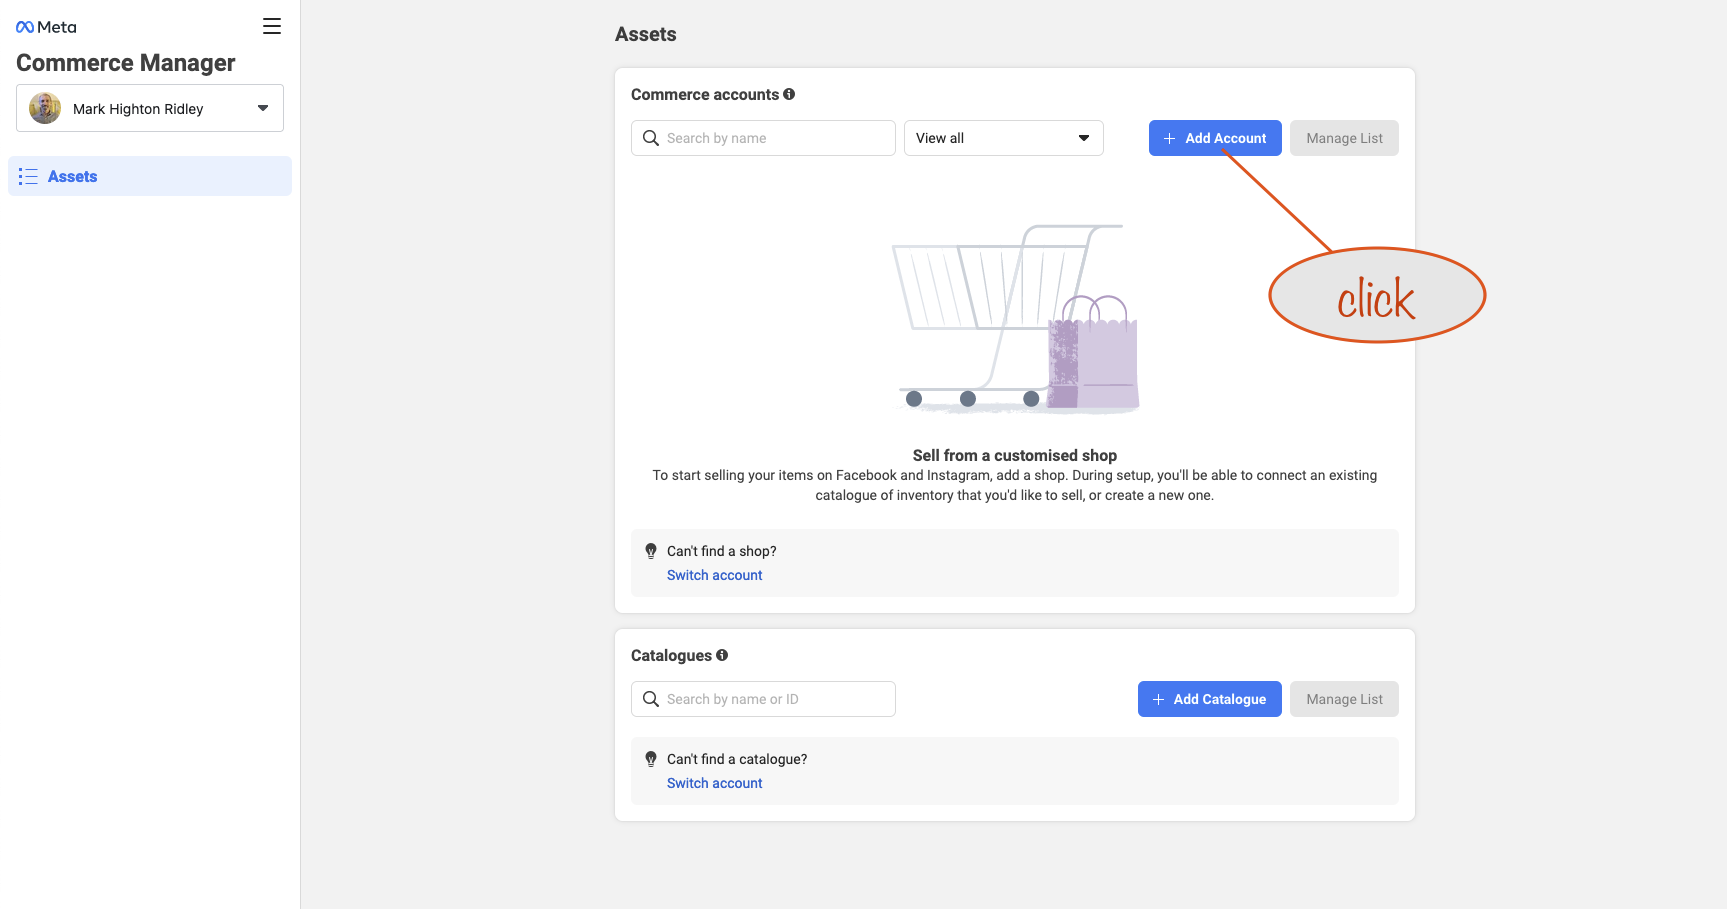
When you click to add a new Commerce account, a page opens to let you create your Facebook Shop.

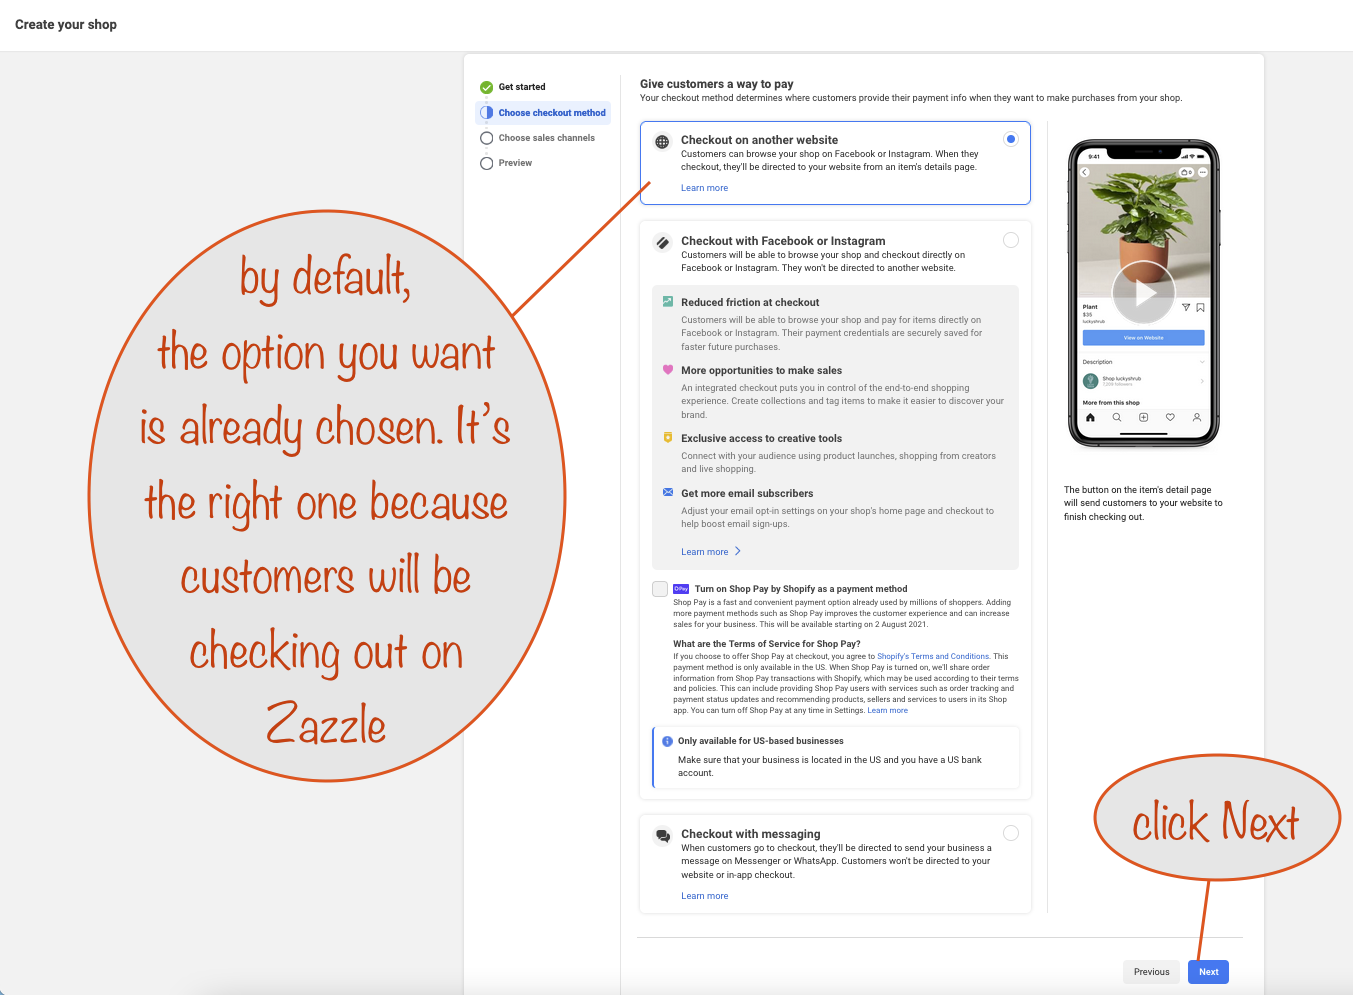
Click the Next button to see the screen where you choose the checkout option:
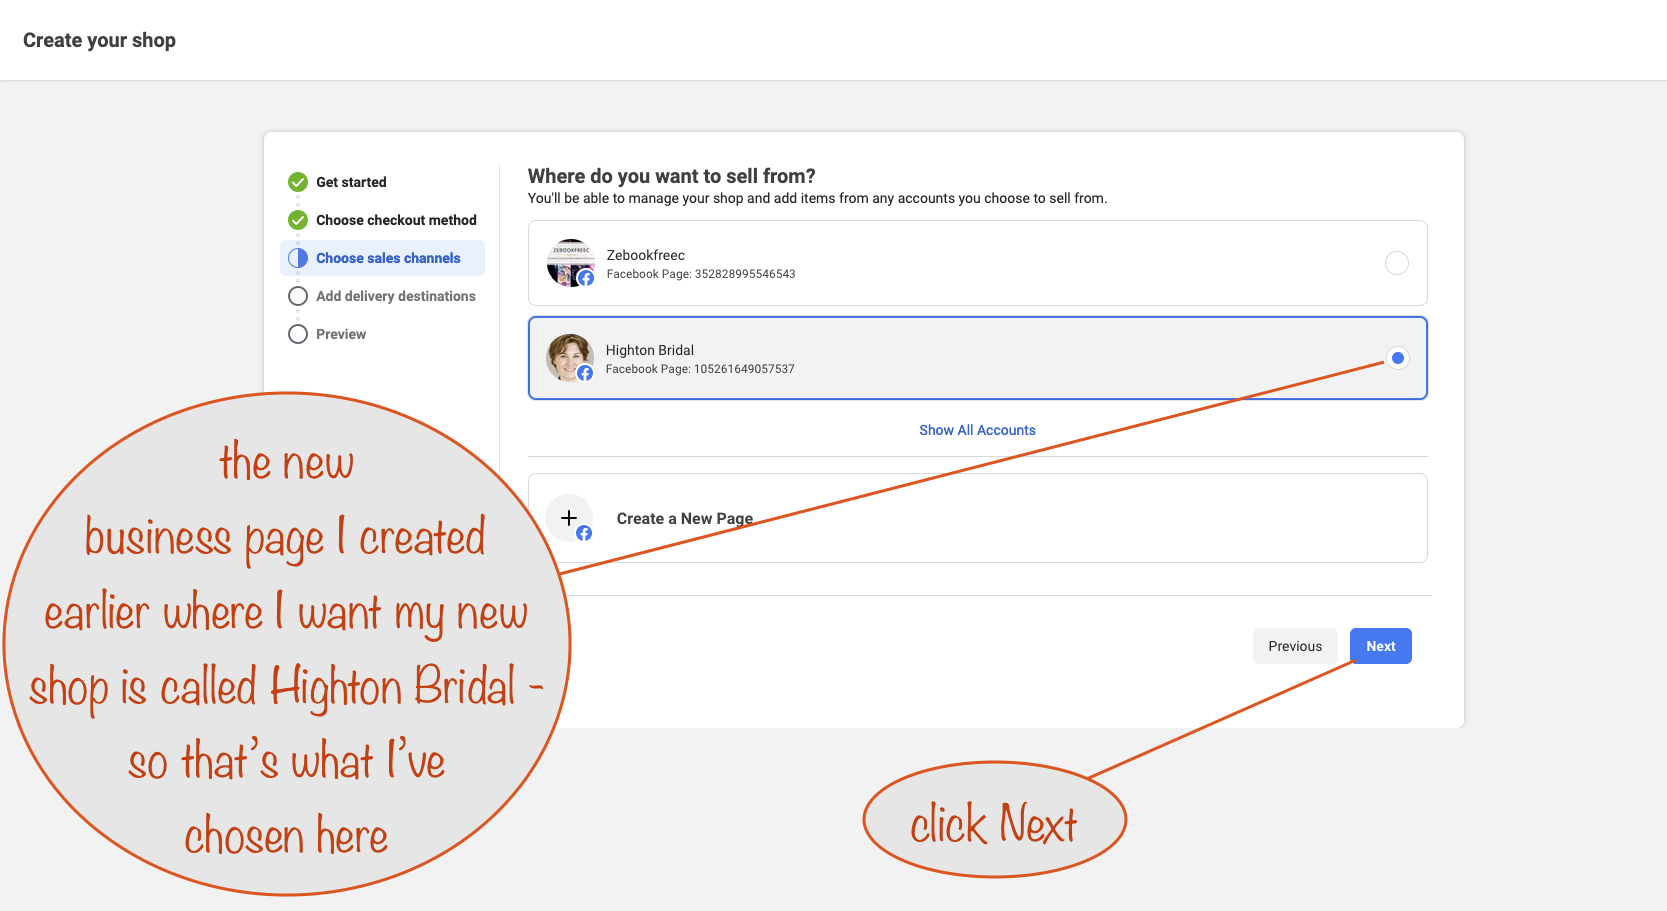
Now to select the right sales channel – it’s the new Facebook Page you created earlier:
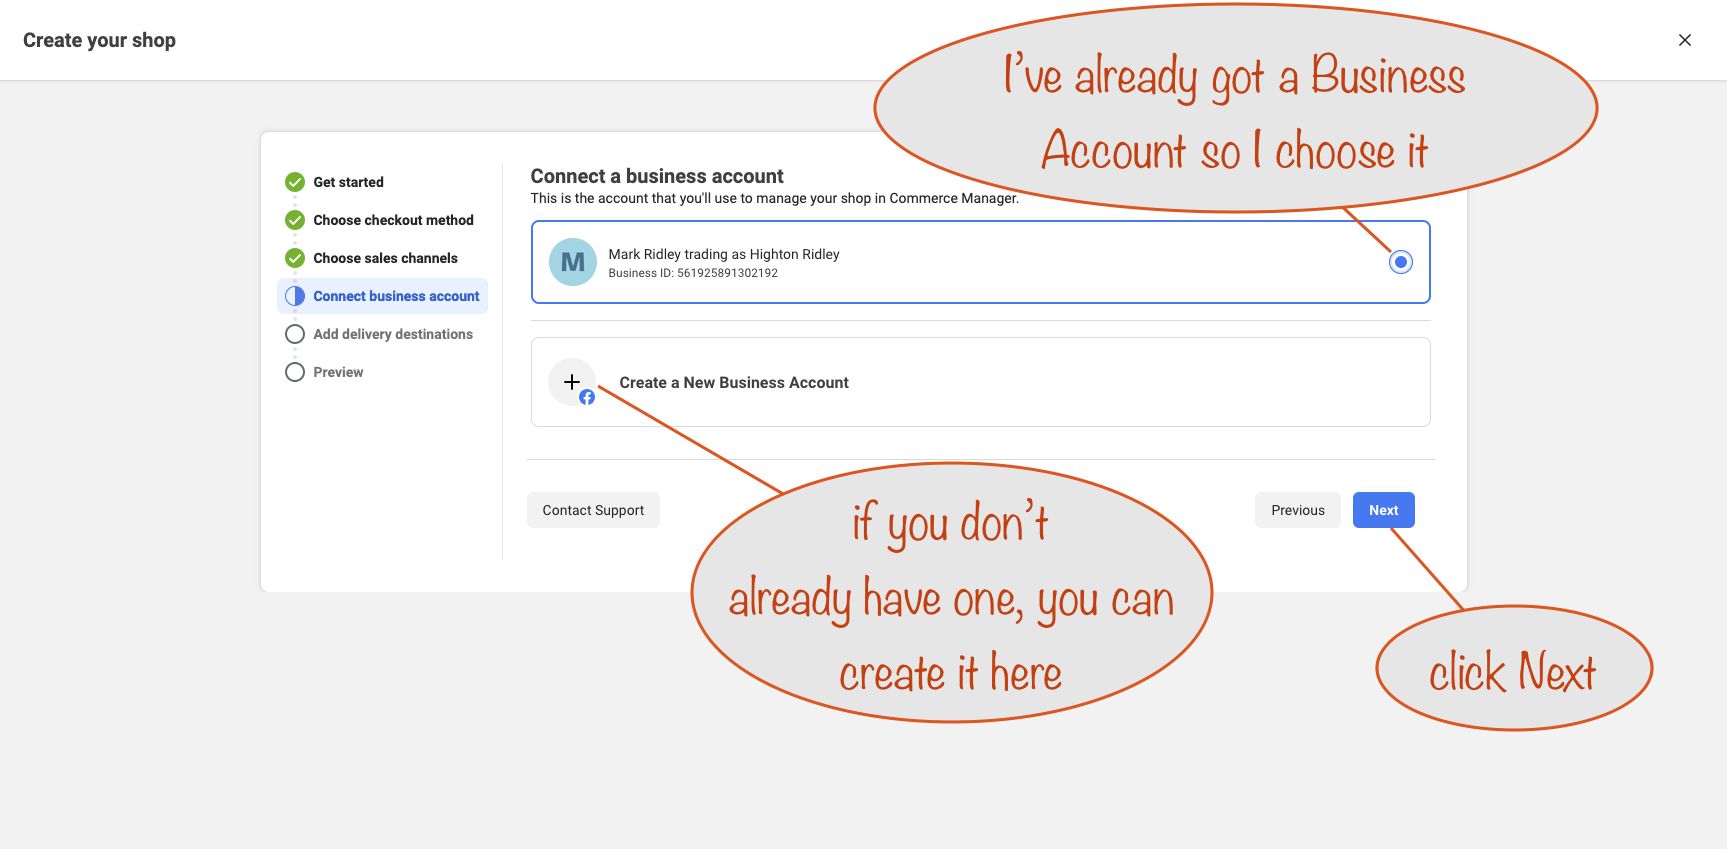
Now to choose the Business account that you’ll be using to manage your shop in Facebook’s Commerce Manager. If you don’t already have one, you can create one here:
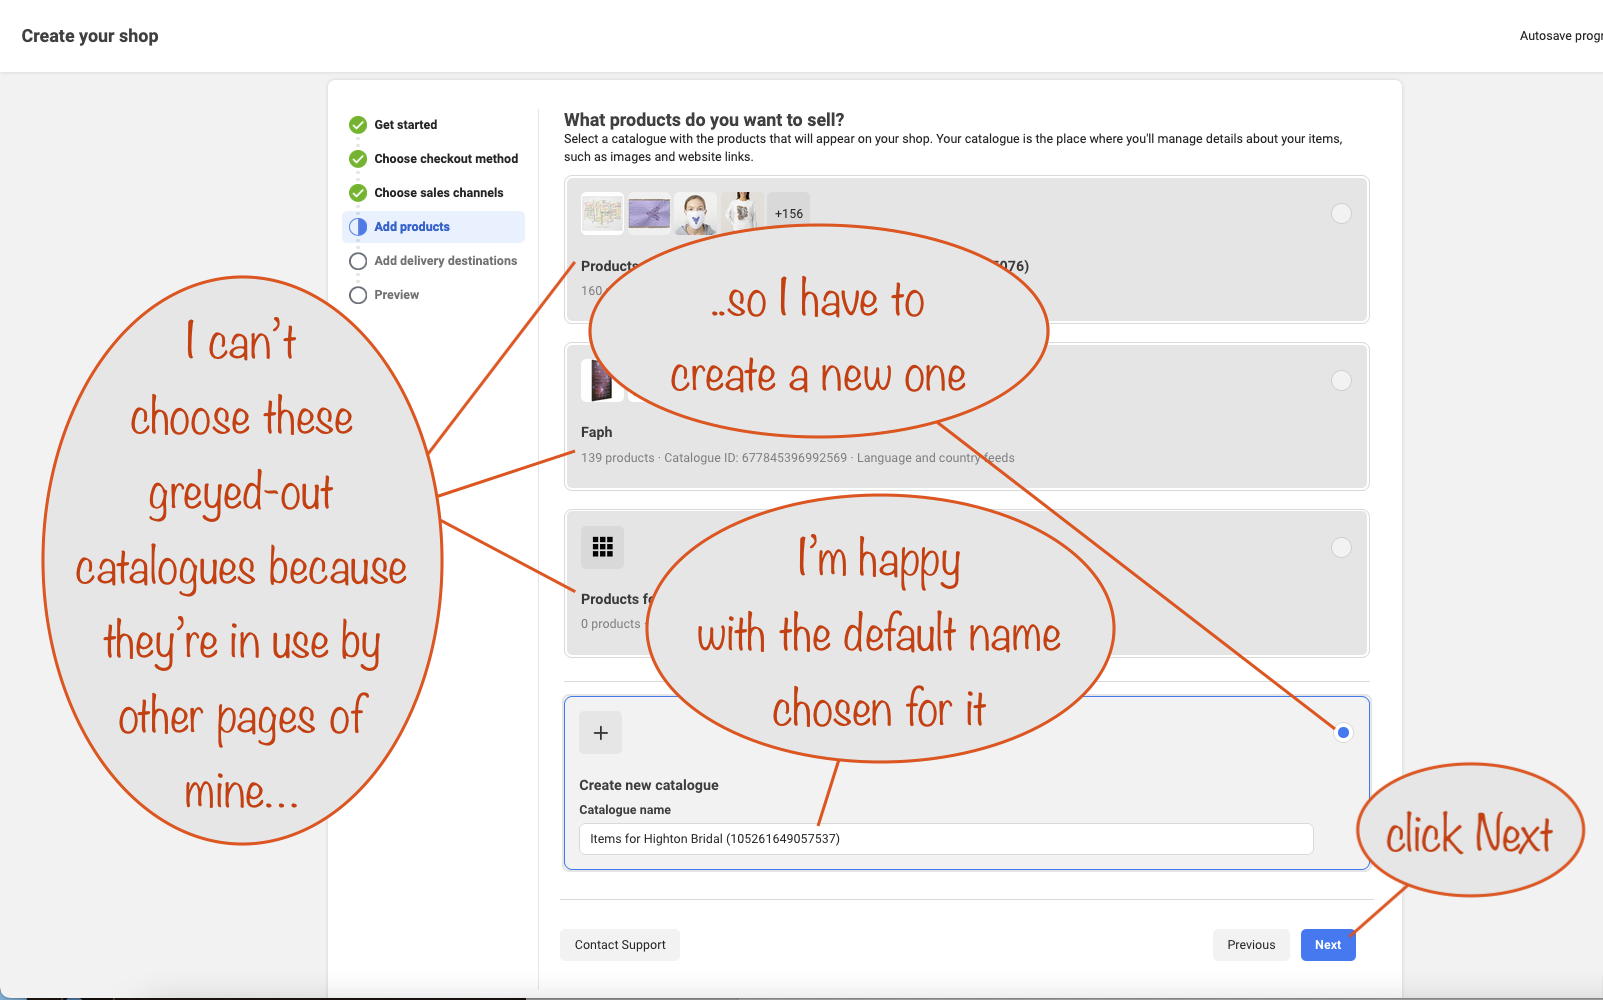
With that done, the next step is to tell Facebook you’re going to use a new (empty) Catalogue:
Next, Facebook needs to know what countries you’ll deliver to. Even though Zazzle decides, Facebook needs to know so that it can put your Shop in front of the right people.
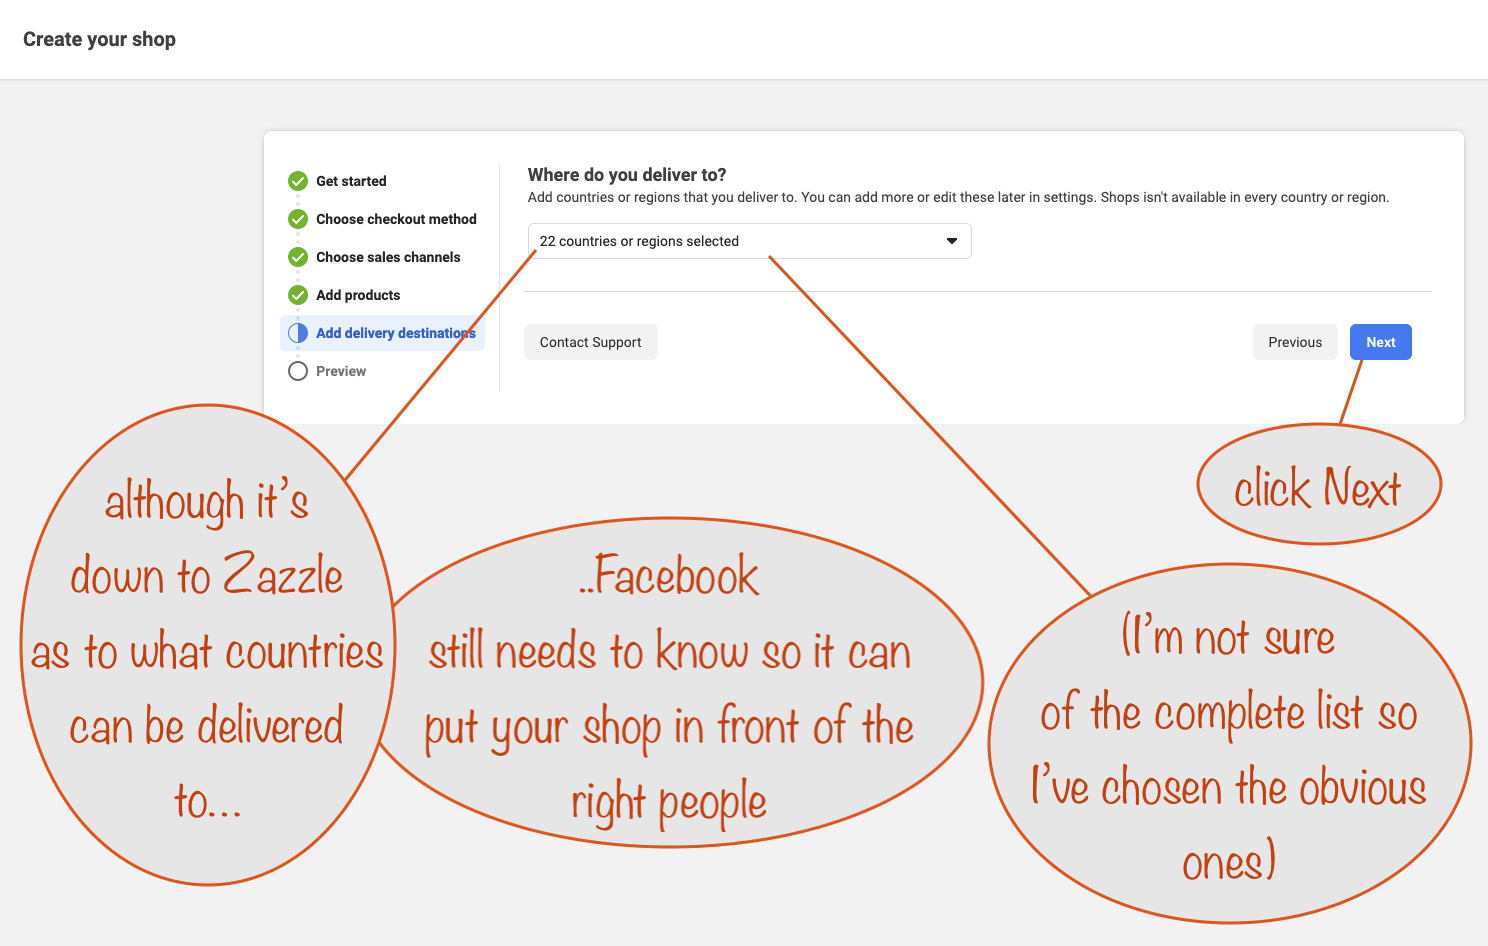
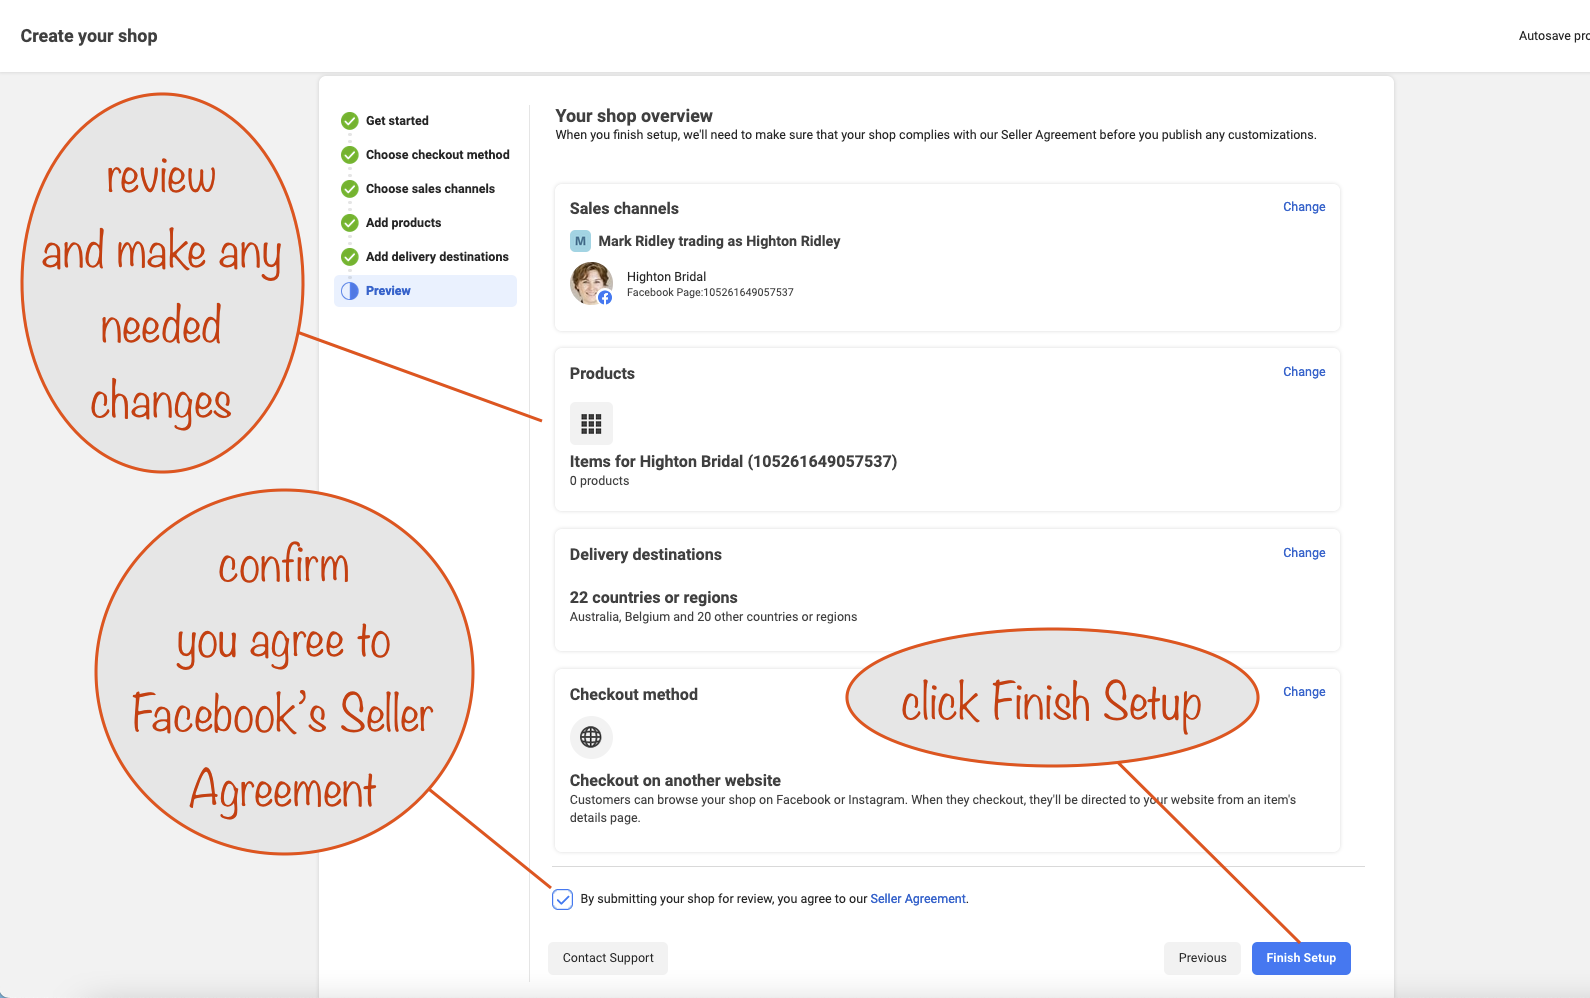
Review your setup, agree to the terms and then click the Finish Setup button:
After saving your setup information, you’ll be taken to Facebook’s Commerce Manager page and (likely, hopefully, fingers crossed) see a confirmation that all is good:
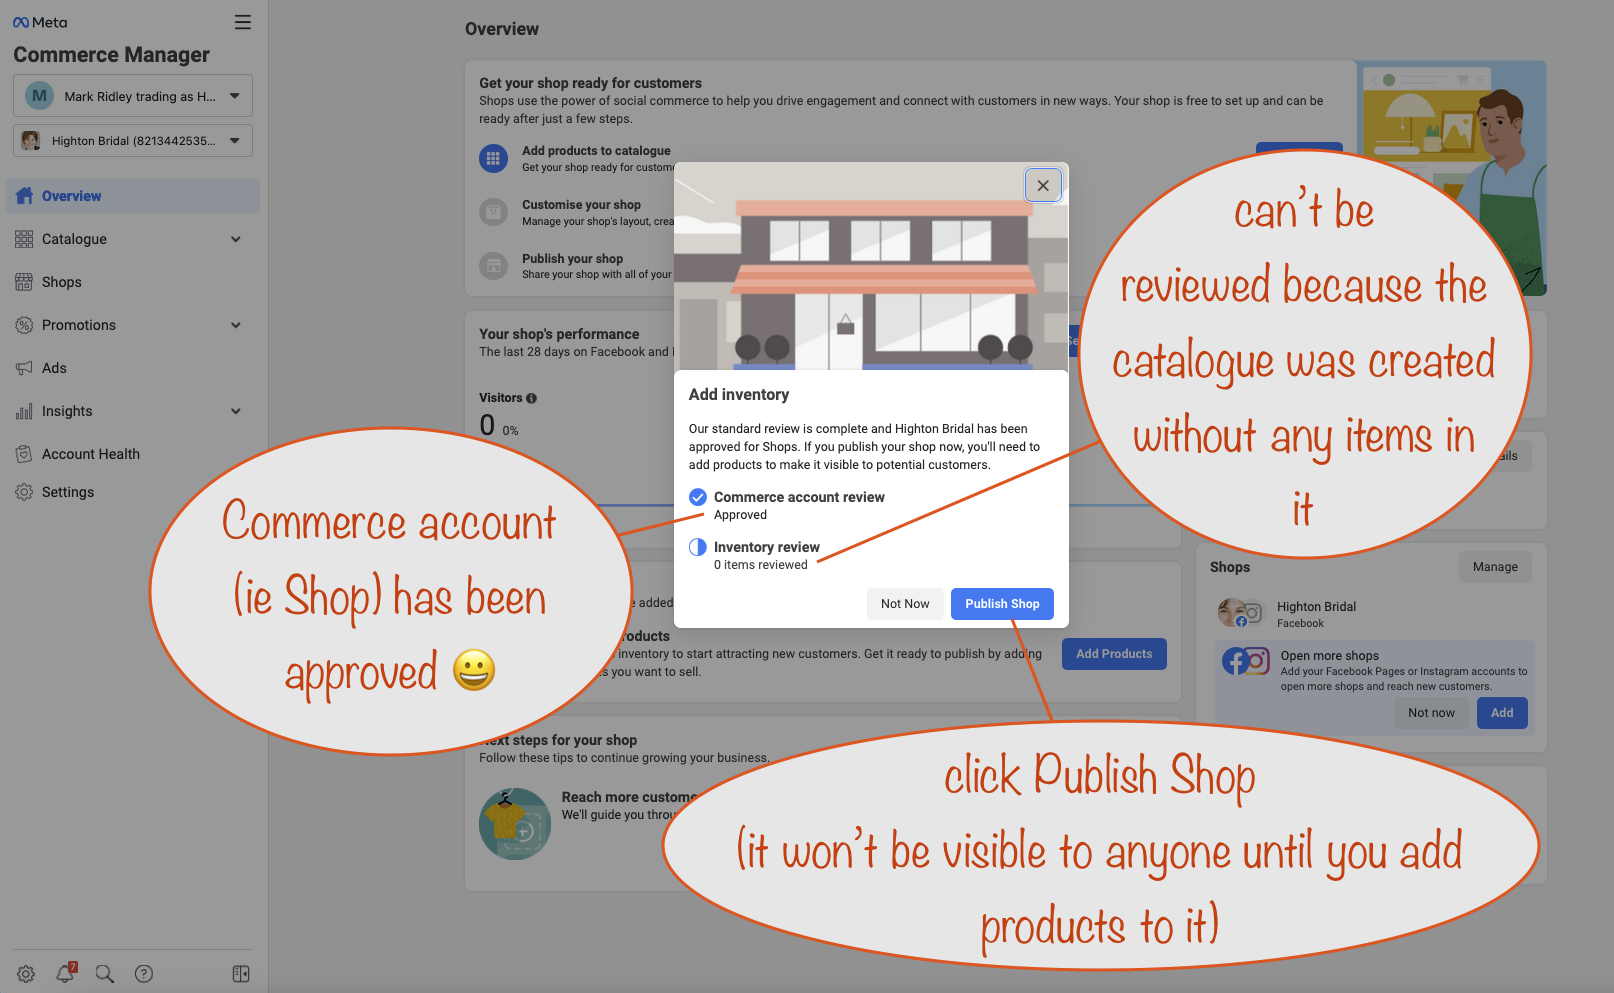
Even though you’ve now published your Shop, until you add inventory to it, no-one will be able to see it.
Maybe it’s just a glitch for me but clicking Publish Shop doesn’t dismiss the dialog, I had to close it manually with the close button at top right of the dialog box.
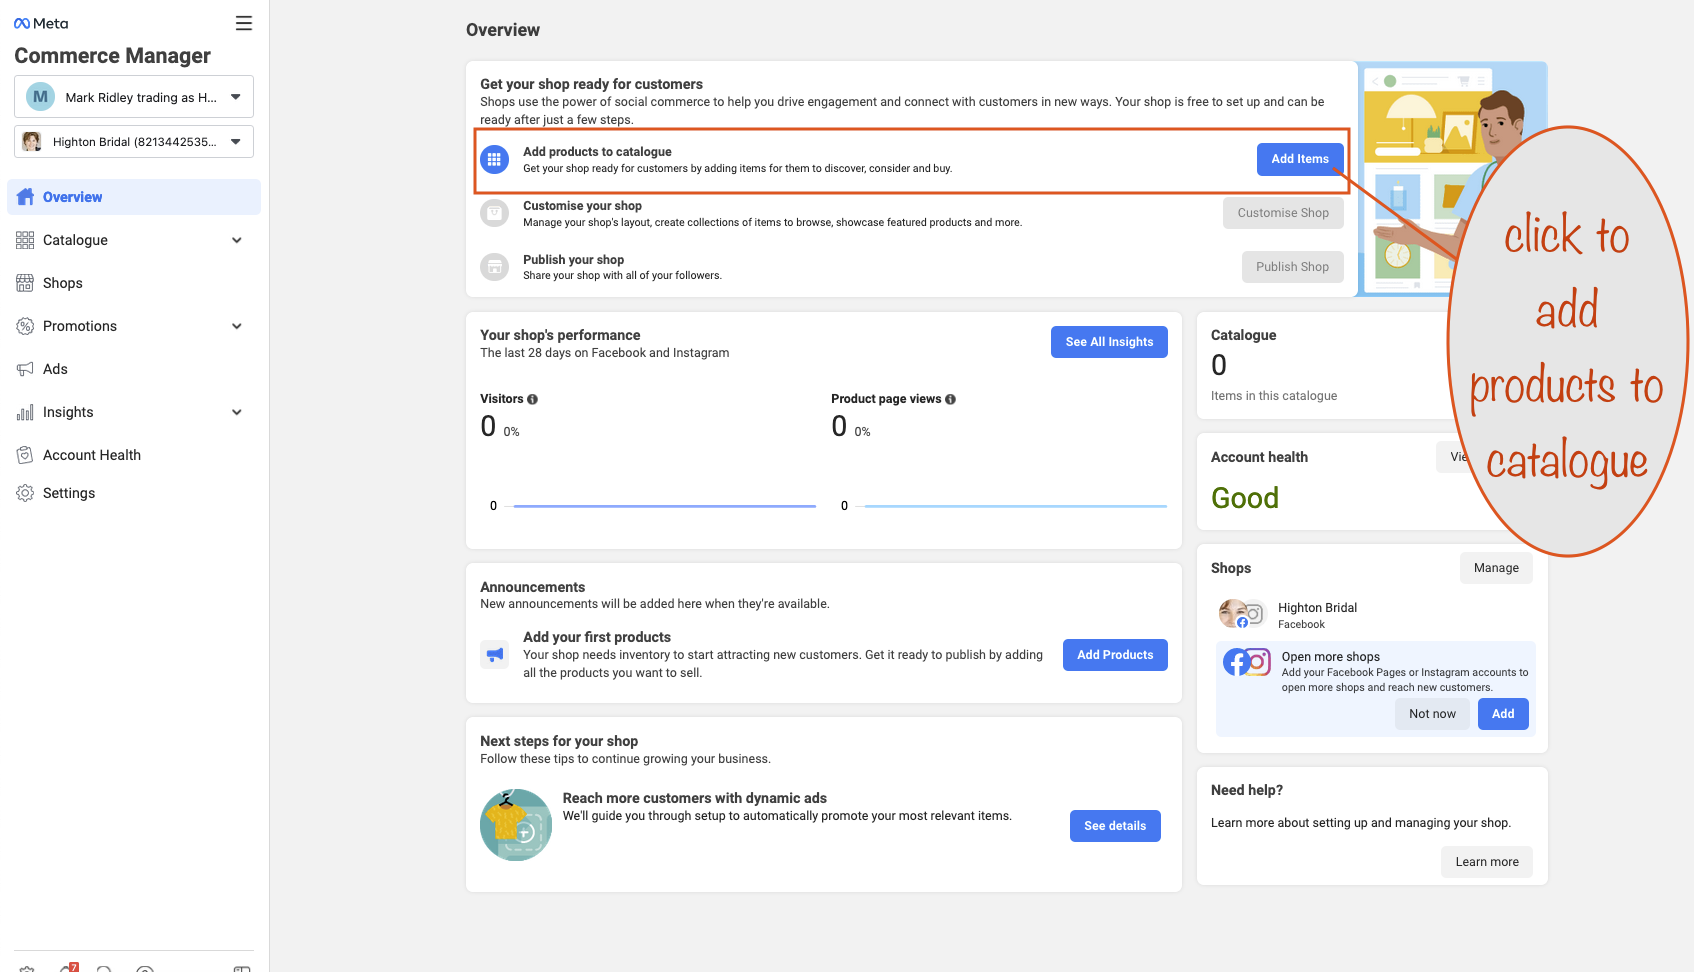
Once you’ve done that, the next step is to add products from Zazzle to your Catalogue.
Adding products from Zazzle to your Catalogue
After closing the dialog box above, this is what you see and where you choose to add products from Zazzle to your Catalogue. You’ll be using the Nifty Promo Control Panel (opens in a new tab / window) to do this shortly:
When you click the Add items button, this is what you see:
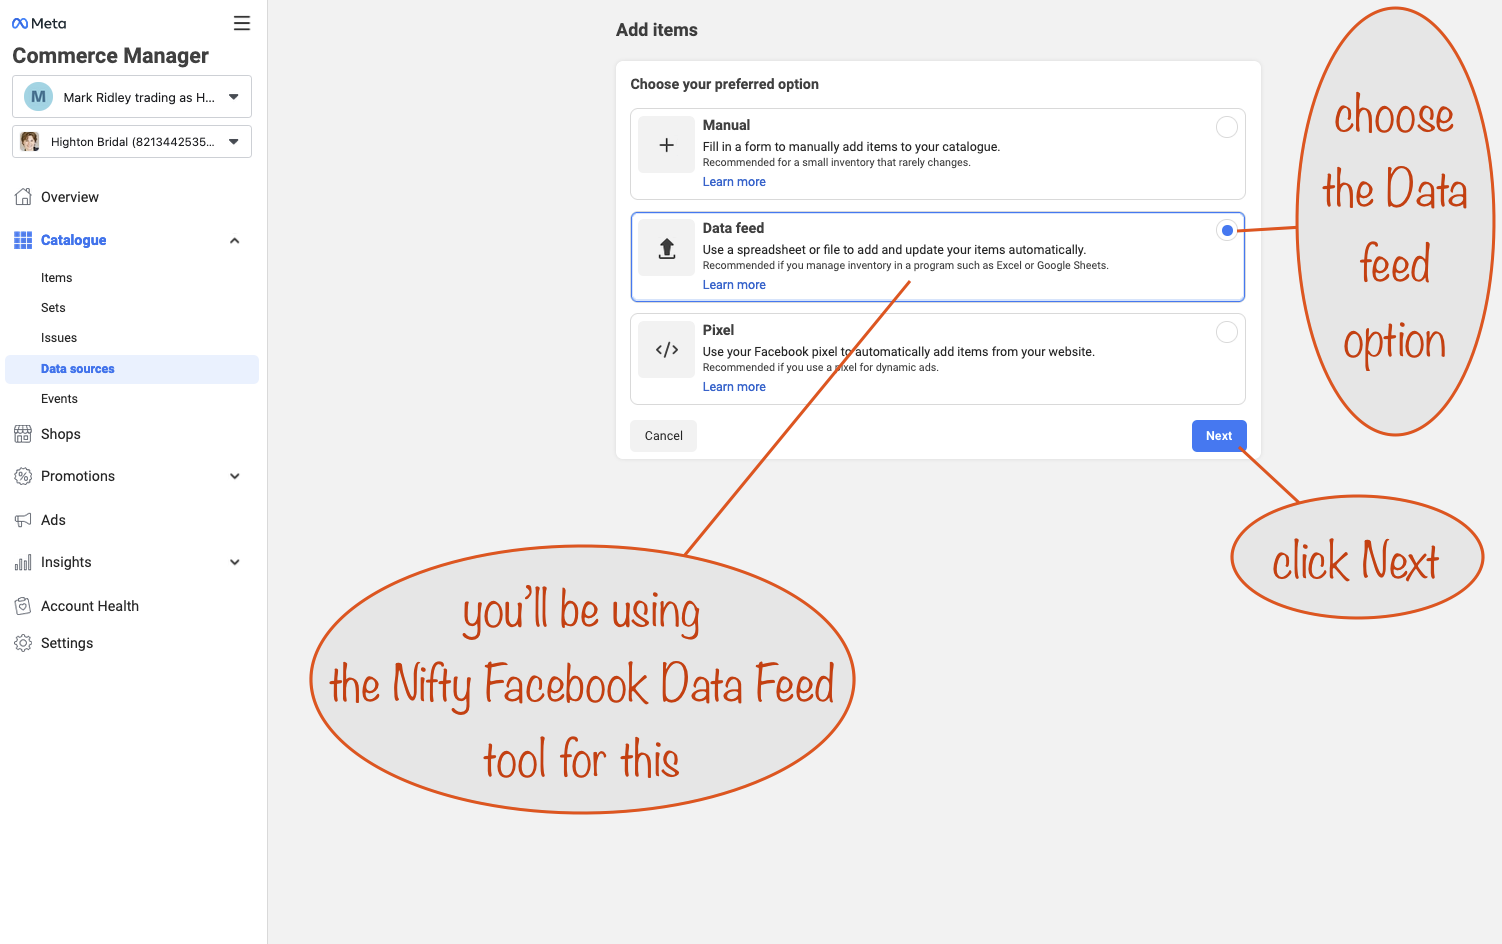
Next you confirm you’re ready to proceed without needing a template:
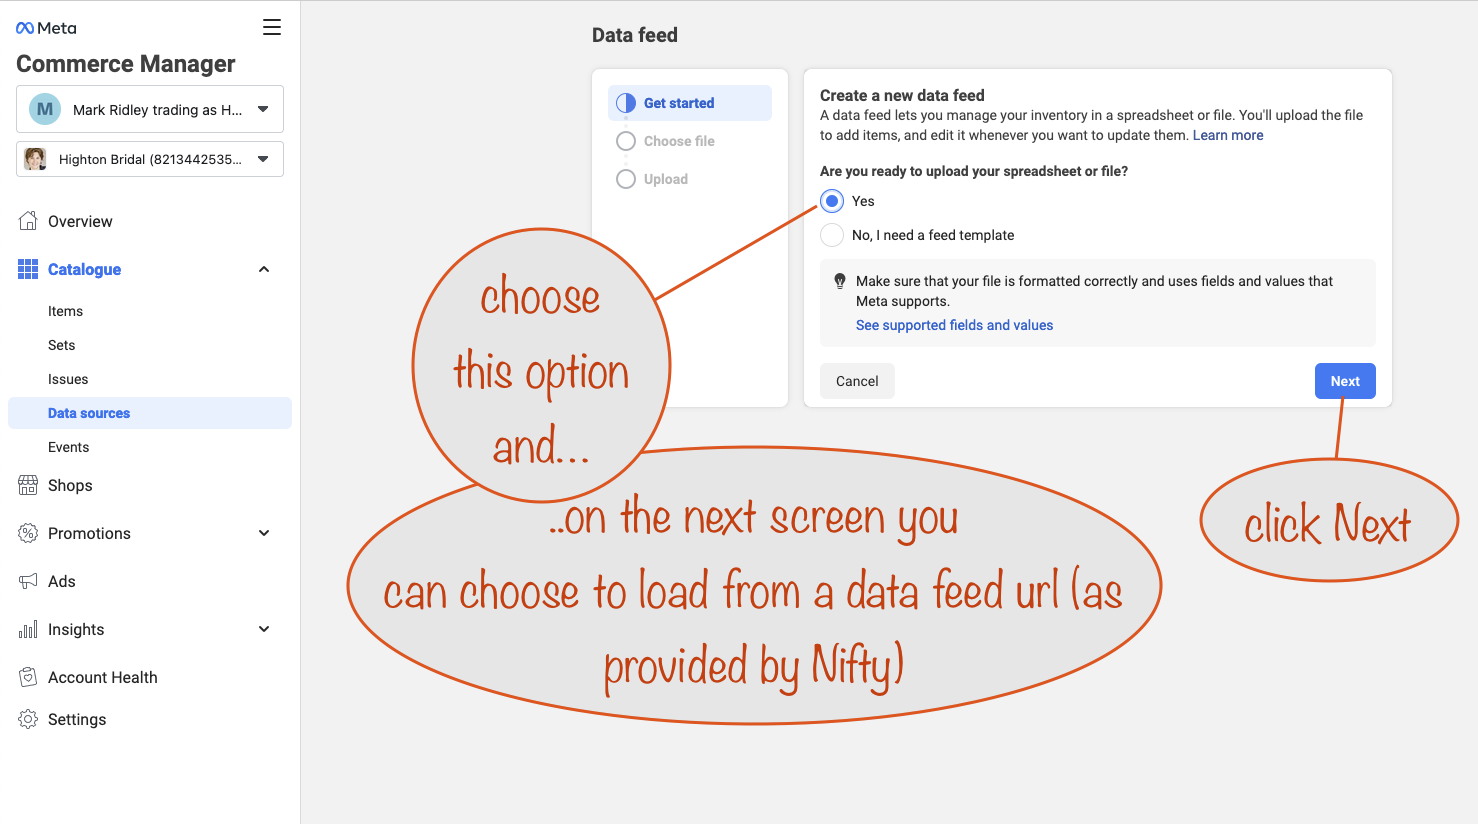
After clicking Next, you’ll see:

Ok, now to get the data feed url from Nifty. Make sure you open a new browser tab / window for Nifty so that you don’t lose where you are in Facebook.
Getting the data feed url from Nifty
Set up the pull from Zazzle
Later, I’ll be adding lots of data feed urls, each with their own specific products and ways of selecting them for sets / collections.
For my first Nifty Facebook data feed pull from Zazzle, I want the 40 orchid wedding invitation designs that have sold the most over the last month.
To get just wedding invitations I need to use the department id: 252426587536370673.
I get the ID from Zazzle’s Department ID finder, linked under more options->advanced options in the Nifty Promo Control Panel (opens in a new tab / window)
Here’s the setup in Step 1 of Nifty to get 40 orchid wedding invitations that have sold the best in the last month:
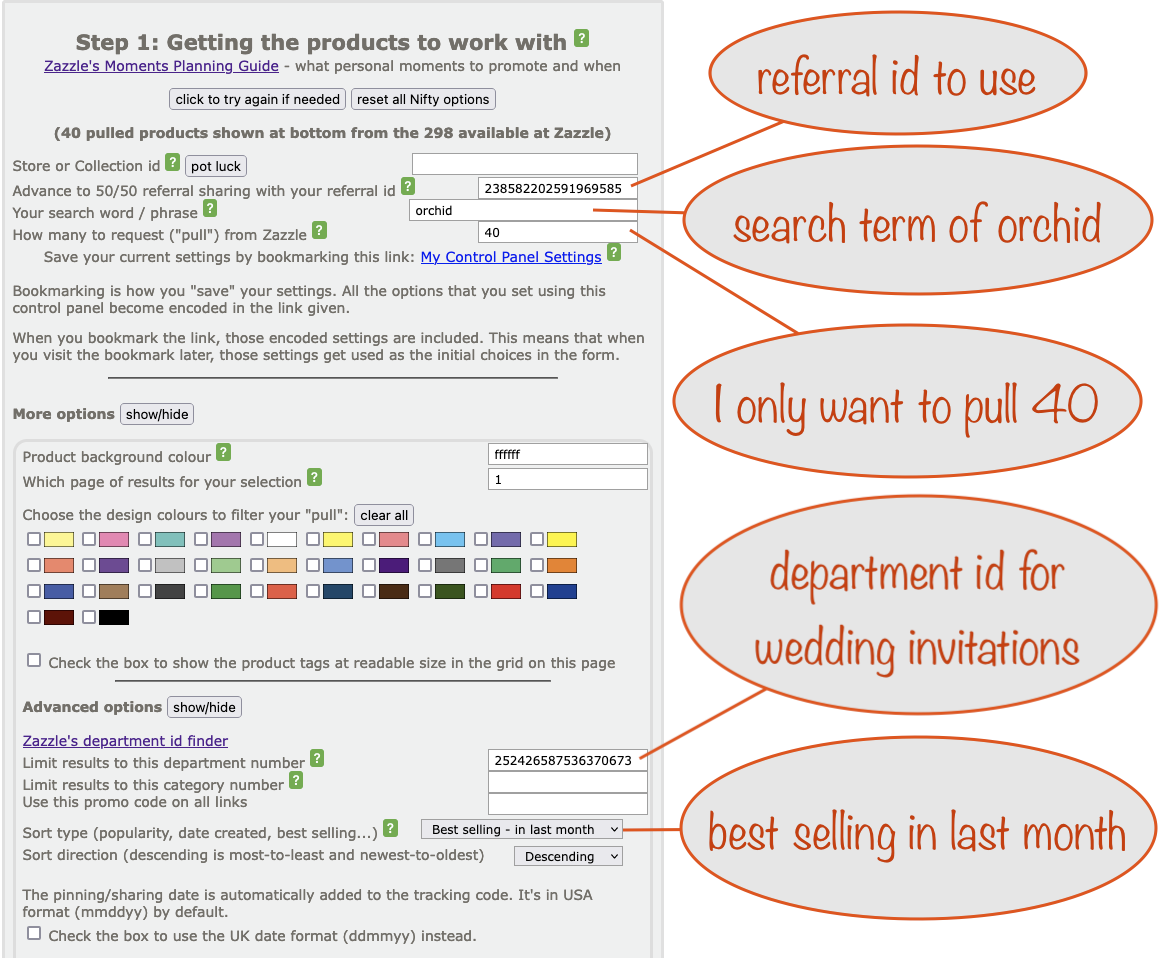
Note that because Facebook will re-pull from the data feed at least every week (option you set), you’ll always get the most recent best-sellers.
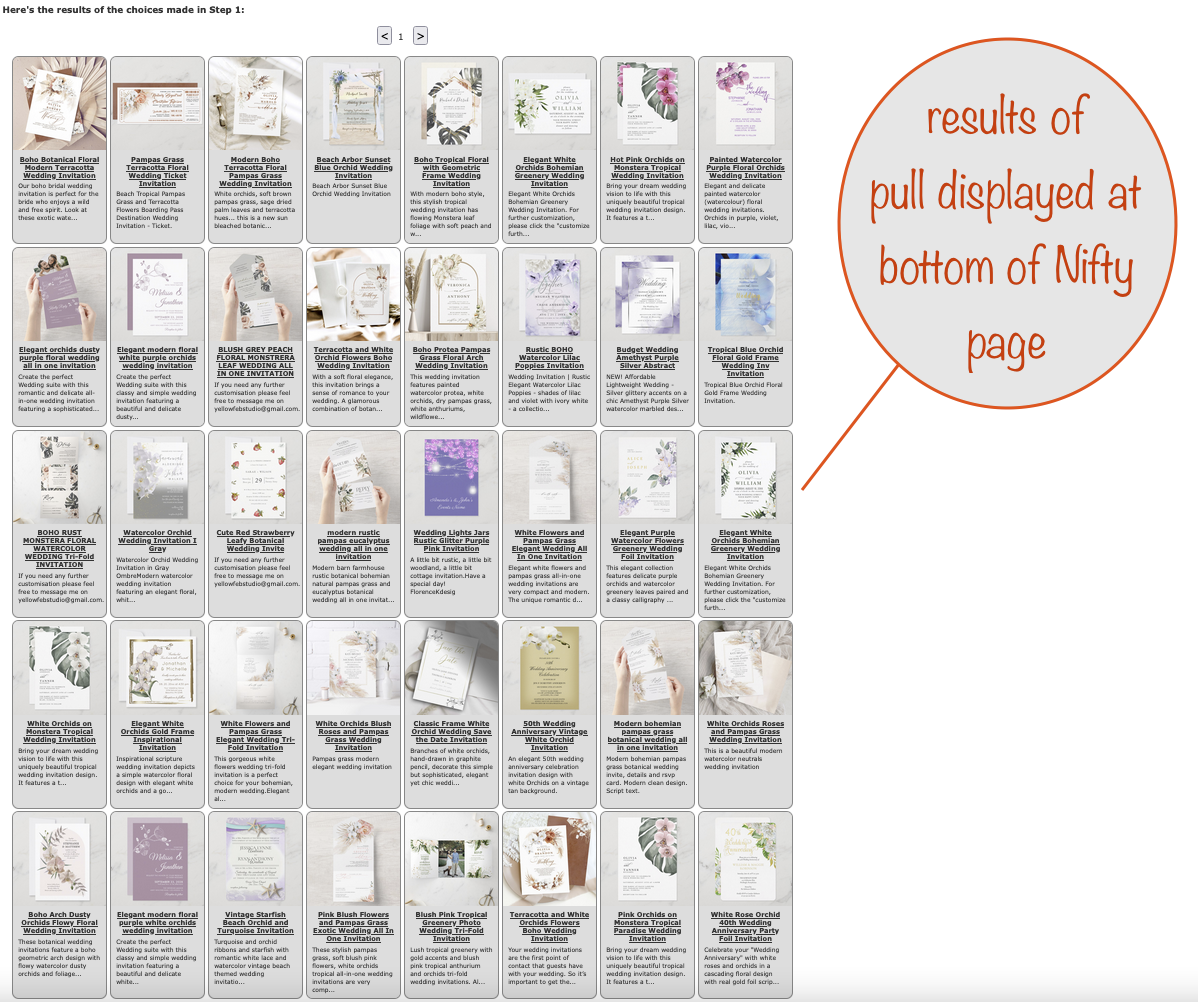
Results of the pull are shown at the bottom of the Nifty page. It’s always a good idea to scroll down and double-check you’re getting what you want:
Getting the data feed url for Facebook from Nifty Step 2
Next, get to Step 2 in Nifty and click the show/hide button next to the Get a data feed for your Facebook Shop heading:
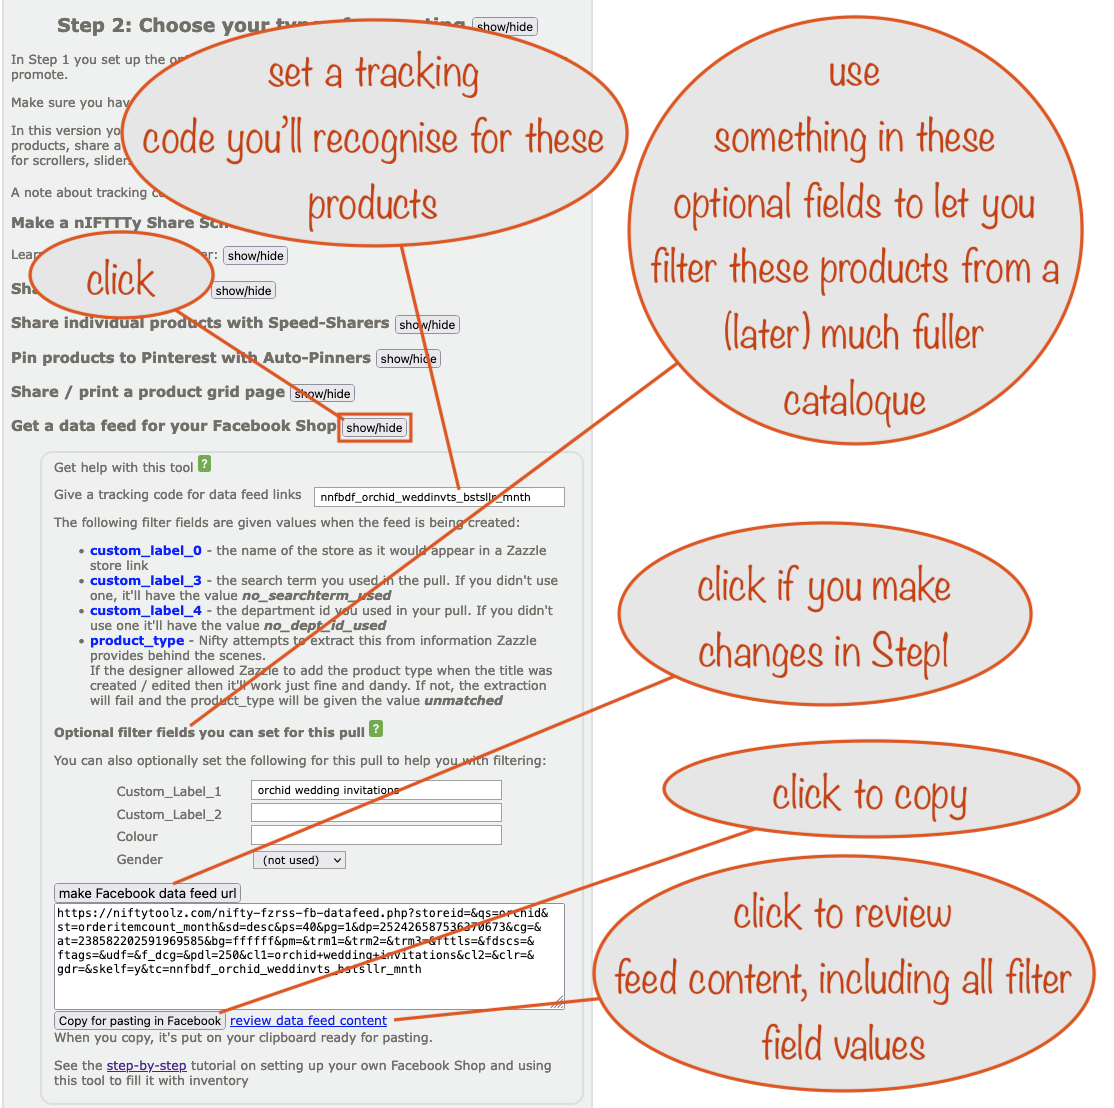
Fill in the tracking code with something that’ll let you know when one of the links from the pull is successful in making a sale.
Next, set up your Facebook Filter field values for this pull. Their purpose is to use them later to create a set (aka collection) by filtering all the products in your catalogue which have those values. (That’s not quite true as Facebook filtering can be quite flexible, allowing for things like “doesn’t contain“.) For this, I’ve only used filter field “Custom_Label_1” with something that makes sense for this pull.
When you’ve added the data feed to your catalogue, you’ll only have these products, but later you’ll end up with many more data feeds. So you need a way of distinguishing what comes from where so that you can make a set/collection of just the products you want to appear in it.
When you’re ready, click the button Copy for pasting in Facebook and you’re ready for the next step, pasting it into Facebook.
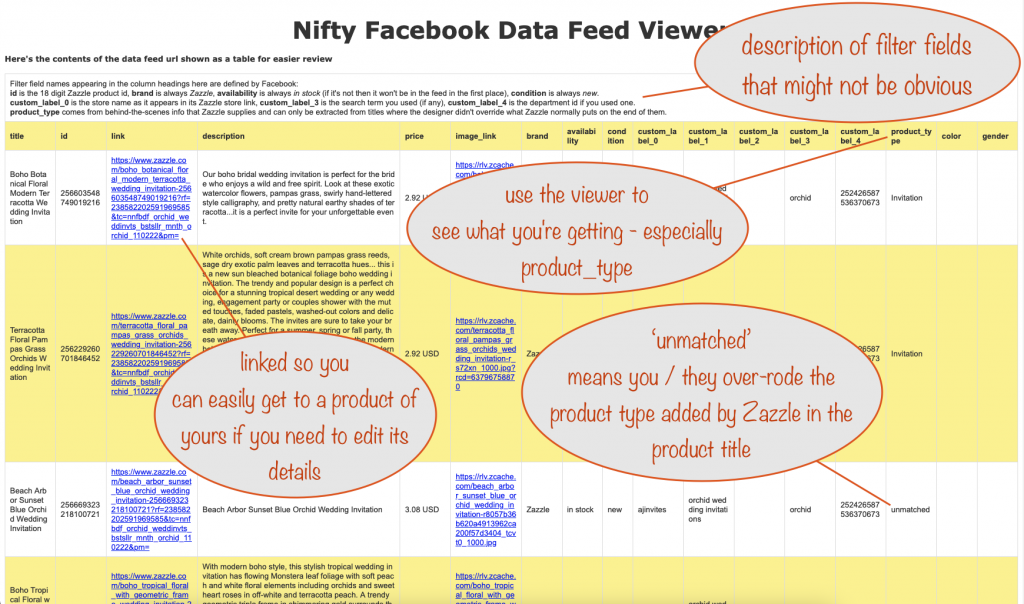
If you’d like to review what the feed will add to your Facebook Catalogue, click the review data feed content link. Here it is for the pull shown here:
Continuing with Facebook
Switch round to the Facebook tab / window you left open from previously. Your clipboard will have the data feed url in it ready for pasting.
Pasting the data feed url into Facebook
Click the text box labelled “Enter the URL where your file is hosted” and paste what’s on your clipboard (right click, hit paste).
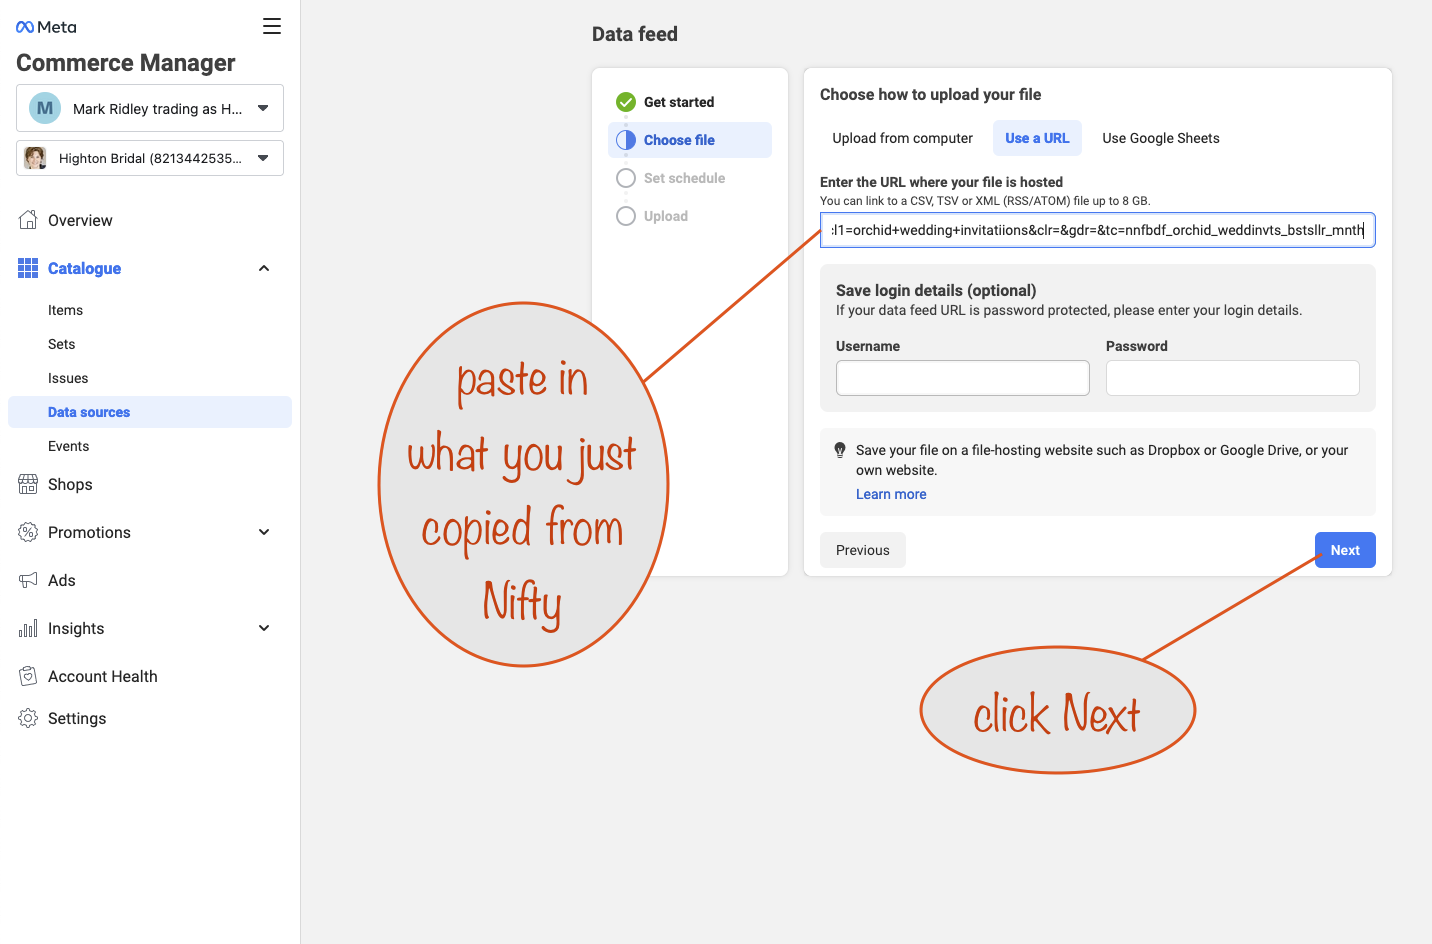
When you click Next, Facebook lets you set a re-pull schedule so the products will always be ‘fresh’. I’ve chosen weekly so someone who comes back has a chance to see what they saw last time:

Now you review the settings before telling Facebook to load the products from the data feed url you just gave:
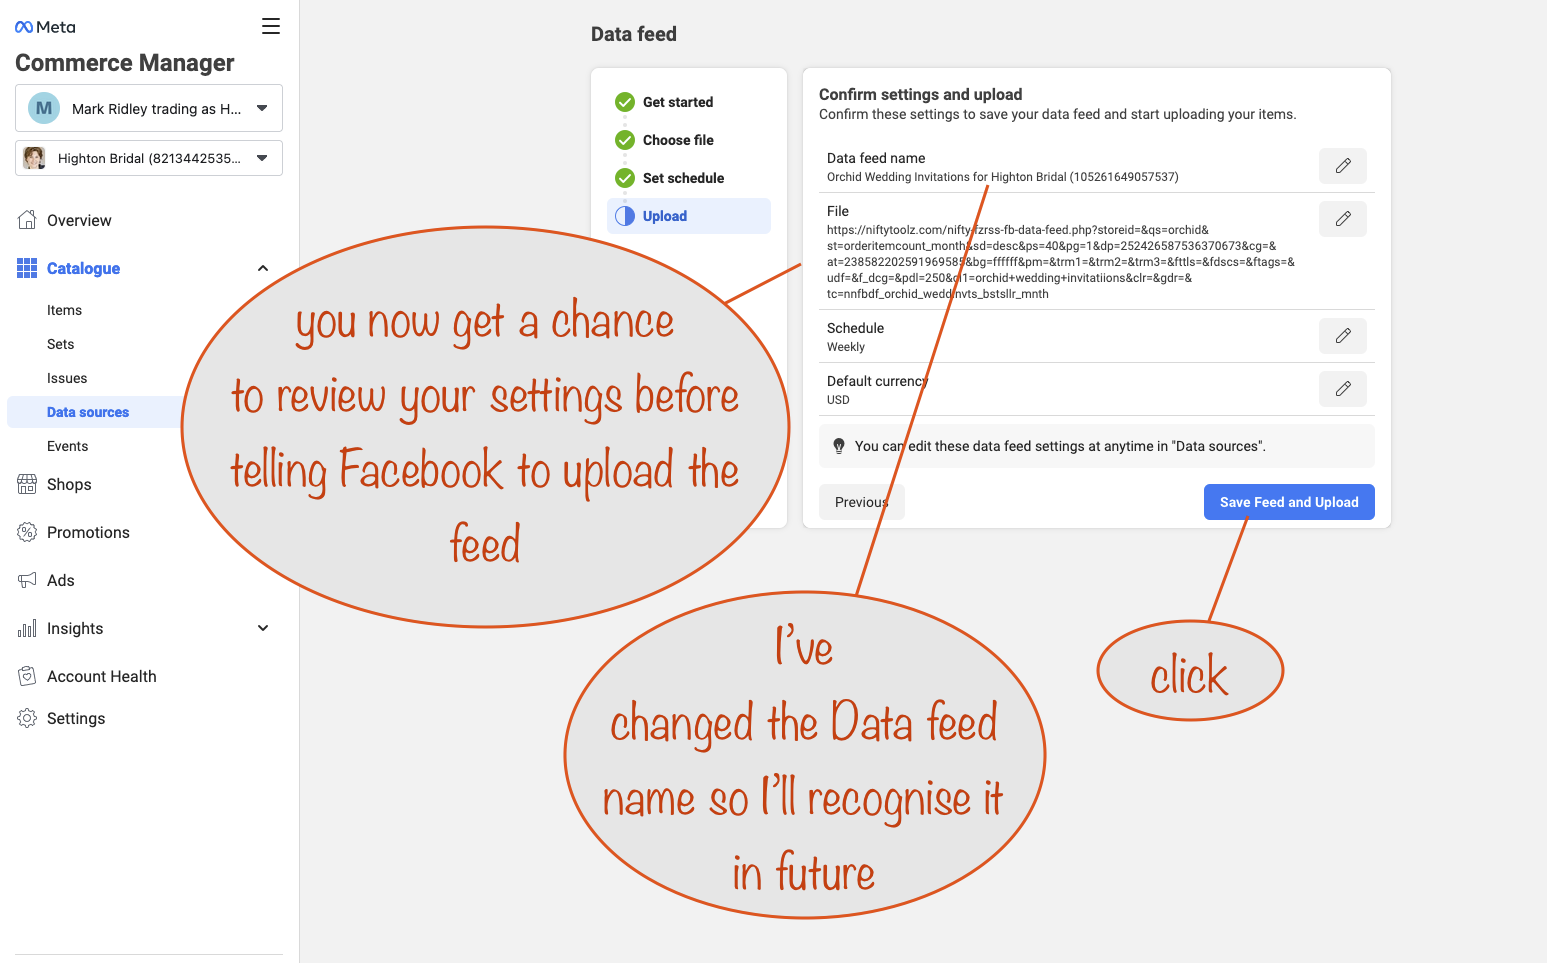
Nearly there…
Uploading the data feed into your Catalogue
When you click Save Feed and Upload, after a few minutes you’ll see the upload results (and a different spelling of Catalog!):
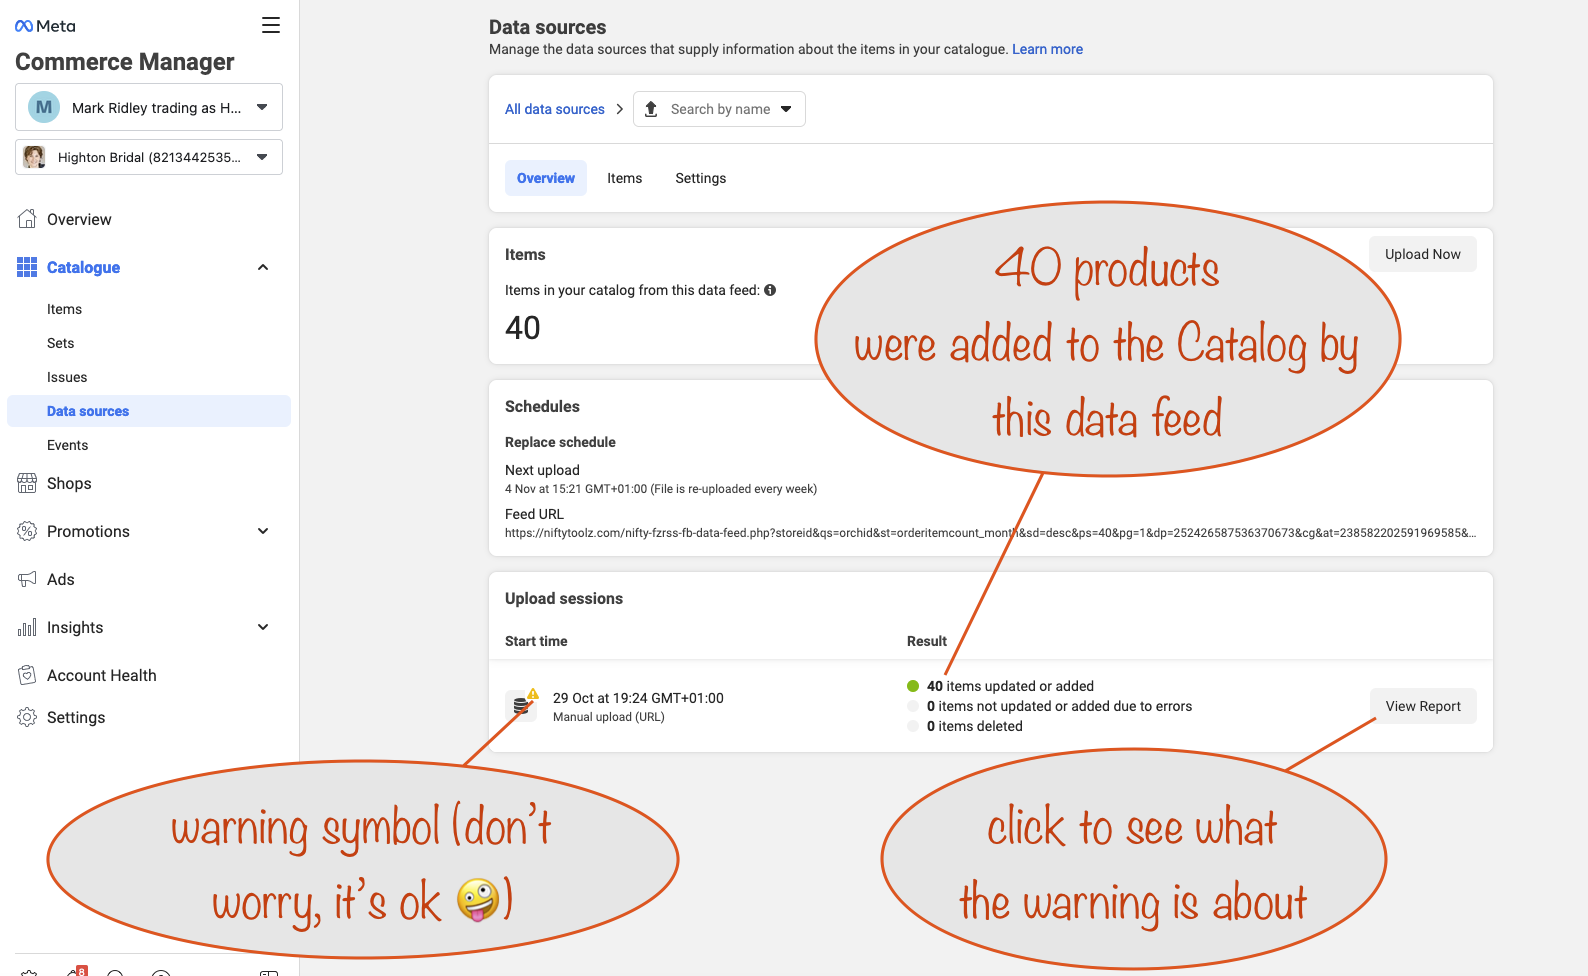
With a Nifty Data Feed you’ll always get a warning about the google_product_category being missing but it’s nothing to worry about. Let’s take a look at the upload sample report:
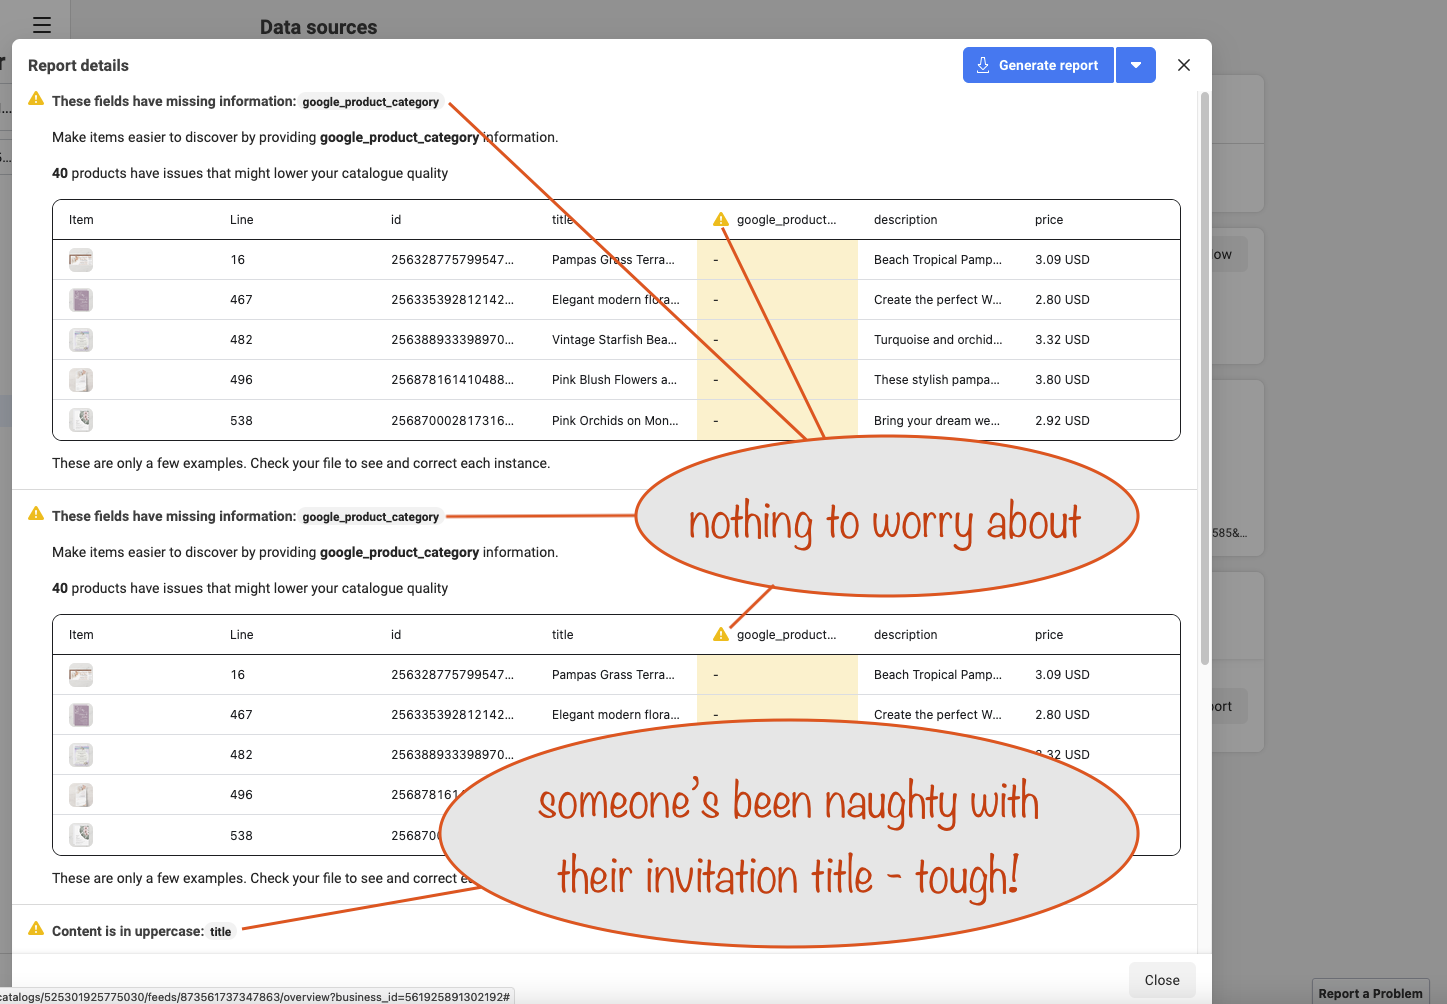
The warning to do with google_product_category is nothing to worry about as it’s optional unless selling directly on Facebook. As we’re doing the sales / checkout on Zazzle, it is an optional data field.
Learn more about it here: https://www.facebook.com/business/help/526764014610932?id=725943027795860
You’ll get an email from Facebook warning you there are issues with the upload – best to check it’s just about the google_product_directory not being filled in and not something else you might need to take action on.
If you want to see the full report instead of the smaller sample, you’ll need to hit the Generate Report button and then dowload the result.
I see that there’s another warning about at least one invitation title being all in uppercase. That’s something that’s frowned on as “shouting”, as I’m sure you already know 😉
Getting them into your Shop
Ok, so you’ve now got items in your catalogue and you’re ready to add a set/collection to your shop:
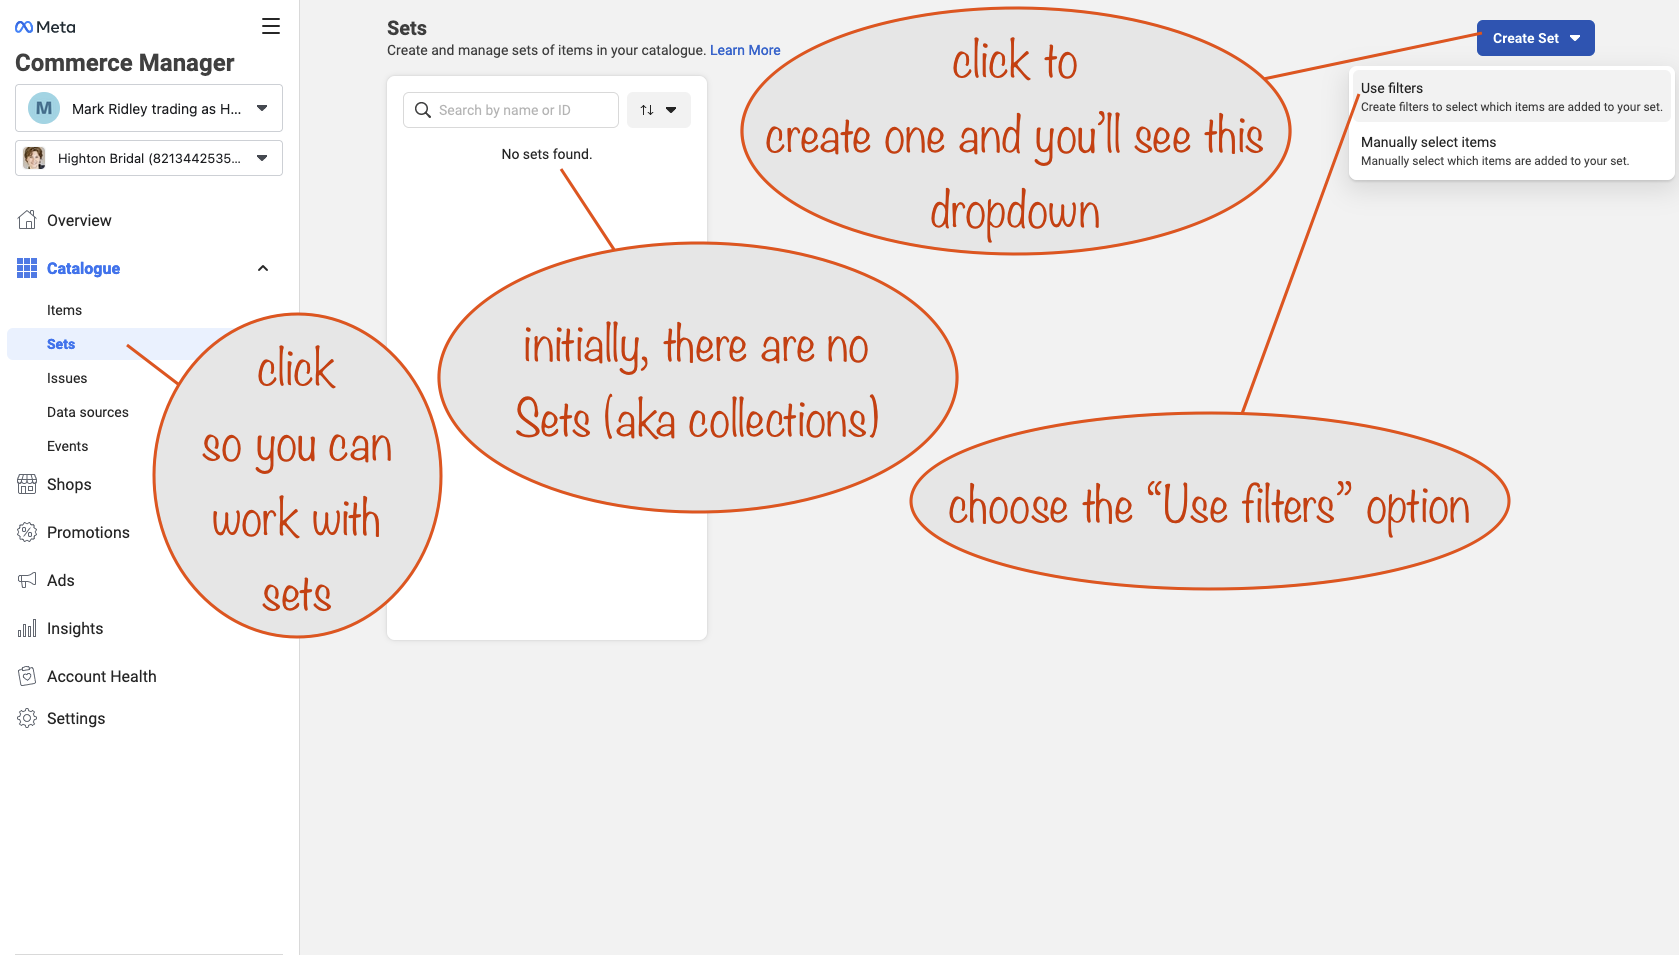
Creating a Set using filters
Next, you set a filter condition so that only the products you want get drawn from the Catalogue into the Set you’re creating:
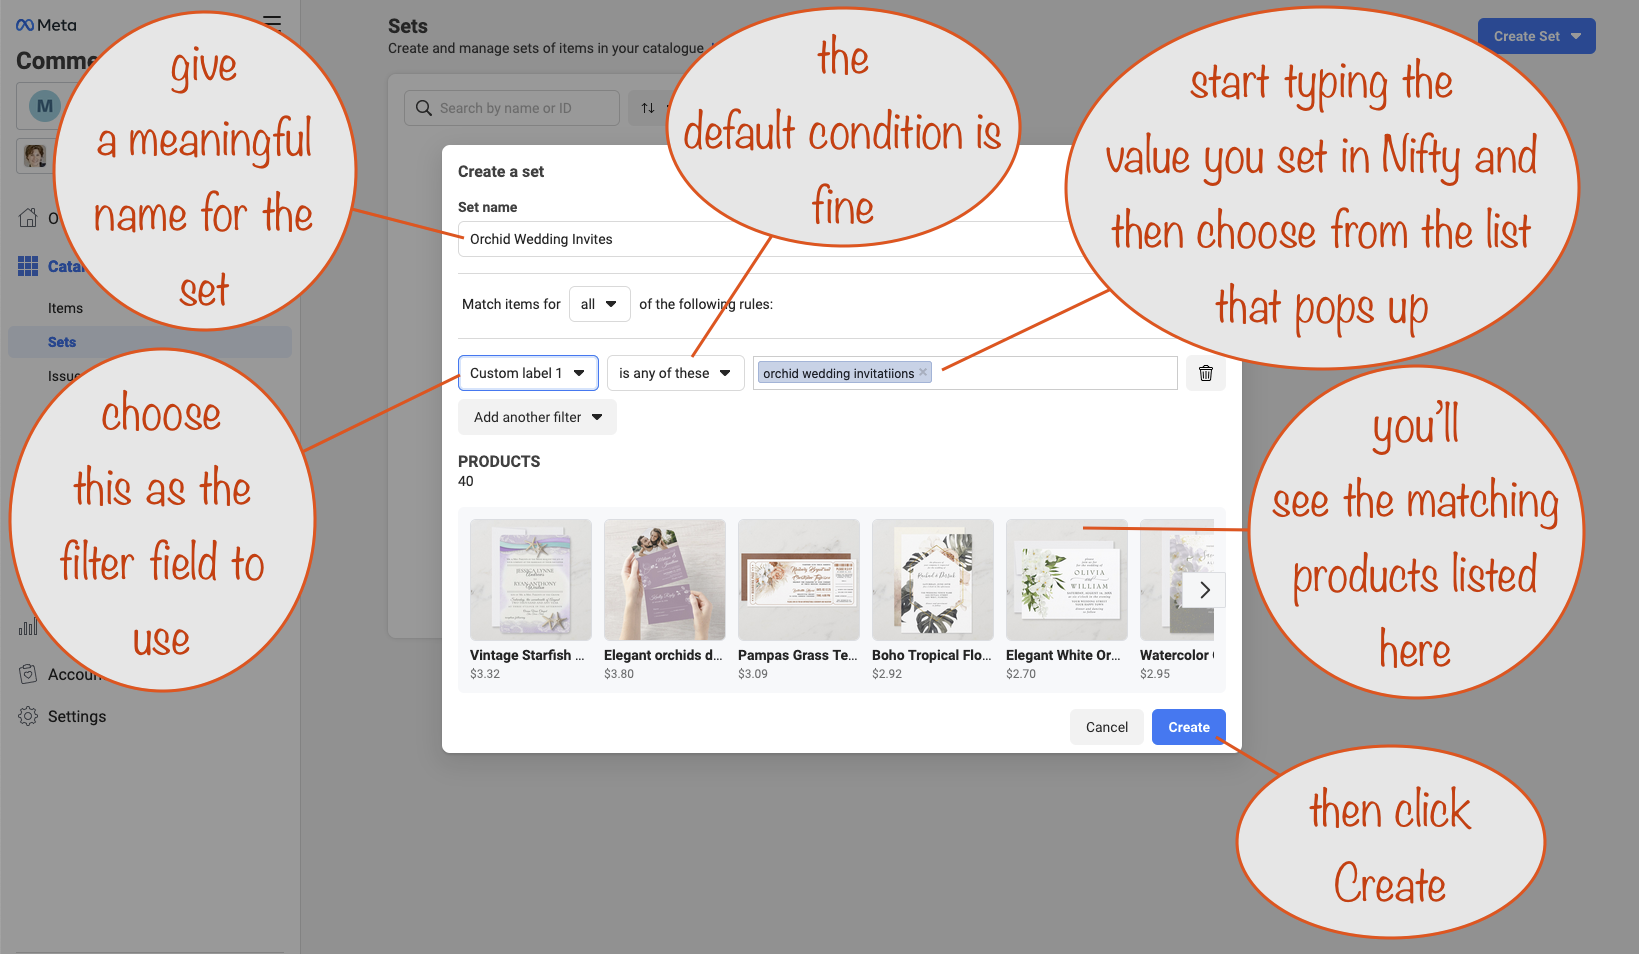
When you click Create, you’ll see where you can now add the Set to your Shop. Finally! At last!
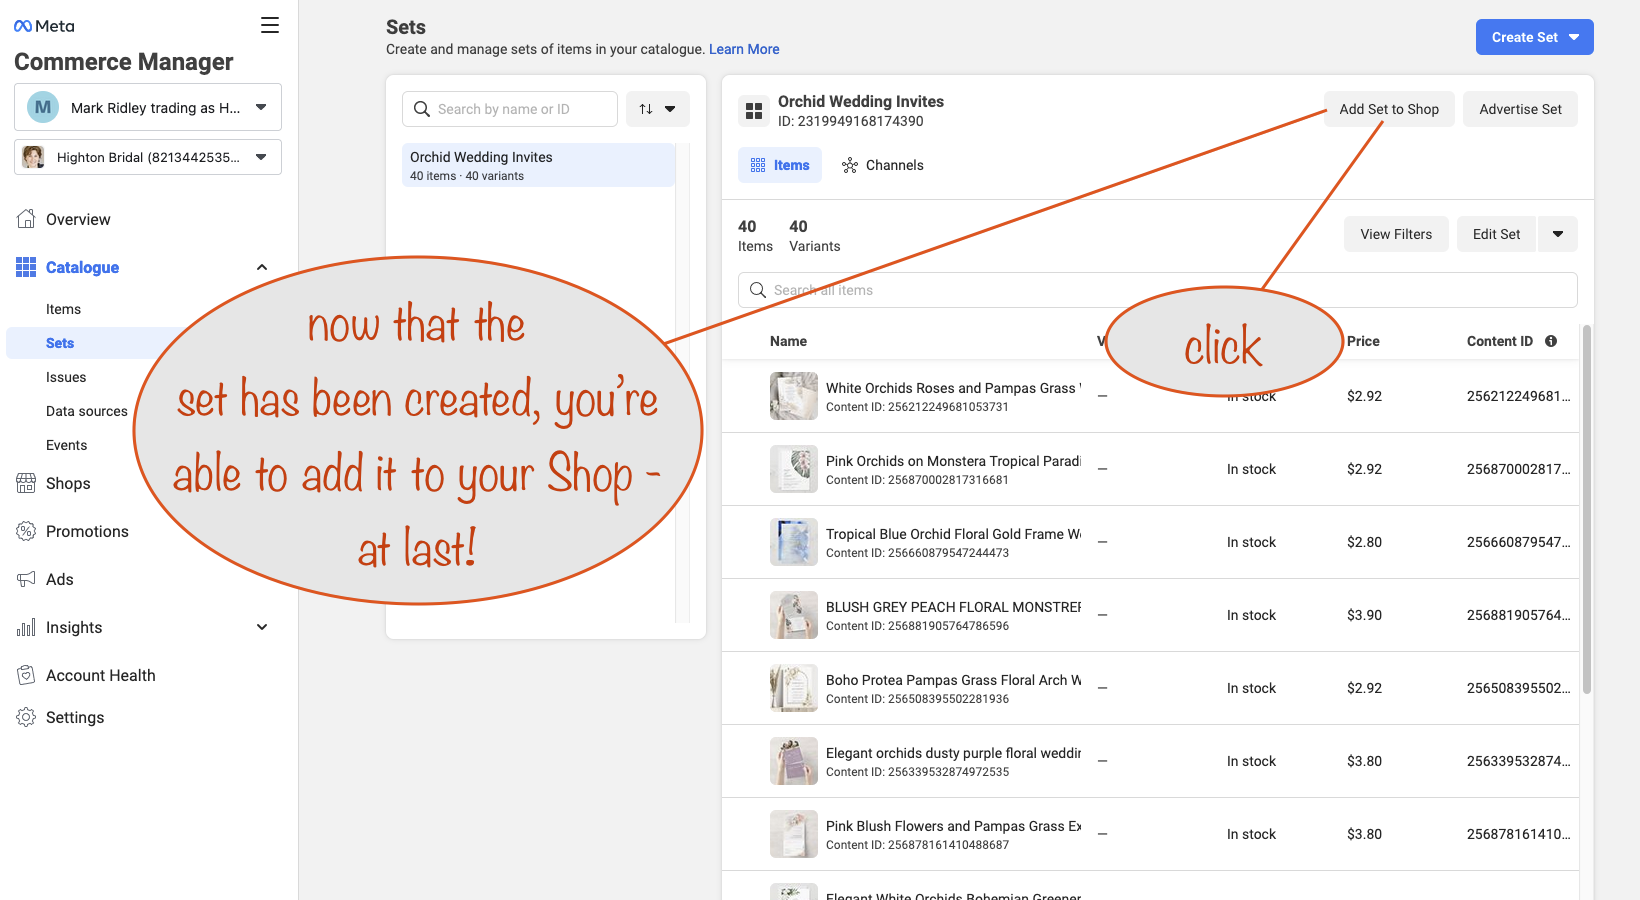
Commerce Manager
When you click the Add Set to Shop button, you’ll be taken to the Commerce Manager where you choose the Set (now called a Collection) to add to your Shop:

When you click the Confirm button, you get to see the Collection in your Shop and all you have to do is to click the Publish Updates button:
Almost there – last thing to do is to choose how you want any rejections handled and then hit the Submit button:

Finally, you get a dialog telling you that your Shop is in review.

Maybe it’s a glitch but the Got it button does nothing for me, and neither does the close button at top right of the dialog – and refreshing doesn’t help either.
So what I do is to close all the Facebook tabs I have open because they all seem to be stuck / have crashed.
Review confirmation email
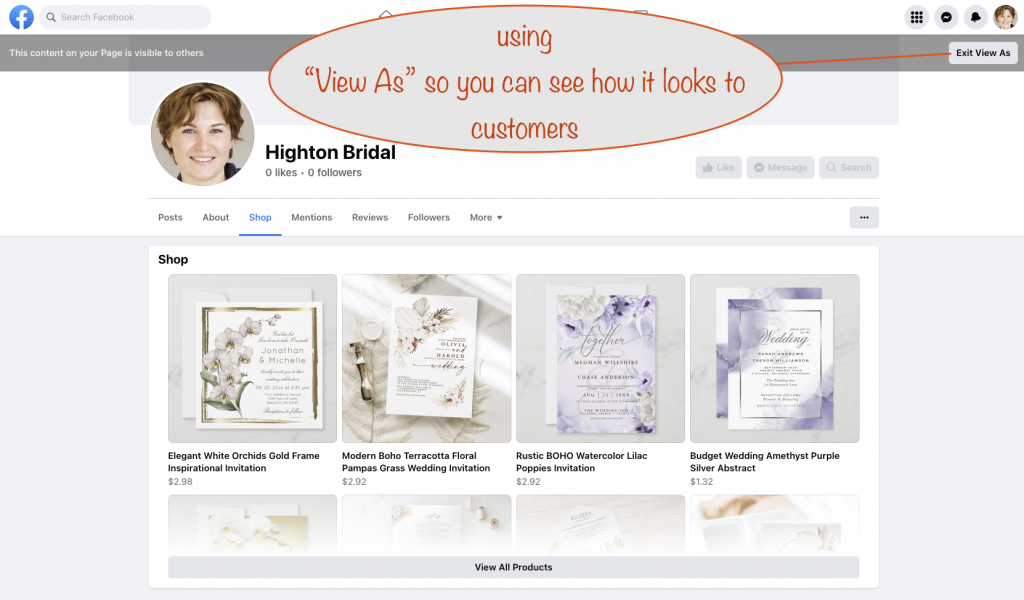
When I get the email confirming that the Shop changes have been reviewed and been made live, I pop over to my Facebook Page and choose Shop so I can take a look at it.
I copy the url from the address bar and paste it into a different browser (not logged in) so I can see what it looks like to others.
And that’s it!
Whew!
Well done for getting to this point. I hope you’ve found the tutorial useful and that you’ve now got your own Facebook Shop with your first collection.
Your comments and suggestions for improvements are always welcome, you know what to do!
And why not take the time to share your own Facebook Shop created with this tutorial – I’d love to see it and so would everyone else, I’m sure of it 😎