this is another mix ‘n match module in the Nifty Hobby Projects for LEDs and Solar series
Power this outdoors with the solar charger module or indoors with the dark-activated switch.
Here’s a video showing three 5 LED strings connected together (powered by a dark-activated switch module)
Parts List
- a total of 3m (120 inches) of super-flexible twin core wire 22 awg 0.3mm2
- 5 x 3.2mm heat shrink sleeve cut into 1cm lengths
- 5 x 4.8mm heat shrink sleeve with in-built adhesive cut into 1cm lengths
- 5 x 5mm colour-changing LEDs
- 5 ping pong balls
You’ll also need
- superglue (hint: keeping superglue in your fridge will make it last much longer because a fridge pulls moisture out of the air and it’s the moisture that helps superglue set)
- UV glue
- craft knife
- side cutters
- soldering iron and solder
- “Helping Hand”
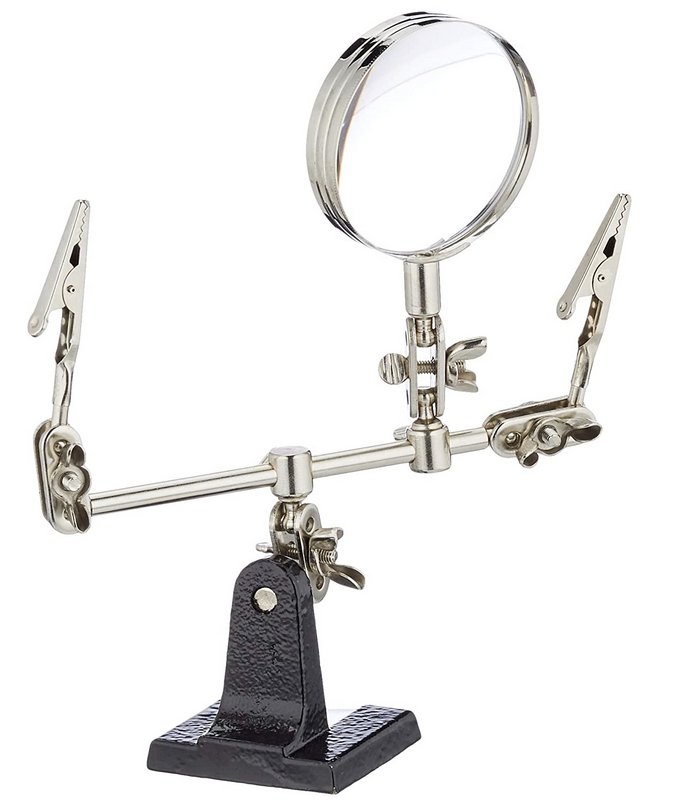 – invaluable aid during soldering and gluing
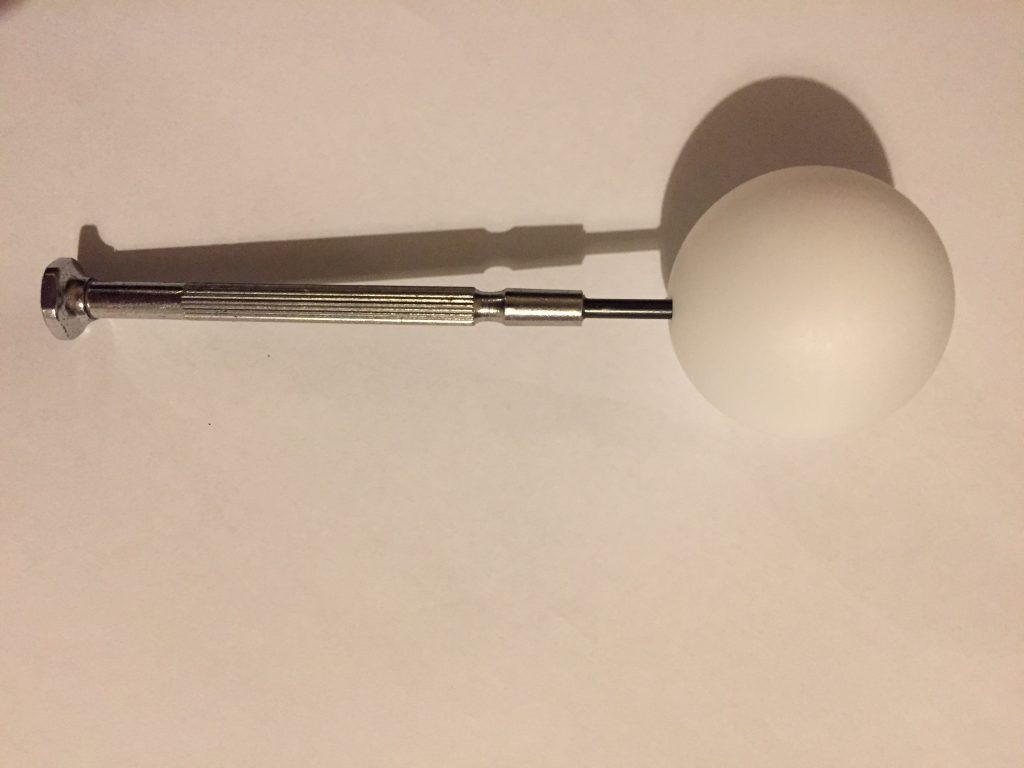
 - set of watchmaker’s screwdrivers
- drill (hand or electric) and 3, 4 and 5mm drill bits
- your choice of connectors, male for one end and female for the other so that you can string your strings together and connect up to other mix ‘n match modules
I’m using EC5s because I had a bunch to hand, you may prefer the EC3s or another robust, weatherproof-able connector
Prepare the wire for the string
Cut a length of super-flexible wire to 3m (120 inches)
Initial preparation
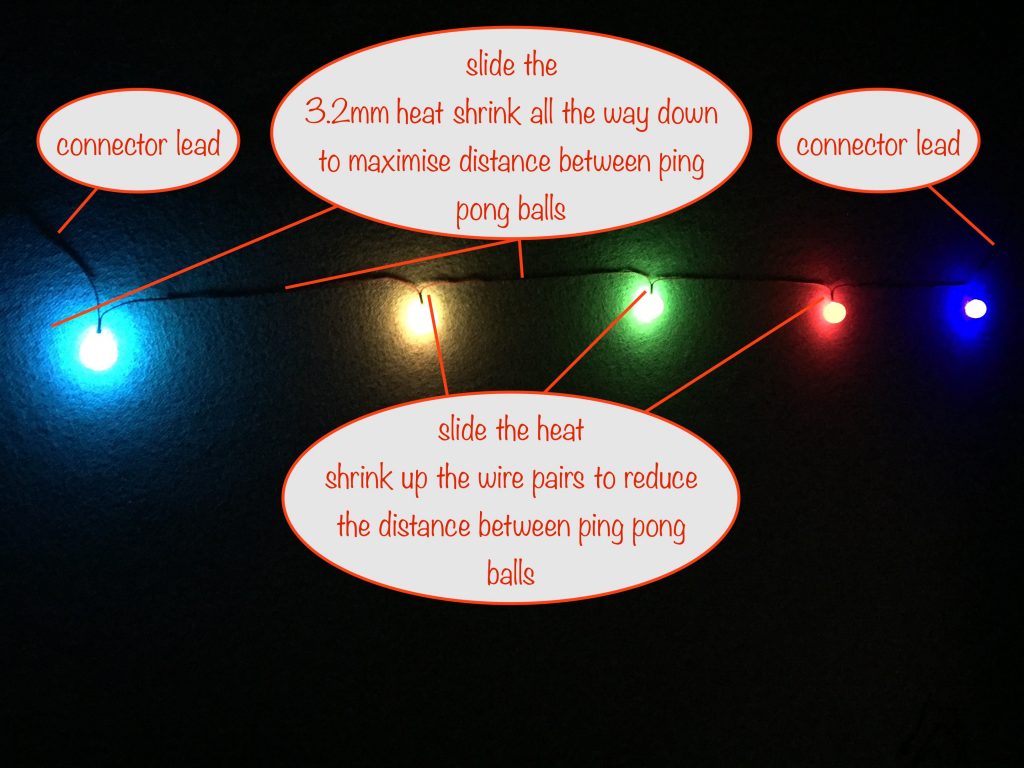
Measure off 50cm (20 inches) and fold it back over itself. Slide a piece of 3.2mm heat shrink (1cm long) over the end (you won’t be shrinking this piece). This piece locks the fold in place and will be used later to adjust the length of the doubled-over section, giving you flexibility for display purposes.
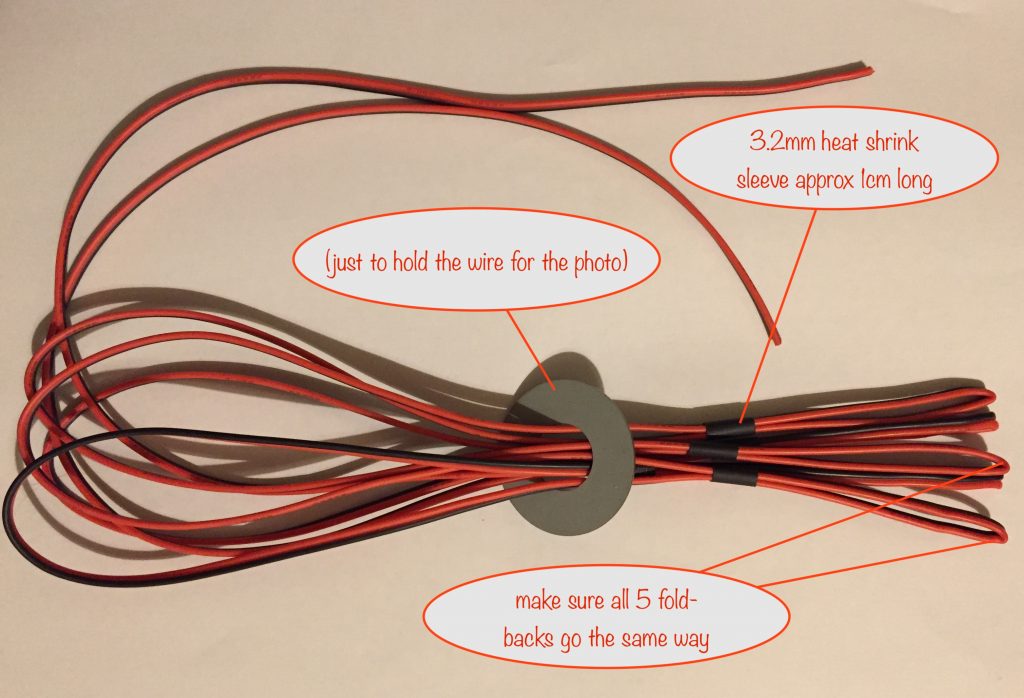
Repeat the above until you’ve got 5 doubled-over sections, each separated from the next by 50cm (20 inches). Ok, somewhat less than that because of the sleeving on the doubled-over sections.
You should have a 50cm (20 inch) length at the start and at the end. They’ll be used to attach your connectors to.
Prepare a fold-back to receive its LED
I recommend completing one LED in the string first so you have a chance to make any mistakes and learn from them before doing the rest.
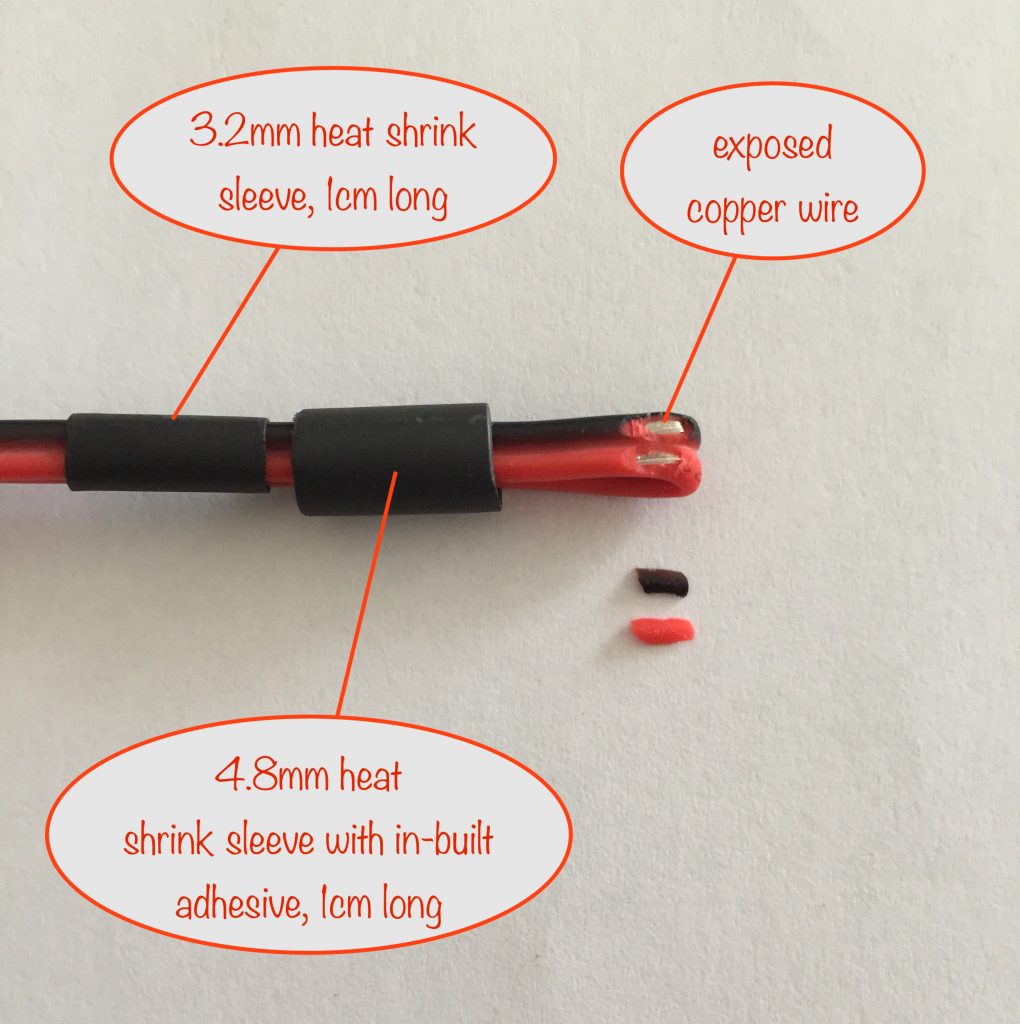
Take another 1cm length of heat shrink sleeve, this time the 4.8mm diameter one with built-in adhesive, and slip it over the bend. Don’t overlook this as you can’t do it after soldering the LED in place!
Slide it far enough down the wire so it doesn’t get in the way. This piece is going to help with weatherproofing as it’s glue will prevent water entering the joint from the wire end.
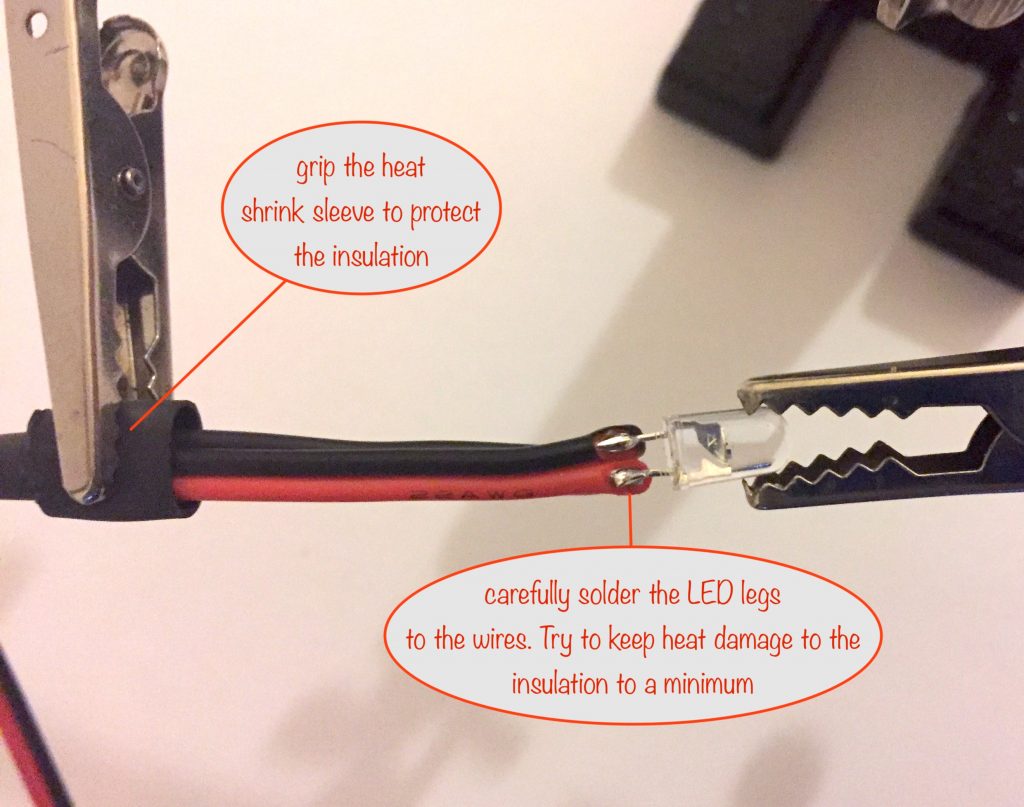
You can also use it when using your helping hand to protect the insulation of the wire from the crocodile clip.
You need to be careful here! Use your craft knife to gently remove the insulation as shown. Try not to cut any of the strands of copper wire – though it’s not a huge deal if you do as soldering will put it right.
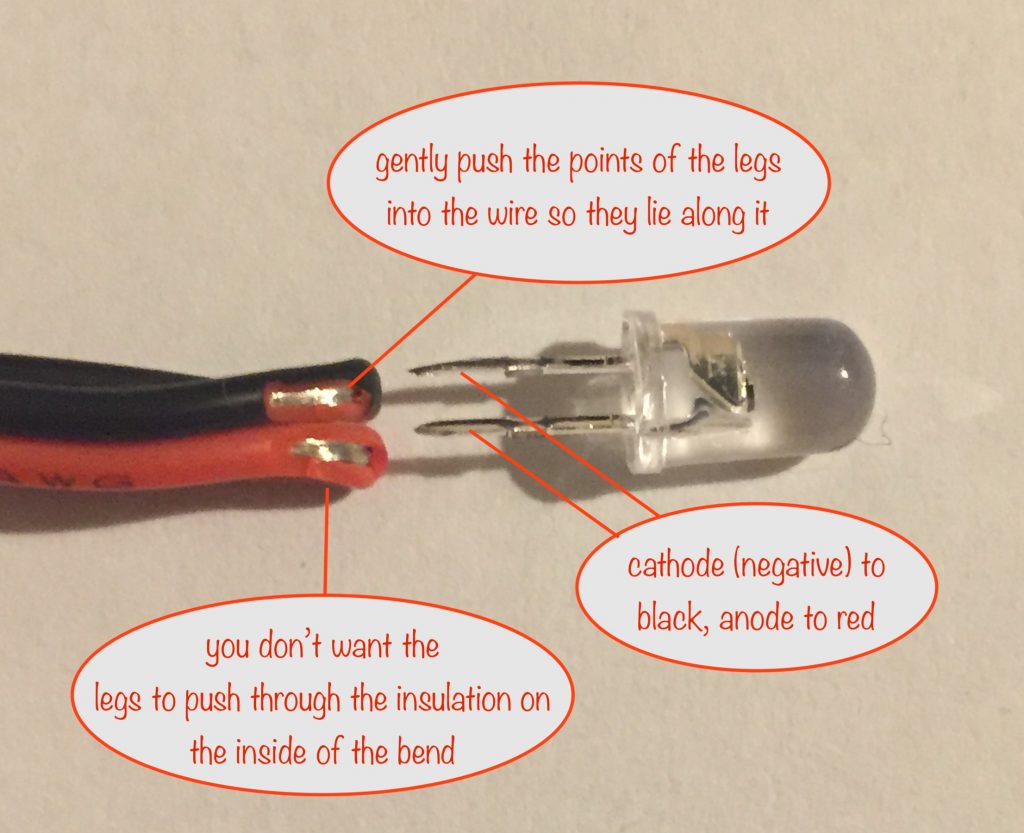
Prepare a 5mm colour-changing LED
Before doing this, check the LED works because if it doesn’t, you’ll save yourself a lot of grief later!
Very carefully cut the legs of the LED at an angle so that you make a sharp point in each. Before you do, double check that the short lead is the one nearest the flat edge of the LED. That’s the negative leg (the cathode) of the LED.
The reason for checking is that once the legs are cut, you need to make sure you insert the right leg in the right wire!

Very carefully (those legs are sharp and can easily pierce skin!) push the legs into the wire so they lie along its length, making sure that the LED’s cathode goes into the negative wire and the anode (positive leg) goes into the red wire.
They don’t have to go in far just enough to make a connection and hold them in place.
Now solder them carefully, trying not to damage the insulation with too much heat.
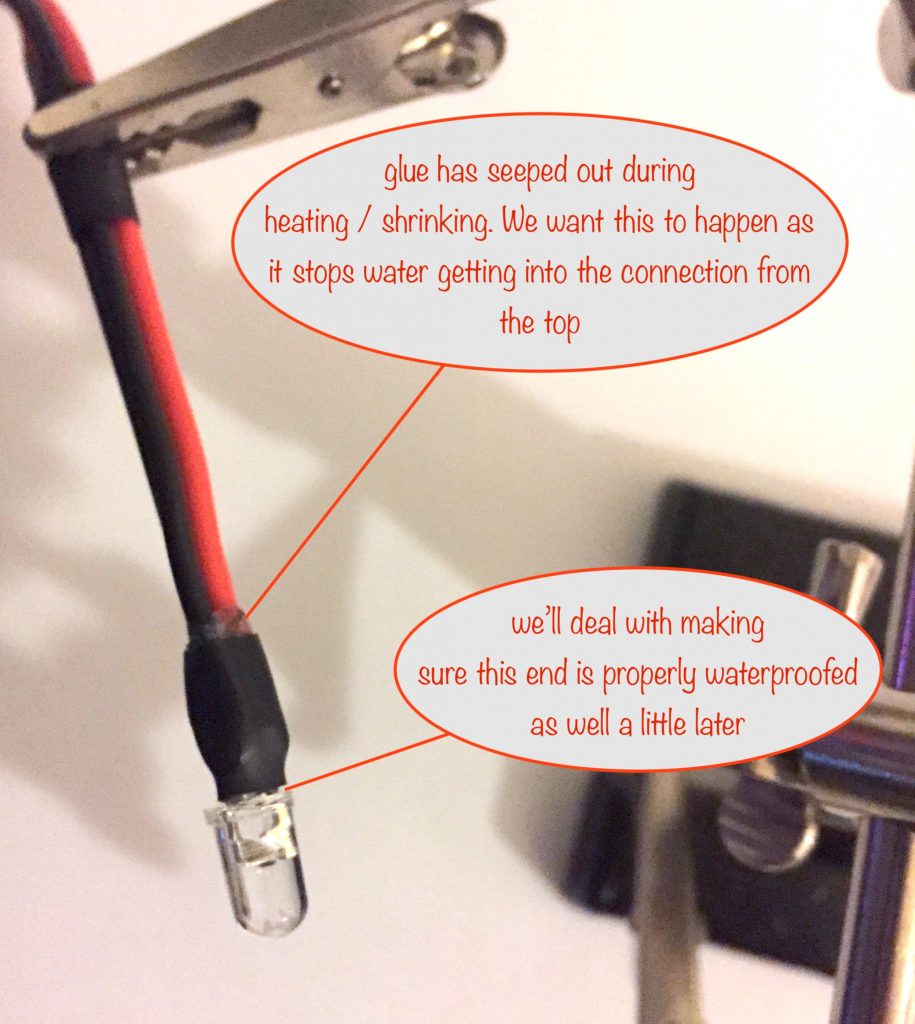
You can now slide the 4.8mm heat shrink down to the base of the LED and apply heat from the barrel of your soldering iron to shrink it into place.
It’s a good thing to see some of the glue overflowing out of the ends of the sleeving, confirming for you that it’s doing its weatherproofing job.
Making the LED “diffuse”
Why not just buy diffuse ones? It’s because I can’t find any cheap ones! It’s much cheaper to buy clear ones and make them diffuse.
Why do they need to be made diffuse? It’s because things would look ugly otherwise.
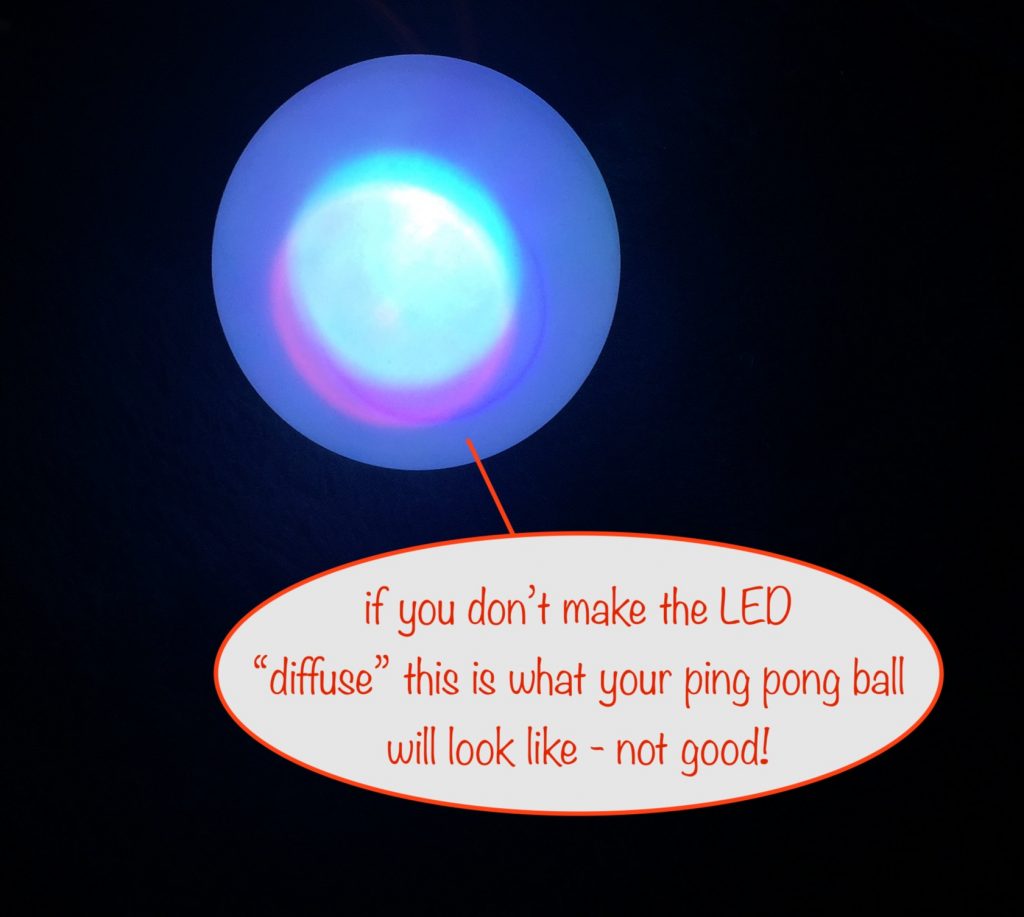
So here’s how to make them diffuse. Use some coarse wet and dry or other type of sandpaper. Make sure you roughen the whole of the top and a little down the sides.
…and here’s what the ping pong ball looks like using it
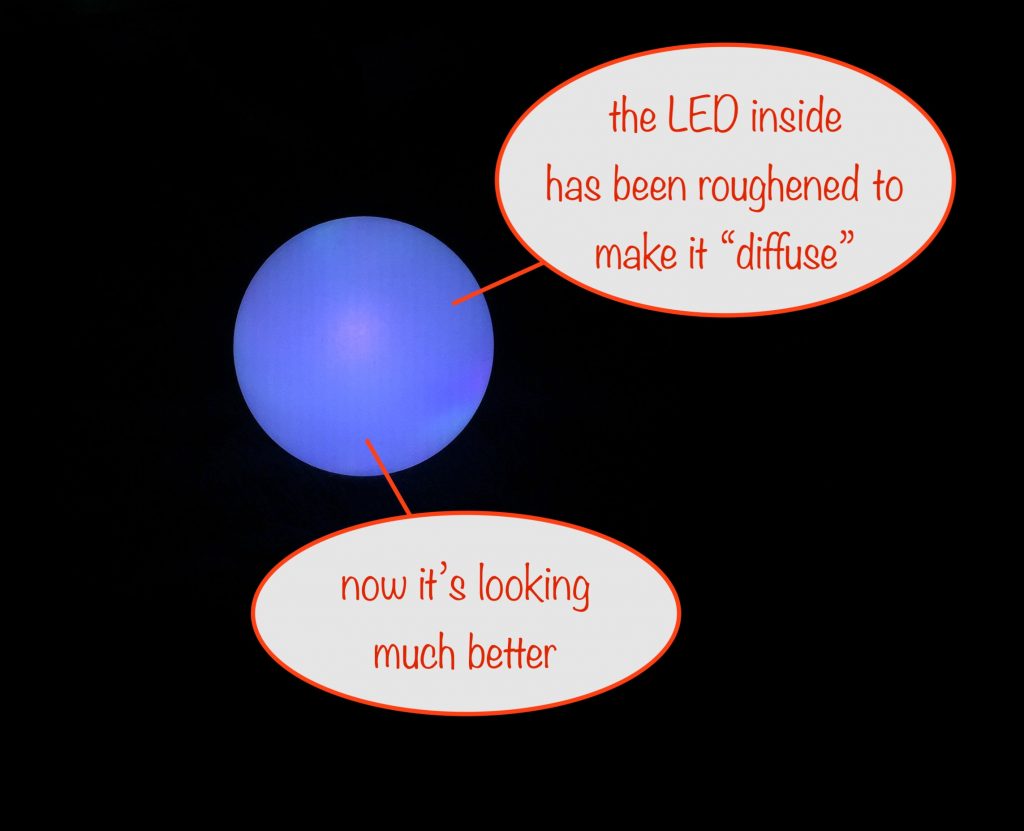
I think you’ll agree there’s no comparison – it looks so much prettier now.
Preparing a Ping Pong Ball
Use your smallest flat-bladed watchmaker’s screwdriver to pierce the ping pong ball. Be careful, that small blade is sharp!
Work your way up the sizes of screwdriver to give a good pilot hole for the drill.
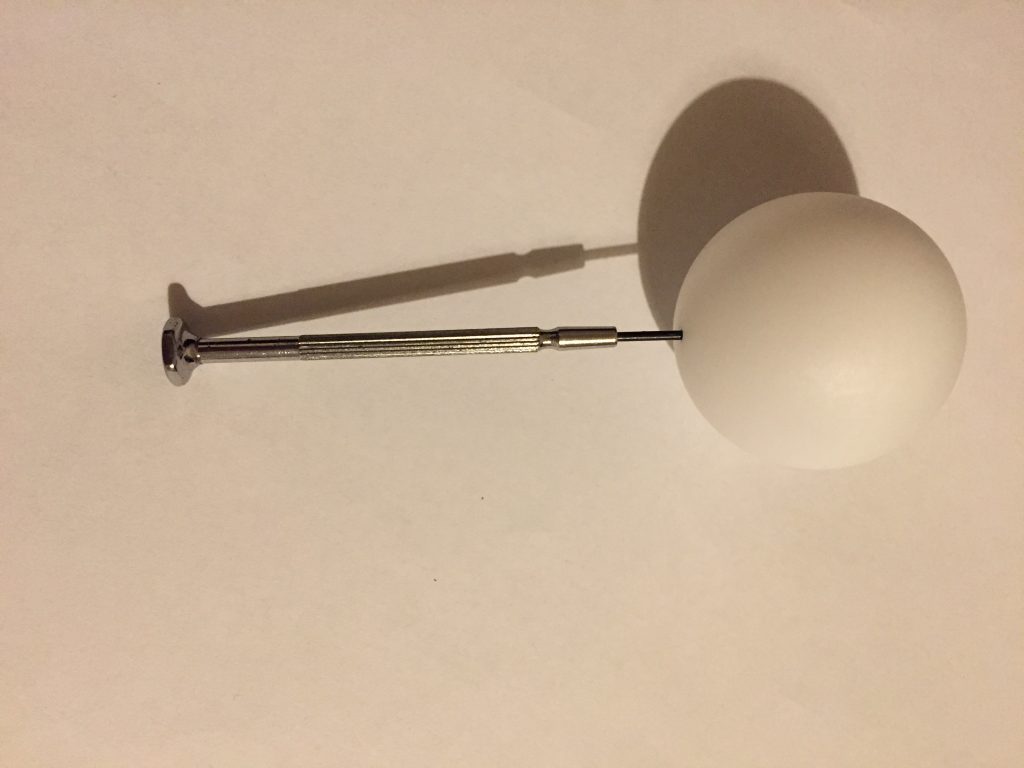
When you’ve done that you can now use your drill to increase the hole size to 5mm, working your way up in drill bit size so you get a good, clean hole.
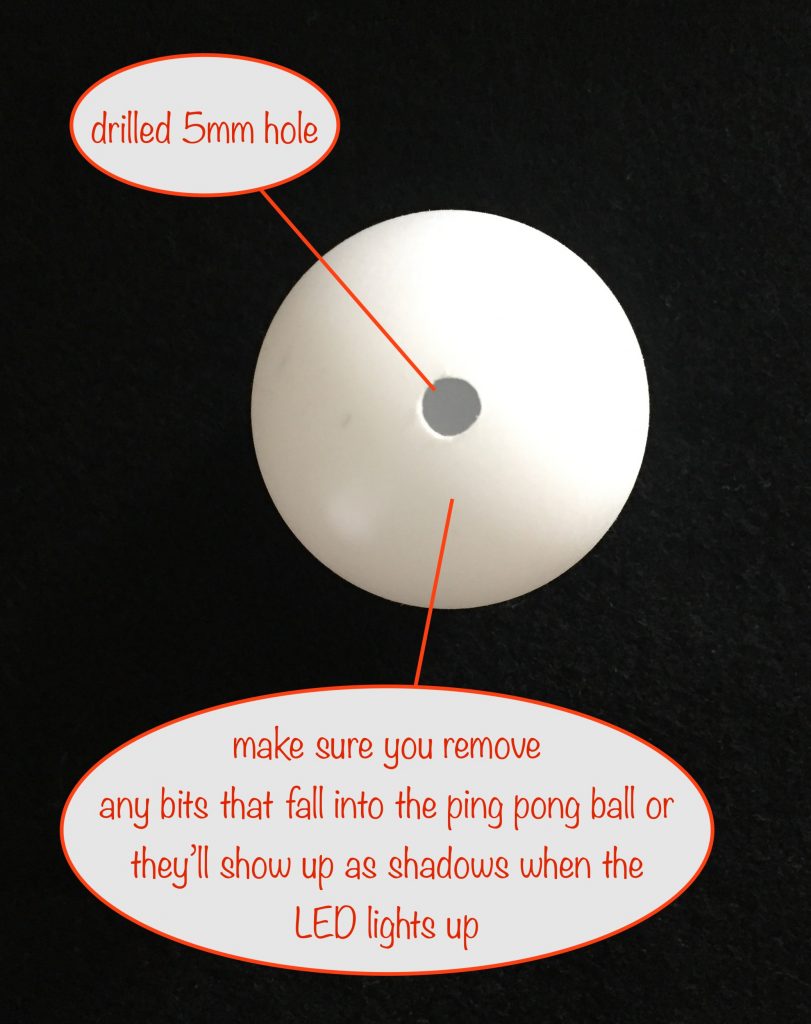
Remove any excess from around the hole and make sure no bits have fallen into the ping pong ball. If they have, they’ll show up as shadows when the LED lights up and it’ll look ugly.
Gluing the LED into the Ping Pong Ball
You’ll start off with some superglue and finish off with some UV glue.
Supergluing
push the LED into the ping pong ball and then pull it out 1 or 2mm.
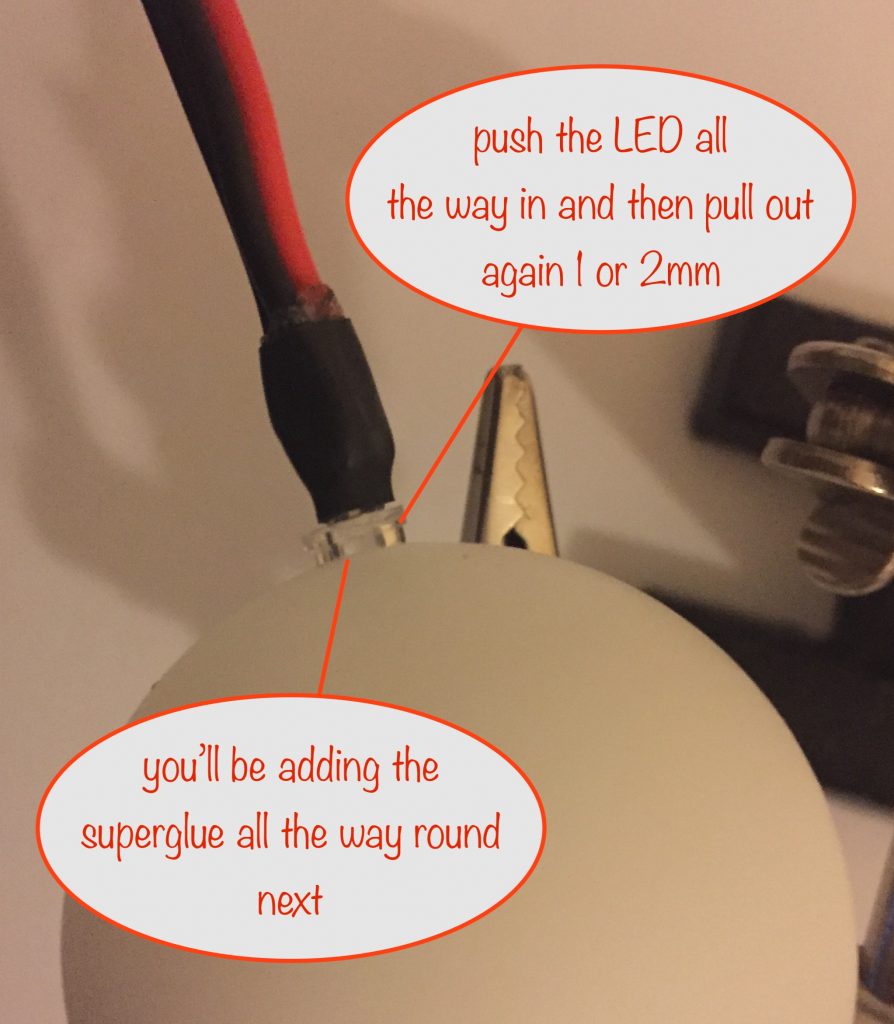
Apply a little superglue all the way round and then quickly push the LED all the way in. The helping hands will support things while the superglue is drying. While it’s doing that, add a little more superglue all the way around to finish off the waterproofing.
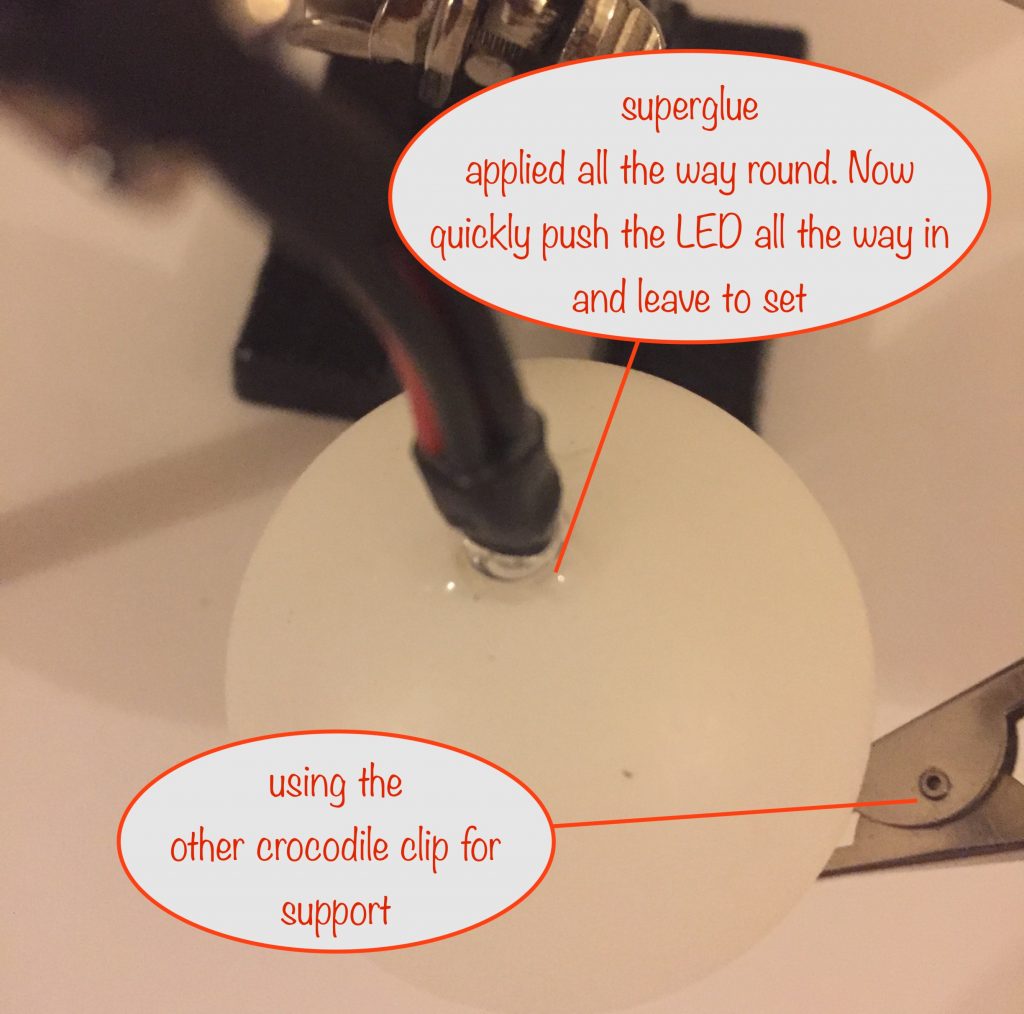
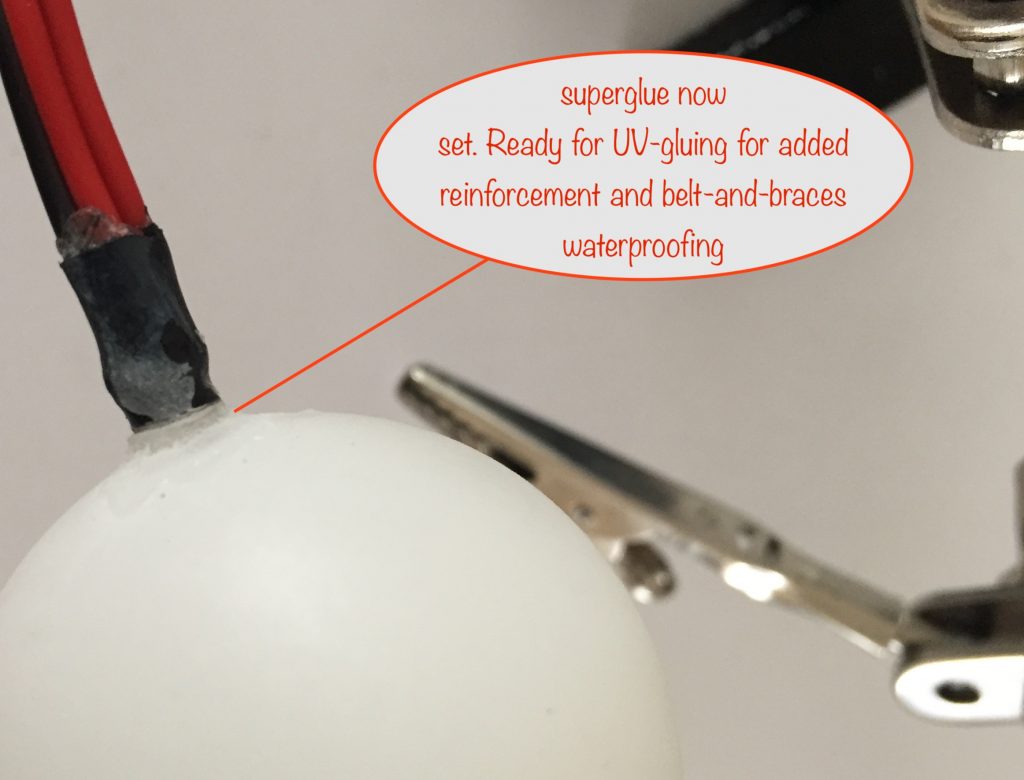
Leave it for a good 20mins, longer if you can, to make sure the superglue ‘takes’ properly.
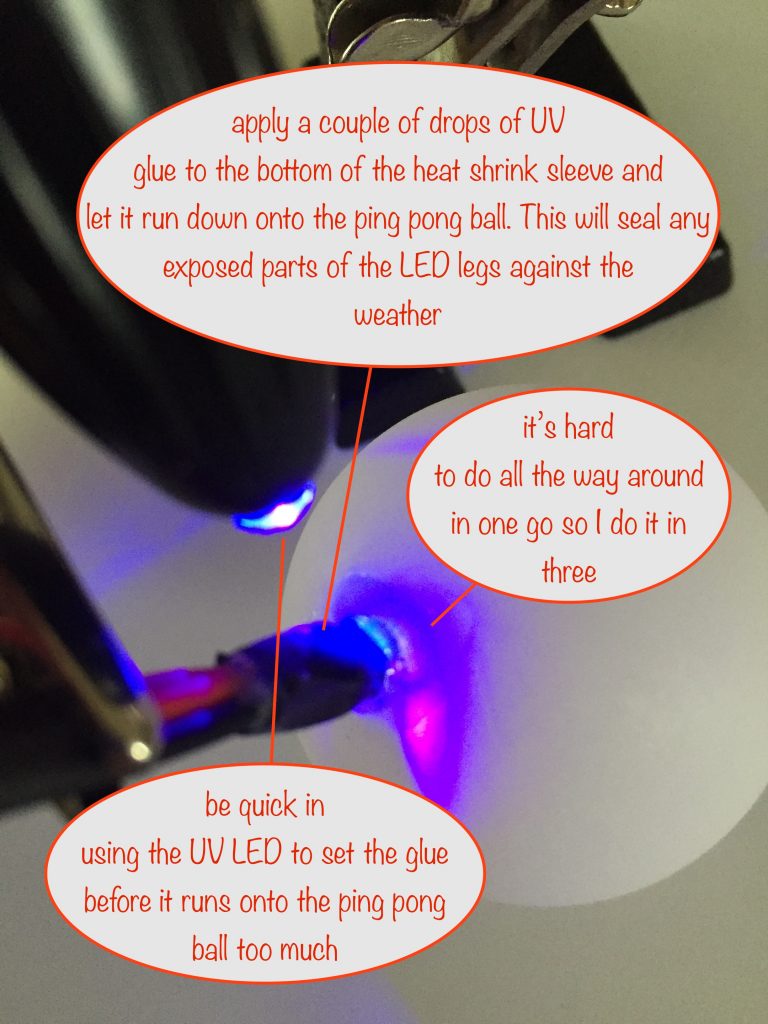
UV gluing
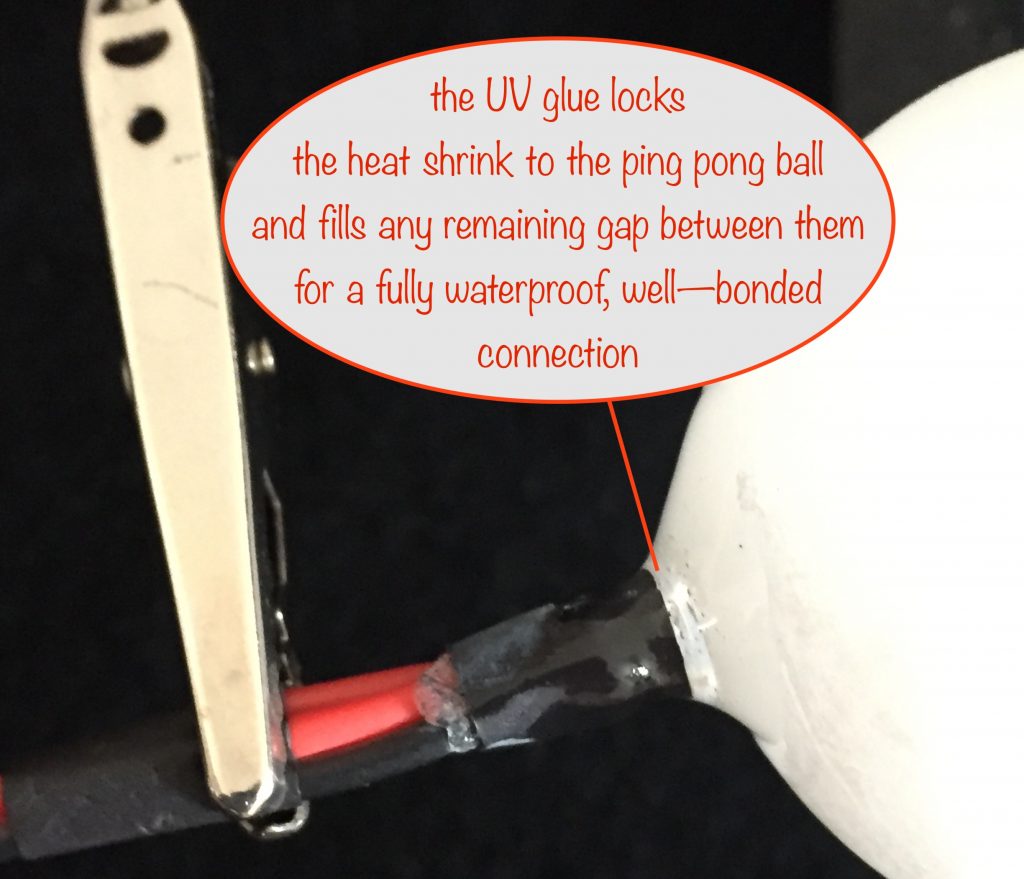
Once the superglue has dried, you can now add and set the UV glue. This enhances the bonding and also gives the final waterproofing – keeping moisture away from any still-exposed parts of the LED’s legs.
What you’re trying to achieve here is:
- final waterproofing of the exposed legs of the LED at the bottom of the sleeving
- additional bonding strength of the LED to the ping pong ball
It’s tricky to apply the UV glue all the way round and set it in one go so I do it in three.
Make sure you apply the UV glue to just above the bottom of the sleeving so it runs down, filling the gap and onto the ping pong ball. That’s your final waterproofing.
You’ll need to be quick with the UV setting LED otherwise the UV glue will spread further on the ping pong ball then you want. Give it a good 20 seconds with the UV LED to make sure the glue sets fully.
You will likely get some UV glue “sweat” – a slight residue left behind by the process. Nothing to worry about.
You can now go ahead and do the other four.
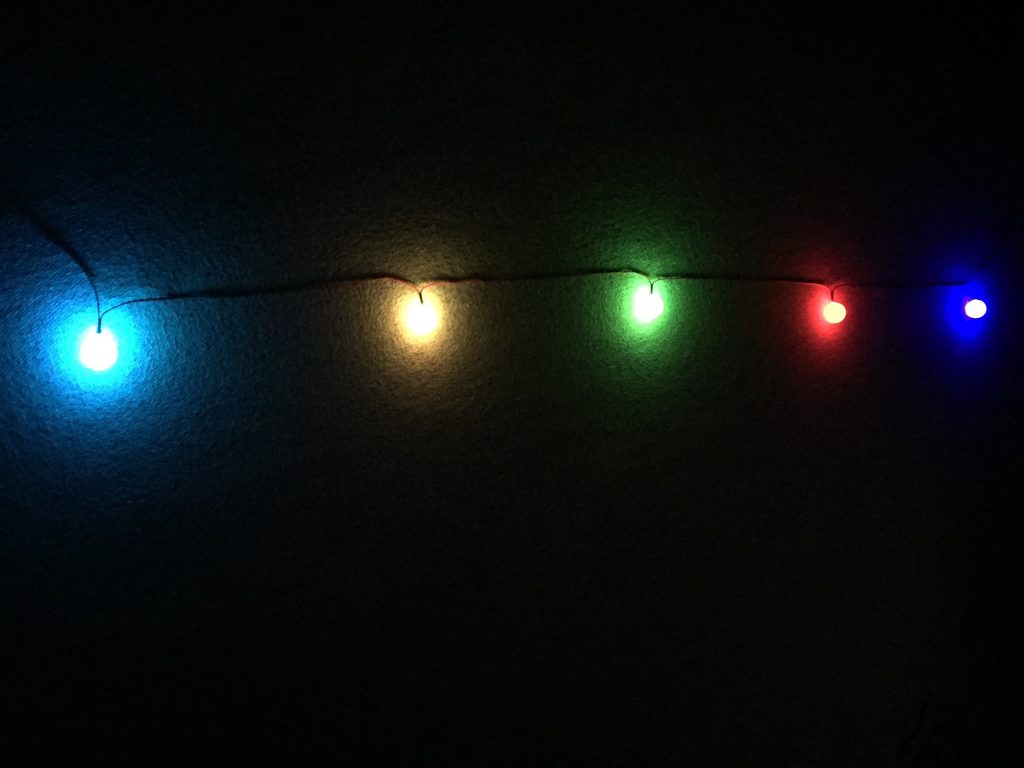
Here’s what the finished LED string looks like.
Enjoy what you’ve just made! 😎
Other projects in the Nifty Hobby Projects for LEDs and Solar series (so far, more to come very soon):
- Flasher Memory Aid
- Dark-activated Switch
- Fibre Optic Display
- Mini Sparkles Colour-changing LED Fibre Optic String
- Solar Lithium Ion Battery Charger
- Solar NiMH Battery Charger for 2 AAA batteries
- Solar NiMH Battery Charger for 2 AA batteries
- Solar NiMH Battery Charger for 6 AA batteries
- Timer-delay Off Switch
- 4-LED Porch Light
- 10-LED Bedside lamp
- Mini Camping / Bedtime Reading Lamp
- Main page with links to where to buy stuff