Finally, the LM317LZG voltage regulators arrived so I was able to finish the build and tutorial.
Finally, the LM317LZG voltage regulators arrived so I was able to finish the build and tutorial.
I’ve been working on a project (coming very soon) in my solar / renewables series that lets you charge NiMH rechargable batteries.
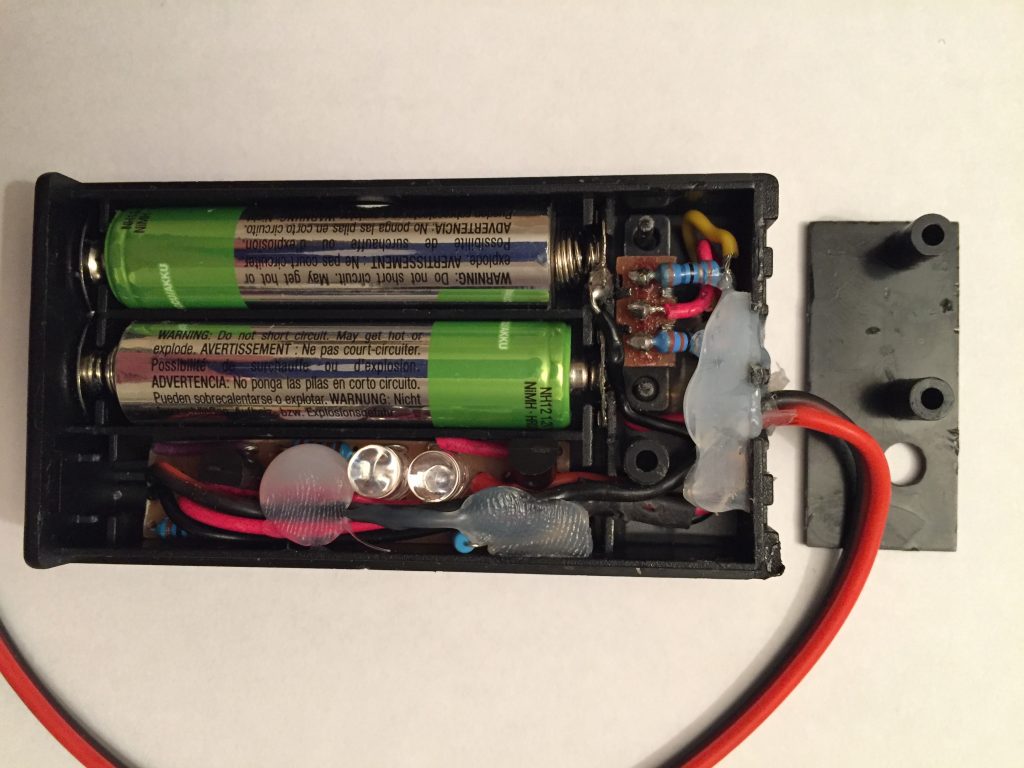
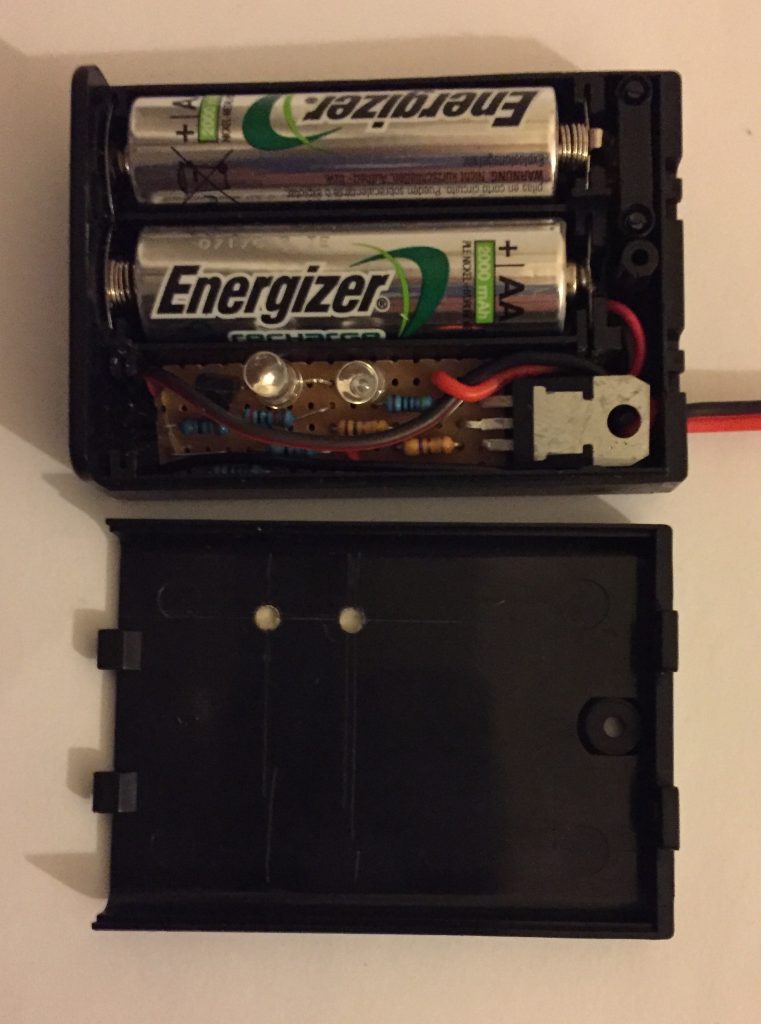
What a journey! Here’s a prototype I built to help me visualise the way forward:
The challenges to overcome are that the batteries come in two different sizes – the smaller AAA and the larger AA ones. More than that, they come in lots of different capacities and each capacity has to be charged at a different rate.
Another complication is that the solar panel needed depends both on the number of batteries to be charged and the charging current – Ohm’s law tells us that the solar panel power needed is the total battery voltage x the charging current.
Coming up with the most practical combination for the project with all those variables proved to be a real mind bender.
In the end, after much checking of physical sizes and layouts of the charging circuit compared with the available space in AA and especially AAA battery boxes, I decided on two projects – a solar charger for:
Here’s a comparison of the size of the lower power version (TO-92 package) on the right, with the higher power one (TO-220 package) on the left.
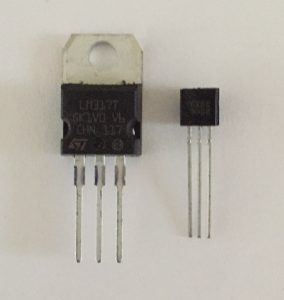
With so little space to play with in the AAA battery case, you can see why it’s circuit needs to use the lower power version!
To help get my head around things, here’s the table I put together covering many of the commonly available battery capacities, the resistors needed to set the manufacturer-recommended C/10 safe charging currents for them and the resulting solar panel wattages:
| Battery Capacity (mAh) | R1 value (Ω) | C/10 charging current (mA) | 2 Battery 6V Solar Panel | 6 Battery 12V Solar Panel |
| 500 | 15 + 10 | 50 | 0.5 Watt | 1 Watt |
| 700 | 18 | 69 | 0.5 Watt | 1 Watt |
| 800 | 10 + 5.6 | 80 | 0.5 Watt | 1 Watt |
| 900 | 10 + 3.9 | 90 | 0.6 Watt | 1.5 Watt |
| 1000 | 10 + 2.7 | 98 | 0.6 Watt | 1.5 Watt |
| 1300 | 8.2 + 1.5 | 129 | 0.9 Watt | 1.8 Watt |
| 2000 | 4.7 + 1.8 | 192 | 1.25 Watt | 2.5 Watt |
| 2300 | 3.3 + 2.2 | 227 | 1.5 Watt | 3 Watt |
| 2400 | 2.7 + 2.7 | 231 | 1.5 Watt | 3 Watt |
| 2500 | 3.3 + 1.8 | 245 | 1.5 Watt | 3 Watt |
| 2800 | 3.3 + 1.2 | 278 | 2 Watt | 4 Watt |
| 2900 | 2.2 + 2.2 | 284 | 2 Watt | 4 Watt |
I’m sure I’m not the first but I’ve not seen anyone else doing this. Have a look at the photo at the top and you’ll see two holes in the battery box lid to let the LEDs show through.
If you look closely, you might notice that they’ve been filled with uv glue. That way, the LEDs can still shine through but water / dust won’t get into the box.
It’s simple to do – just drill a couple of holes and then stick some sticky tape on the underneath. You can now fill the holes with uv glue and it won’t run away while you set it. Once set, just peel away the sticky tape.
Nice!