Ever wished you could easily highlight some text in the WordPress block editor and apply your own predefined text styling to it – without resorting to editing as html?
And better than that, only have to do it once for your whole site?
How does highlighting work “out of the box”?
As things stand, using the Block Editor’s rich text drop down, you can highlight text with one of 12 predefined colours (see the screenshot) for the foreground and the same ones for the background – or you can use a colour of your choice.
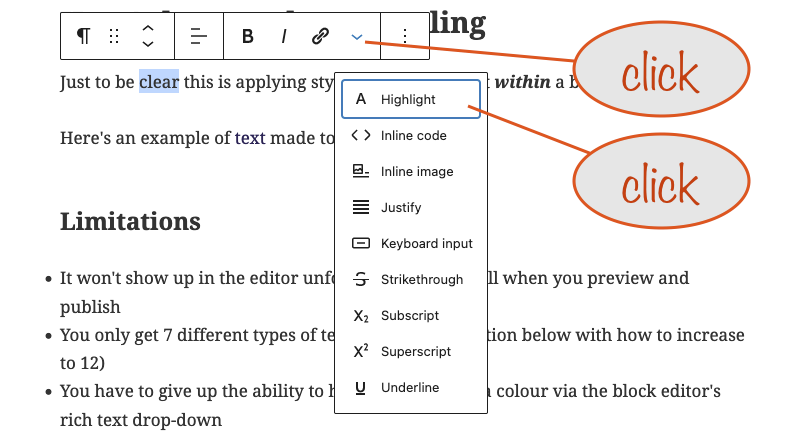
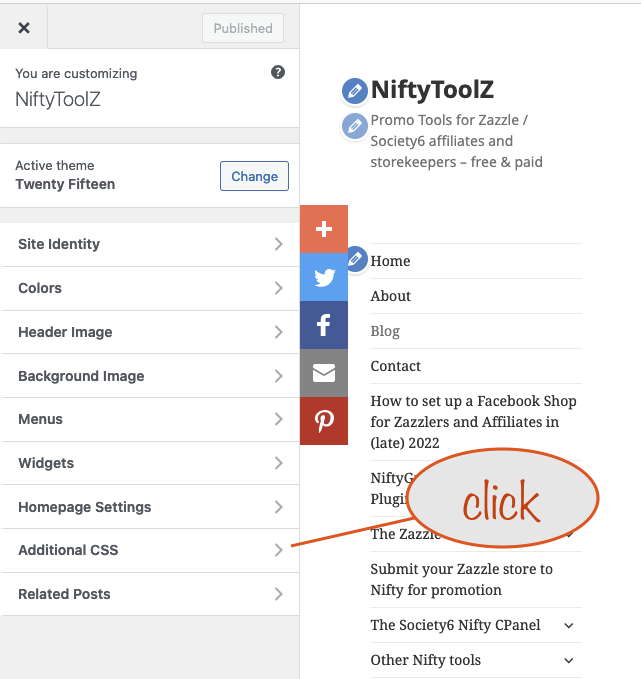
Here’s how you do it. Select some text and then:
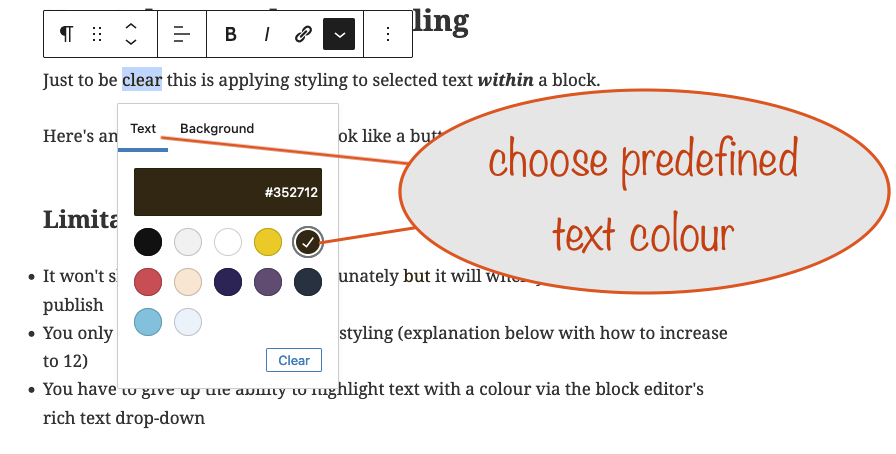
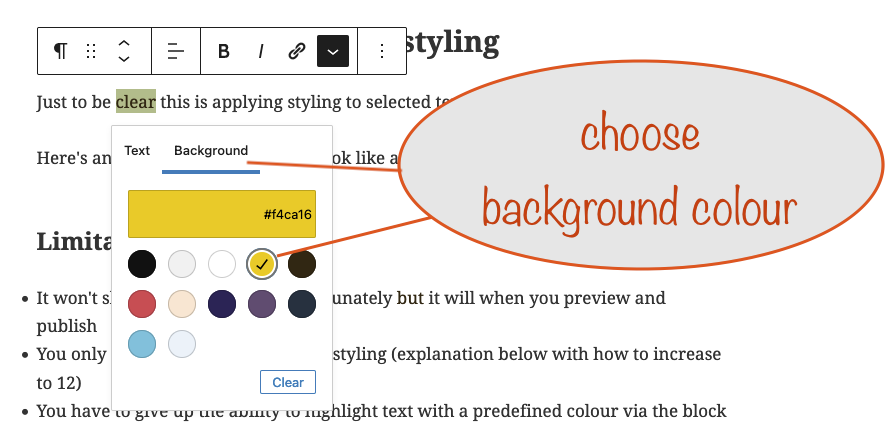
You don’t have to use a pre-defined colour. Instead you can choose from the full colour palette by clicking the panel above the circles, if that’s what you want.
Maybe you’re writing a tutorial and want to mention the name of a button to click or to draw attention to a specific piece of text on a page that you’re talking about in your article.
Here’s how to apply your own text styling
Just to be clear this is applying styling to selected text within a block.
Here’s an example of text made to look like a button.
Limitations
- It won’t show up in the editor unfortunately but it will when you preview and publish – but you can do something to show you’ve done it, read on to find out how
- You only get 12 different types of text styling (explanation below)
- You have to give up the ability to highlight text with a predefined colour (via the block editor’s rich text drop-down) for every one you “hijack”
How does it work?
The trick is to hijack what happens when I choose to highlight text using the block editor’s rich text drop-down.
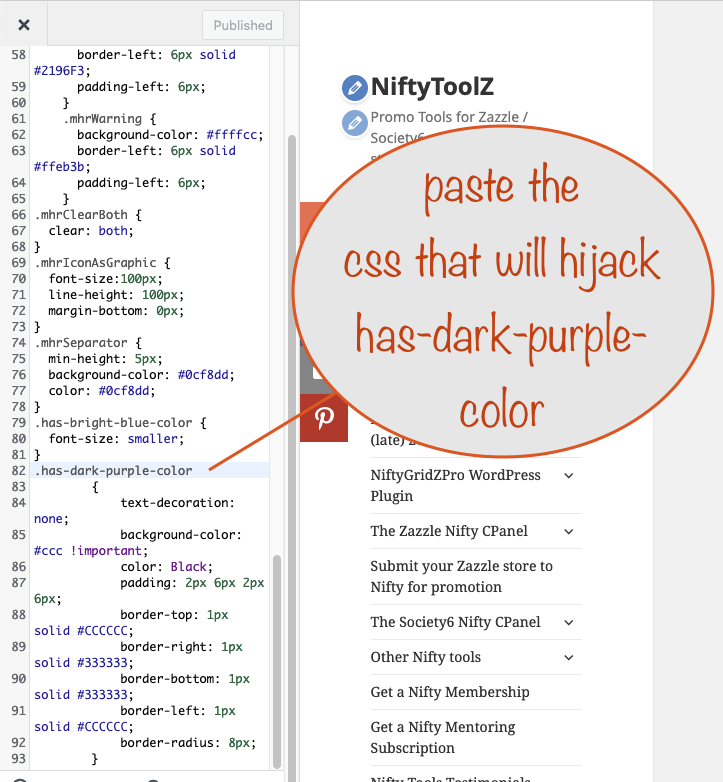
Here, I’m hijacking the predefined colour called “Dark Purple”.
I know it’s called that because the name appears when I hover over it in the predefined colour palette. Note that in the following “Dark Purple” becomes “.has-dark-purple-color”.
.has-dark-purple-color
        {
            text-decoration: none;
            background-color: #ccc !important;
            color: Black;
            padding: 2px 6px 2px 6px;
            border-top: 1px solid #CCCCCC;
            border-right: 1px solid #333333;
            border-bottom: 1px solid #333333;
            border-left: 1px solid #CCCCCC;
            border-radius: 8px;
        }
The above is a css (cascading style sheet) definition that will make text look like a button – and you place it in your customizer‘s additional css area.
For this example, we’ll copy the above css and paste it in:
(click an image to see larger in a new tab / window)
Once you’ve pasted it, you need to hit publish
Remember, you can only hijack the predefined colours, the ones with names.
Making sure you can see hijacking when editing your page
In the block editor, it helps to be able to see where you’ve used a hijacked highlight colour. The best way I’ve found to do this is to set its highlight background colour to one of the default ones.
If you’ve hijjacked both light and dark highlight text colours, you’ll need to use contrasting background colours for them to make sure that you can always see hijacked text.
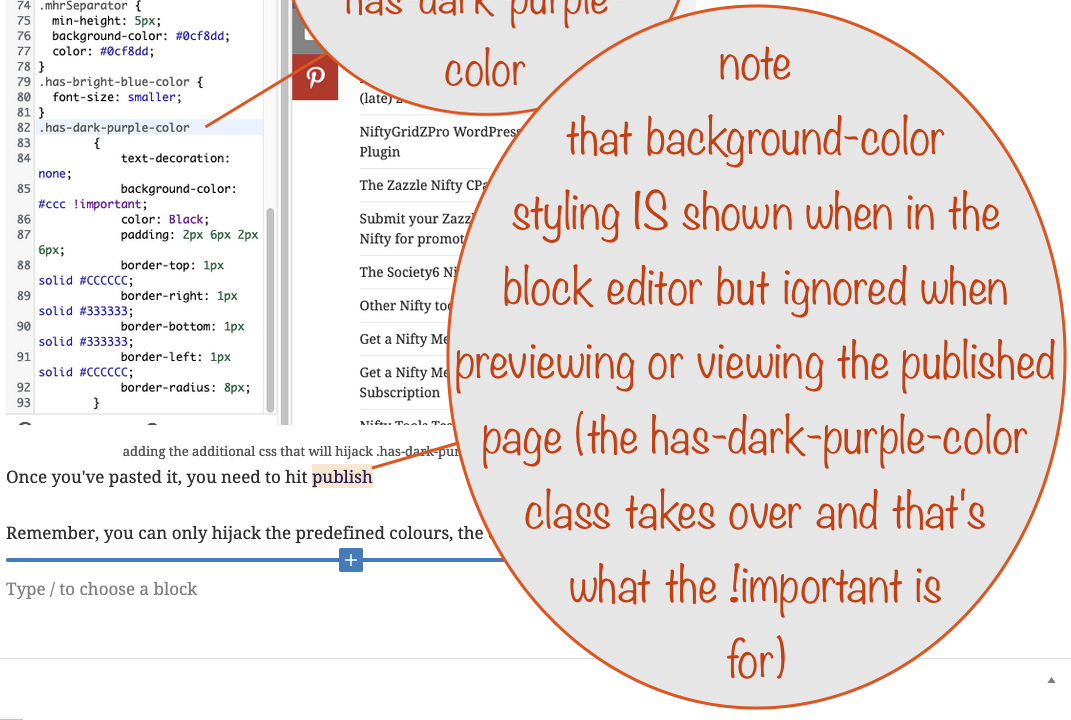
When you’re editing the page / post, the background colour for any hijacked highlights is the one chosen via the rich text drop down and not the one set up in your css class override.
When you’re previewing or once the page is published, the class takes over and the background-color with the !important setting gets used instead.
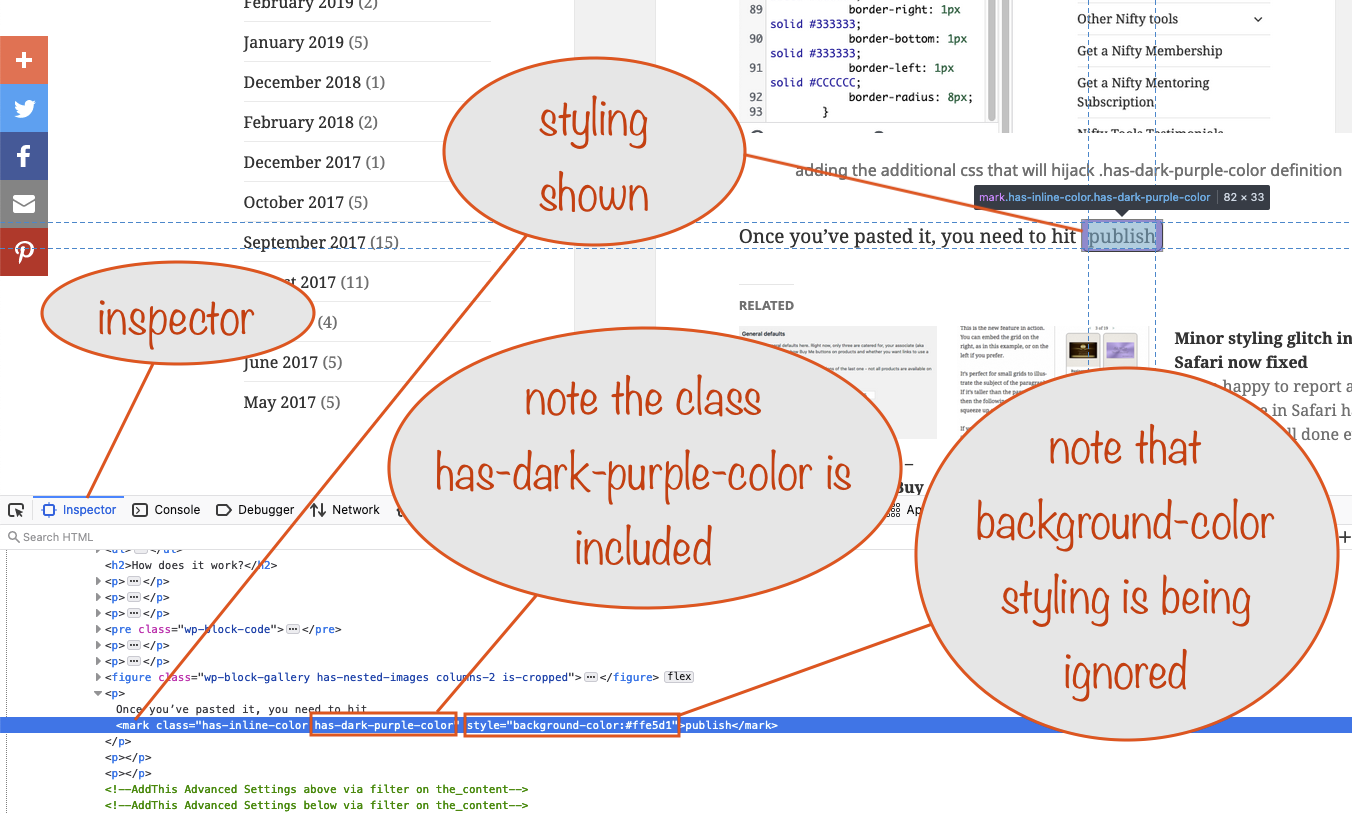
The “publish” text in the screenshot has its background color set to light pink via the rich text drop down, as you can see in the screenshot.
When the page is previewed / published, you see the button styling instead (here it is again).
Tip
Remember that any hijacking will apply across your whole site. It’s because the hijacking method you learned here redefines the highlight colour classes.
You know, the ones that get applied when you use the rich text drop down for highlighting selected text within a block.
So be sure to choose wisely!
For example, I often refer to buttons in lots of posts and pages, so it makes sense to hijack a highlight colour class for displaying them in an obvious way.
Another example from this website: I’ve started to always say (opens in a new tab / window) when a link does that. So I’ve hijacked the bright blue highlight colour for that purpose. I don’t change the colour fom bright blue but I do set the font size to font-size: smaller
If you want to play around with css there’s a great css resource on w3schools.com (opens in a new tab / window)
I hope you’ve found this helpful and will put it to good use. We’d all love to hear how you’ve used it so drop off a comment to let us know!